Epson Stylus Photo RX600 User Manual - Page 130
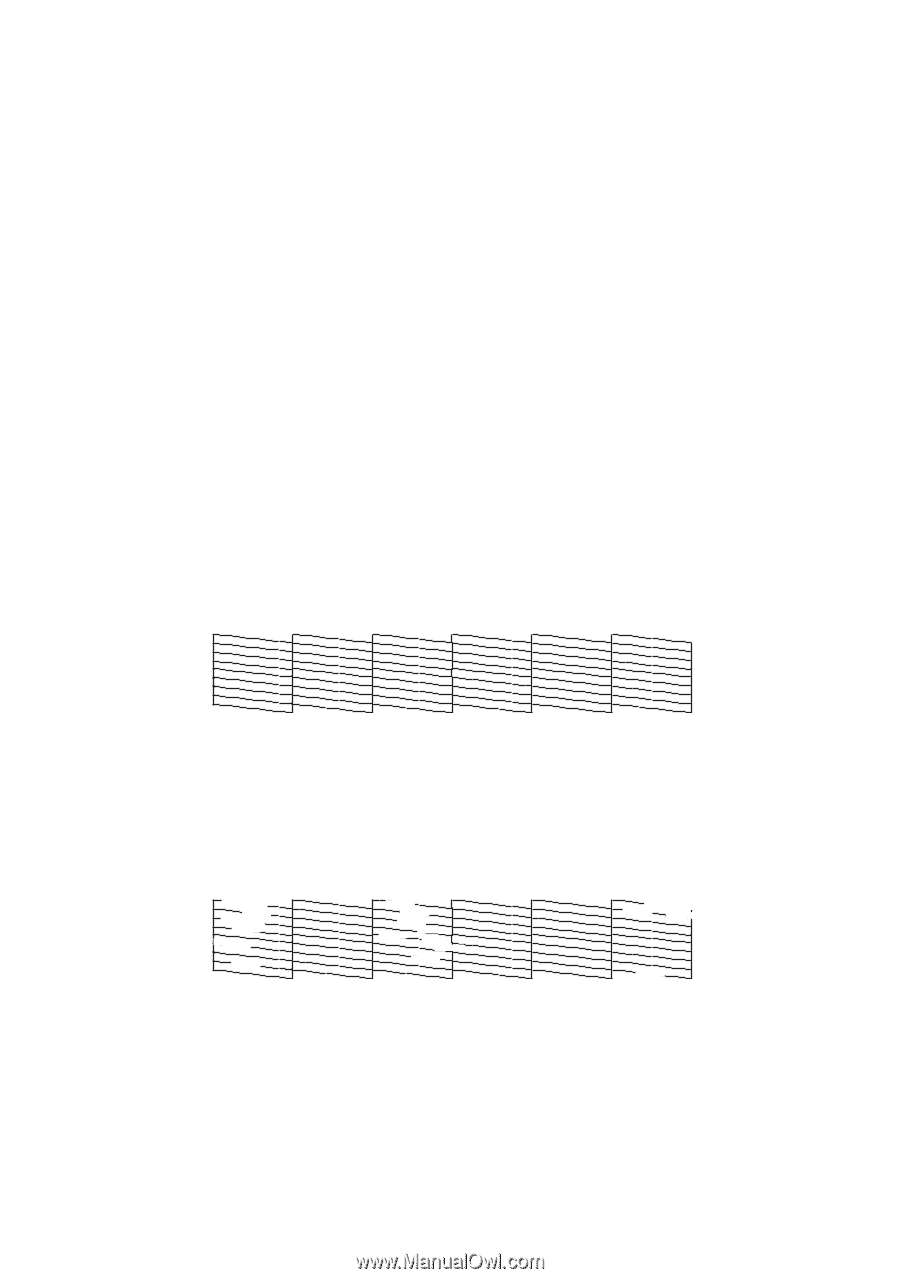
Examine the nozzle check pattern you printed. Each staggered line should be, print a nozzle check.
 |
View all Epson Stylus Photo RX600 manuals
Add to My Manuals
Save this manual to your list of manuals |
Page 130 highlights
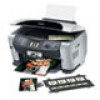
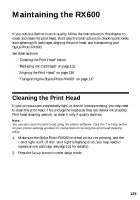
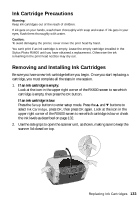
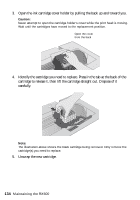
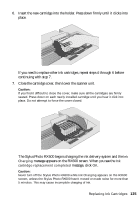
3. Press the u and d buttons to select Head cleaning. 4. Press the OK button, then press OK to start cleaning the print head. Cleaning takes about 30 seconds, during which the message Head Cleaning appears on the RX600 screen. Caution: Never turn off the Stylus Photo RX600 while the message Head Cleaning appears on the RX600 screen, unless the Stylus Photo RX600 hasn't moved or made noise for more than 5 minutes. 5. When head cleaning is finished, you return to the Setup Menu. Use the u and d buttons to select Nozzle Check. 6. Make sure letter-size paper is loaded. Press the OK button, then press OK to print a nozzle check. Note: You can also print a nozzle check using the printer software. Click the ? or Help button on your printer settings window for instructions on printing a nozzle check. 7. Examine the nozzle check pattern you printed. Each staggered line should be solid, with no gaps, as shown. ■ If your printout looks okay, you're done. Click Cancel to return to the main menu. ■ If you see any gaps (as shown below) in the dot pattern, press OK. Then follow the instructions on the RX600 screen to clean the print head again. 130 Maintaining the RX600
-
 1
1 -
2
-
3
-
4
-
5
-
6
-
7
-
8
-
9
-
10
-
11
-
12
-
13
-
14
-
15
-
16
-
17
-
18
-
19
-
20
-
21
-
22
-
23
-
24
-
25
-
26
-
27
-
28
-
29
-
30
-
31
-
32
-
33
-
34
-
35
-
36
-
37
-
38
-
39
-
40
-
41
-
42
-
43
-
44
-
45
-
46
-
47
-
48
-
49
-
50
-
51
-
52
-
53
-
54
-
55
-
56
-
57
-
58
-
59
-
60
-
61
-
62
-
63
-
64
-
65
-
66
-
67
-
68
-
69
-
70
-
71
-
72
-
73
-
74
-
75
-
76
-
77
-
78
-
79
-
80
-
81
-
82
-
83
-
84
-
85
-
86
-
87
-
88
-
89
-
90
-
91
-
92
-
93
-
94
-
95
-
96
-
97
-
98
-
99
-
100
-
101
-
102
-
103
-
104
-
105
-
106
-
107
-
108
-
109
-
110
-
111
-
112
-
113
-
114
-
115
-
116
-
117
-
118
-
119
-
120
-
121
-
122
-
123
-
124
-
 125
125 -
 126
126 -
 127
127 -
 128
128 -
 129
129 -
 130
130 -
 131
131 -
 132
132 -
 133
133 -
 134
134 -
 135
135 -
136
-
137
-
138
-
139
-
140
-
141
-
142
-
143
-
144
-
145
-
146
-
147
-
148
-
149
-
150
-
151
-
152
-
153
-
154
-
155
-
156
-
157
-
158
-
159
-
160
-
161
-
162
-
163
-
164
-
165
-
166
-
167
-
168
-
169
-
170
-
171
-
172
-
173
-
174
 |
 |