Epson Stylus Photo RX600 User Manual - Page 138
Repack the Stylus Photo RX600 and its attachments in the original box using
 |
View all Epson Stylus Photo RX600 manuals
Add to My Manuals
Save this manual to your list of manuals |
Page 138 highlights
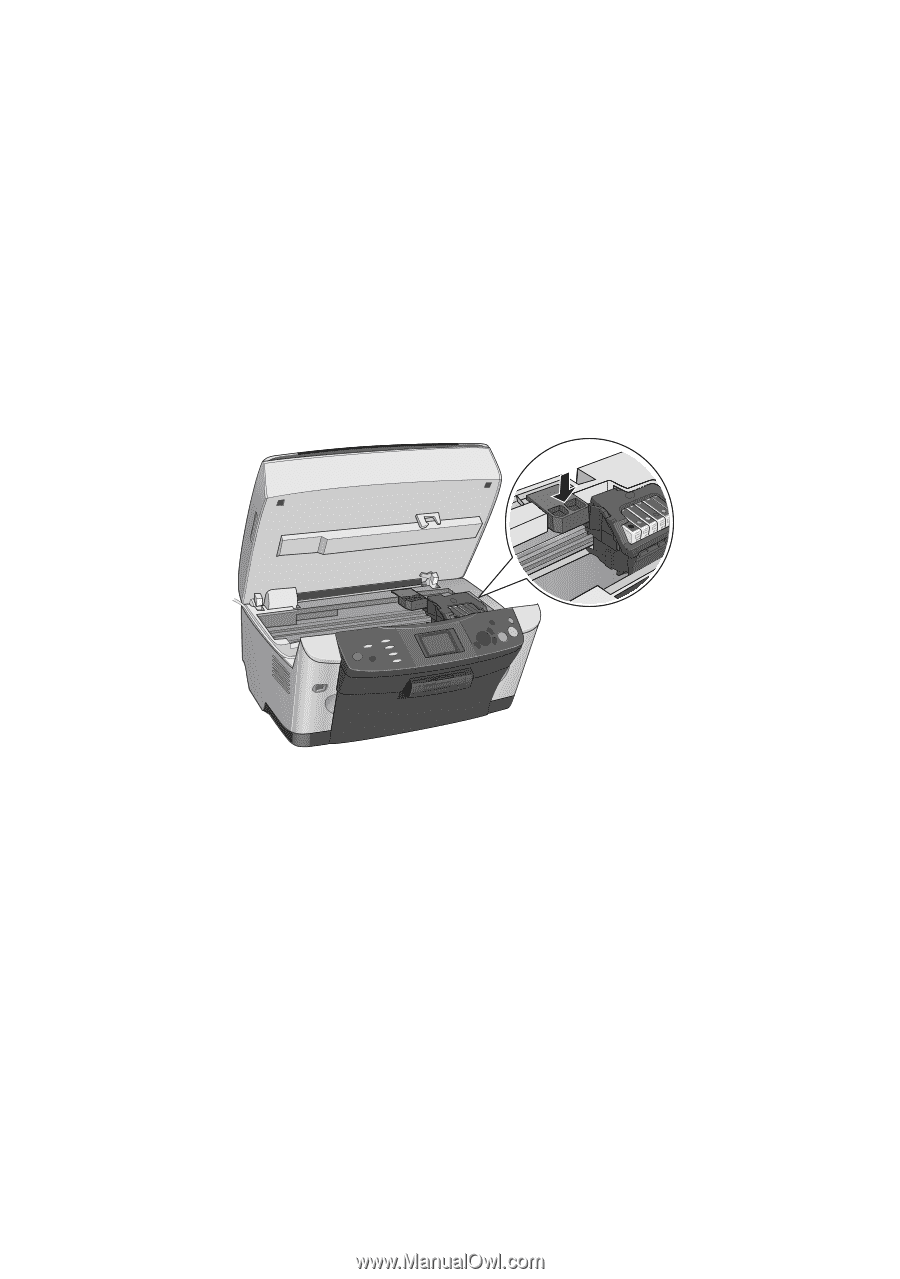
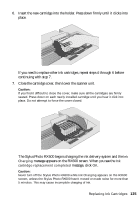
4. Unplug the power cord from the electrical outlet. Then disconnect the USB cable from your computer. 5. Unplug the cord from the TPU connector. 6. Remove any paper from the sheet feeder and output tray, then remove the paper support. 7. Close the output tray. 8. Lift up the scanner unit. 9. Remove the orange print head lock from its storage area and install it as shown to prevent the print head from moving during transport. If you can't find the orange print head lock, tape the print head to the case. Caution: Be sure to remove the orange print head lock or tape after installing the Stylus Photo RX600 in its new location. 10. Close the scanner unit carefully until it clicks back into place. 11. Repack the Stylus Photo RX600 and its attachments in the original box using the protective materials that came with them. Caution: Keep the Stylus Photo RX600 level as you transport it. After transporting the Stylus Photo RX600, remove the orange print head lock or tape securing the print head, unlock the transportation lock securing the scanner carriage, and print a test copy. If you notice a decline in quality, clean the print head (see page 129); if output is misaligned, align the print head (see page 136). 138 Maintaining the RX600
-
 1
1 -
2
-
3
-
4
-
5
-
6
-
7
-
8
-
9
-
10
-
11
-
12
-
13
-
14
-
15
-
16
-
17
-
18
-
19
-
20
-
21
-
22
-
23
-
24
-
25
-
26
-
27
-
28
-
29
-
30
-
31
-
32
-
33
-
34
-
35
-
36
-
37
-
38
-
39
-
40
-
41
-
42
-
43
-
44
-
45
-
46
-
47
-
48
-
49
-
50
-
51
-
52
-
53
-
54
-
55
-
56
-
57
-
58
-
59
-
60
-
61
-
62
-
63
-
64
-
65
-
66
-
67
-
68
-
69
-
70
-
71
-
72
-
73
-
74
-
75
-
76
-
77
-
78
-
79
-
80
-
81
-
82
-
83
-
84
-
85
-
86
-
87
-
88
-
89
-
90
-
91
-
92
-
93
-
94
-
95
-
96
-
97
-
98
-
99
-
100
-
101
-
102
-
103
-
104
-
105
-
106
-
107
-
108
-
109
-
110
-
111
-
112
-
113
-
114
-
115
-
116
-
117
-
118
-
119
-
120
-
121
-
122
-
123
-
124
-
125
-
126
-
127
-
128
-
129
-
130
-
131
-
132
-
 133
133 -
 134
134 -
 135
135 -
 136
136 -
 137
137 -
 138
138 -
 139
139 -
 140
140 -
 141
141 -
 142
142 -
 143
143 -
144
-
145
-
146
-
147
-
148
-
149
-
150
-
151
-
152
-
153
-
154
-
155
-
156
-
157
-
158
-
159
-
160
-
161
-
162
-
163
-
164
-
165
-
166
-
167
-
168
-
169
-
170
-
171
-
172
-
173
-
174
 |
 |