Epson WF-100 Network Installation Guide - Page 19
Allow, IP Address Automatic Configuration DHCP
 |
View all Epson WF-100 manuals
Add to My Manuals
Save this manual to your list of manuals |
Page 19 highlights
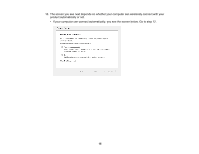
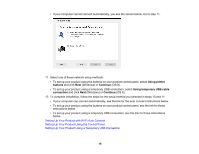
3. OS X: If you see the following messages, click OK and click Allow to let EpsonNet Setup access your password information. 4. Follow the on-screen instructions to let the system automatically configure your product on your network. Note: Your product broadcasts its network information for 60 minutes from the time ink charging begins. If you do not complete Wi-Fi setup within 60 minutes, you cannot connect automatically and may be prompted to enter your network name (SSID) and password on a displayed screen. You can also select a different Wi-Fi setup method. 5. If you see the IP Address Settings screen, select IP Address Automatic Configuration (DHCP) and click Next. 19
-
 1
1 -
2
-
3
-
4
-
5
-
6
-
7
-
8
-
9
-
10
-
11
-
12
-
13
-
 14
14 -
 15
15 -
 16
16 -
 17
17 -
 18
18 -
 19
19 -
 20
20 -
 21
21 -
 22
22 -
 23
23 -
 24
24 -
25
-
26
-
27
-
28
-
29
-
30
-
31
-
32
-
33
-
34
-
35
-
36
-
37
-
38
-
39
-
40
 |
 |

3.
OS X
: If you see the following messages, click
OK
and click
Allow
to let EpsonNet Setup access
your password information.
4.
Follow the on-screen instructions to let the system automatically configure your product on your
network.
Note:
Your product broadcasts its network information for 60 minutes from the time ink charging
begins. If you do not complete Wi-Fi setup within 60 minutes, you cannot connect automatically and
may be prompted to enter your network name (SSID) and password on a displayed screen. You can
also select a different Wi-Fi setup method.
5.
If you see the IP Address Settings screen, select
IP Address Automatic Configuration (DHCP)
and click
Next
.
19