Fluke 8846A FE 8845A & 8846A Users Manual - Page 55
Controlling Trigger Functions, Choosing a Trigger Source, Auto Triggering, External Triggering
 |
View all Fluke 8846A manuals
Add to My Manuals
Save this manual to your list of manuals |
Page 55 highlights
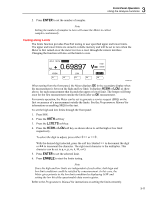
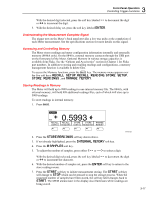
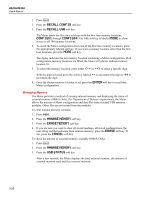
3 Front-Panel Operation Controlling Trigger Functions The display will start adjusting the bar graph as the number of readings accumulates. The mean and standard deviation values also change in accordance with the collected readings. To start the histogram session over, press the STOP soft key followed by the RESTART soft key. To stop the histogram session, press B or the STOP soft key. Controlling Trigger Functions The Meter's trigger functions allows you to select a measurement trigger source, set the number of measurements (samples) per trigger, and set the delay time between receiving the trigger and the start of a measurement. In addition, the trigger function provides a "measurement complete" signal on the trigger port on the rear panel. See item 5 in table 3-3. Triggering the Meter remotely through one of its communication interfaces is covered in the Programmers Manual. The following sections discuss triggering the Meter automatically (internal trigger), or externally using the trigger key on the front panel and the trigger connector on the rear-panel. Setup and control of the trigger function is accessible through the Meter's Measurement Setup key L. Choosing a Trigger Source There are four possible sources for triggering a Meter measurement: automatic, front panel trigger key W, external, and remote. With the exception of remote triggering, trigger source selection is through the trigger menu, found under the measurement setup menu. To select a trigger source: 1. Press L to see the measurement setup menu. 2. Press the TRIGGER soft key to reveal the trigger control selections. Note Setting the Meter to trigger via a remote command is only accessible through the remote interface. See the "Triggering" section in the Programmers Manual for more information on remote triggering. Auto Triggering In auto trigger mode, the Meter's measurements are triggered by internal circuitry. These triggers are continuous and occur as fast as the configuration will allow. Auto triggering is the Meter's power-on trigger source. To return the Meter to auto trigger mode, 1. Press L. If the Meter is in external trigger mode, the soft key label EXT TRIG will be highlighted in the display. 2. Press the soft key labeled EXT TRIG External Triggering In the external trigger mode, a Meter measurement starts each time a low-true pulse is sensed on the external trigger connector or the front-panel trigger key W is pressed. For 3-15
-
 1
1 -
2
-
3
-
4
-
5
-
6
-
7
-
8
-
9
-
10
-
11
-
12
-
13
-
14
-
15
-
16
-
17
-
18
-
19
-
20
-
21
-
22
-
23
-
24
-
25
-
26
-
27
-
28
-
29
-
30
-
31
-
32
-
33
-
34
-
35
-
36
-
37
-
38
-
39
-
40
-
41
-
42
-
43
-
44
-
45
-
46
-
47
-
48
-
49
-
 50
50 -
 51
51 -
 52
52 -
 53
53 -
 54
54 -
 55
55 -
 56
56 -
 57
57 -
 58
58 -
 59
59 -
 60
60 -
61
-
62
-
63
-
64
-
65
-
66
-
67
-
68
-
69
-
70
-
71
-
72
-
73
-
74
-
75
-
76
-
77
-
78
-
79
-
80
-
81
-
82
-
83
-
84
-
85
-
86
-
87
-
88
-
89
-
90
-
91
-
92
-
93
 |
 |
