Frigidaire PCFD3670AF Complete Owners Guide - Page 18
Caution, Using The Oven
 |
View all Frigidaire PCFD3670AF manuals
Add to My Manuals
Save this manual to your list of manuals |
Page 18 highlights
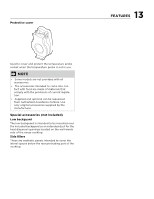
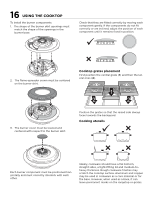
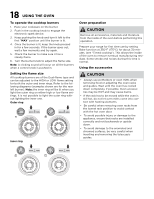
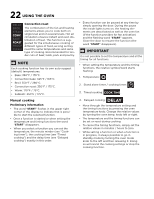
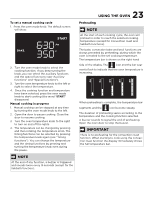
18 USING THE OVEN To operate the cooktop burners 1. Place your cookware on the burner. 2. Push in the cooktop knob to engage the electronic spark device. 3. Keep pushing the knob and turn it left to the first "MAX" position until the burner is lit. 4. Once the burner is lit, keep the knob pressed in for a few seconds. If the burner goes out, wait a few moments and try again. 5. Check the burner to make sure it has a steady flame. 6. Turn the burner knob to adjust the flame size. Note: A clicking sound will occur on all the burners when a control knob is pushed in. Setting the flame size All cooktop burners are of the Dual-flame type and can be adjusted to the HIGH or LOW flame setting for both the outer and inner rings. Refer to the following diagrams (examples shown are for the rear left burner). Note: the inner ring will be lit when you light the outer ring on either high or low flame settings. It is not possible to light the outer ring without lighting the inner one. Outer ring Inner ring Oven preparation CAUTION Remove all accessories, materials and literature from the inside of the oven before performing this operation. Prepare your range for first time use by setting Bake function at 350°F (175°C) for about 30 minutes. (see "Timed cooking"). This allows the inside of the oven to remove eventual manufacturing residues. Some smoke and noises during this time is normal. Using the accessories CAUTION • Always use potholders or oven mitts when removing food or adjusting the oven racks and guides. Wait until the oven has cooled down completely, if possible. Oven accessories may be HOT and may cause burns. • If the rack has to be moved while the oven is still hot, do not let oven mitts come into contact with heating elements. • Be careful when removing oven racks from the lowest rack position to avoid contact with the hot oven door. • To avoid possible injury or damage to the appliance, ensure that racks are installed correctly and not backwards or upside down. • To avoid damage to the enameled and chromed surfaces, be very careful when inserting and removing the telescopic guides.
-
 1
1 -
2
-
3
-
4
-
5
-
6
-
7
-
8
-
9
-
10
-
11
-
12
-
 13
13 -
 14
14 -
 15
15 -
 16
16 -
 17
17 -
 18
18 -
 19
19 -
 20
20 -
 21
21 -
 22
22 -
 23
23 -
24
-
25
-
26
-
27
-
28
-
29
-
30
-
31
-
32
-
33
-
34
-
35
-
36
-
37
-
38
-
39
-
40
-
41
-
42
-
43
-
44
-
45
-
46
-
47
-
48
 |
 |
