Fujitsu 6130 Getting Started Guide - Page 15
To Use Fujitsu Twain 32, To Use Fujitsu Isis - scanner
 |
UPC - 097564307287
View all Fujitsu 6130 manuals
Add to My Manuals
Save this manual to your list of manuals |
Page 15 highlights
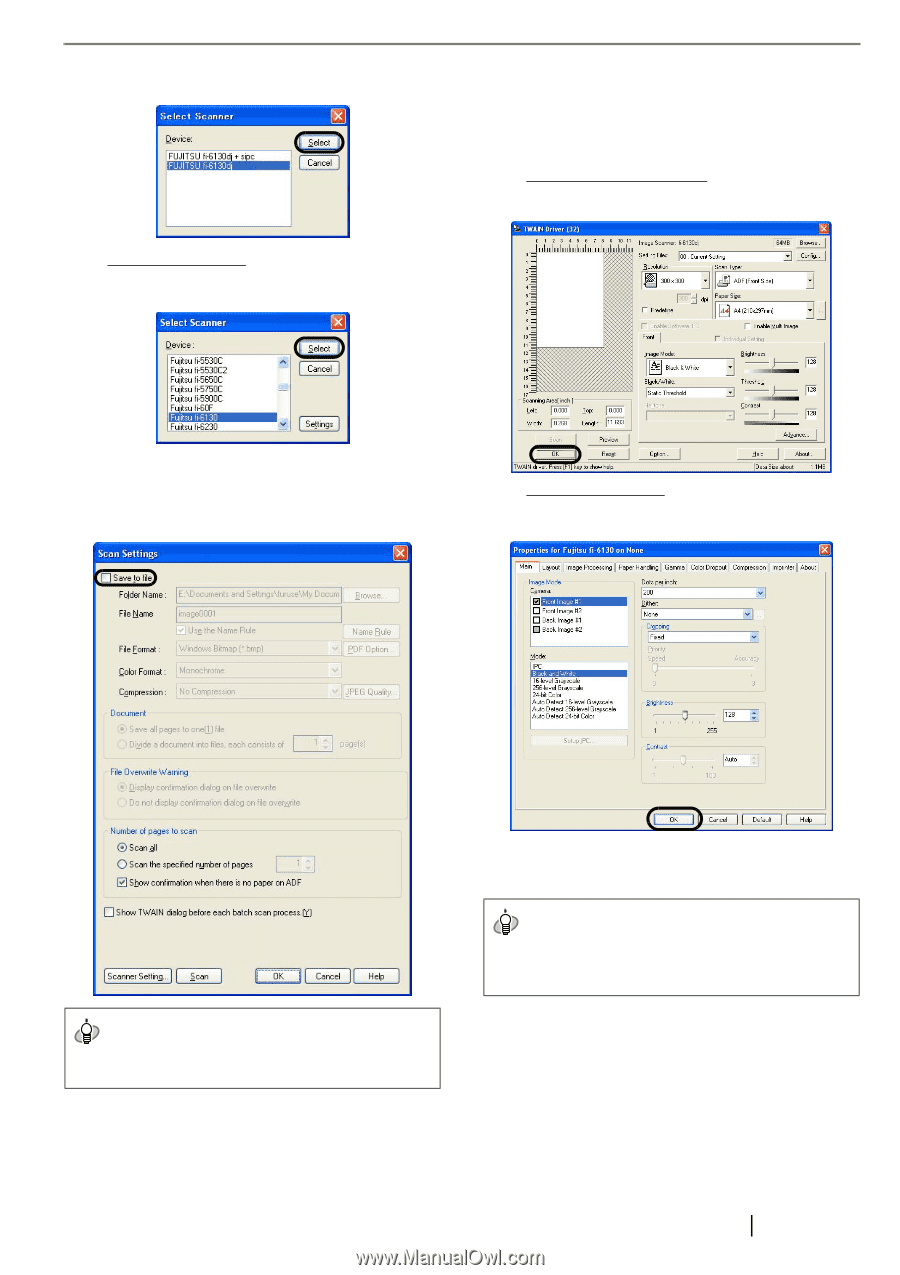
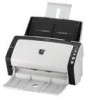
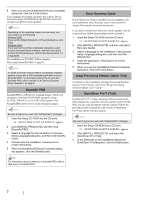
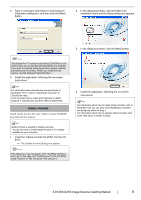
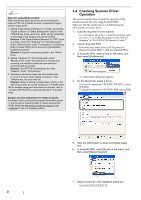
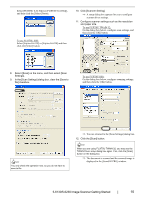
Select [FUJITSU fi-6130dj] or [FUJITSU fi-6230dj], and then click the [Select] button. To use FUJITSU ISIS: Select [Fujitsu fi-6130] or [Fujitsu fi-6230] and then click the [Select] button. 10. Click [Scanner Setting]. ⇒ A setup dialog box appears for you to configure scanner driver settings. 11. Configure scanner settings such as the resolution and paper size. To use FUJITSU TWAIN 32: On the dialog box below, configure scan settings, and then click the [OK] button. 8. Select [Scan] on the menu, and then select [Scan Settings]. 9. In the [Scan Settings] dialog box, clear the [Save to file] checkbox. To use FUJITSU ISIS: On the dialog box below, configure scanning settings, and then click the [OK] button. HINT You only check the operation now, so you do not have to save to file. ⇒ You are returned to the [Scan Settings] dialog box. 12. Click the [Scan] button. HINT When you are using FUJITSU TWAIN 32, you may see the TWAIN Driver setup dialog box again. If so, click the [Scan] button on the dialog box. ⇒ The document is scanned and the scanned image is displayed in the [ScandAll PRO] window. fi-6130/fi-6230 Image Scanner Getting Started 10
-
 1
1 -
2
-
3
-
4
-
5
-
6
-
7
-
8
-
9
-
 10
10 -
 11
11 -
 12
12 -
 13
13 -
 14
14 -
 15
15 -
 16
16 -
 17
17 -
 18
18 -
 19
19 -
 20
20
 |
 |