Fujitsu 6130 Getting Started Guide - Page 8
INSTALLATION OF THE SCANNER, 2.1 Installing the Scanner - specifications
 |
UPC - 097564307287
View all Fujitsu 6130 manuals
Add to My Manuals
Save this manual to your list of manuals |
Page 8 highlights
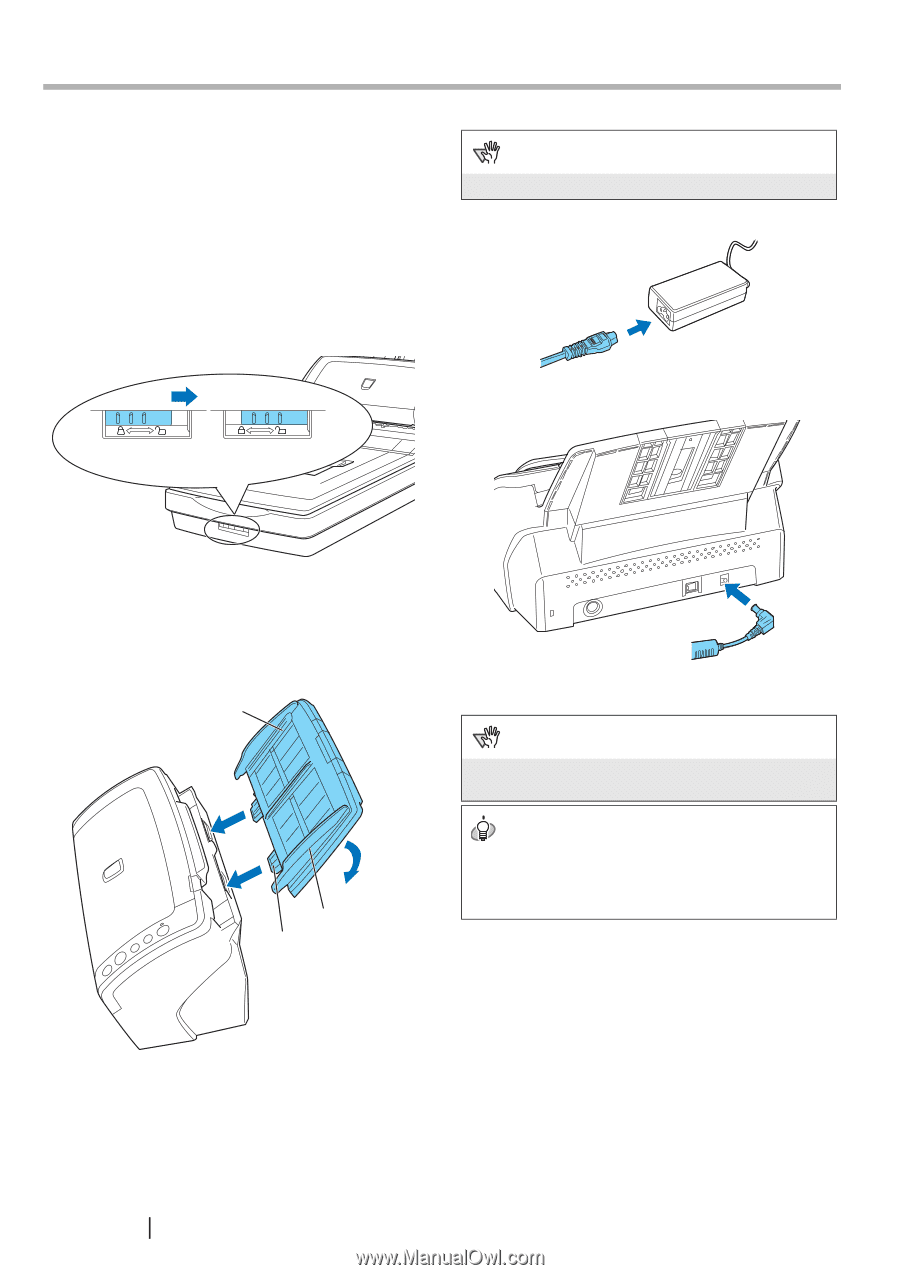
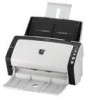
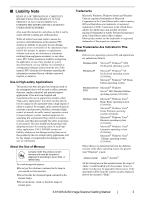
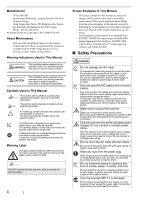
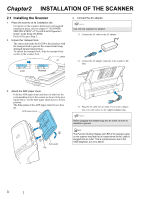
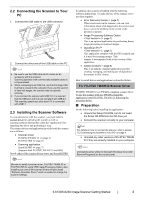
Chapter2 INSTALLATION OF THE SCANNER 2.1 Installing the Scanner 1. Place the scanner at its installation site. For details on the scanner's dimensions and required installation space, refer to chapter 9 "SCANNER SPECIFICATION" of "fi-6130/fi-6230 Operator's Guide" in the Setup CD-ROM. For fi-6130, go to Step 3. 2. Unlock the Transport lock. The carrier unit inside the fi-6230 is fixed in place with the transport lock to prevent the scanner from being damaged during transportation. To unlock the transport lock, slide the transport lock switch on the scanner front. Lock Release 4. Connect the AC adapter. ATTENTION Use only the supplied AC adapter. 1) Connect the AC cable to the AC adapter. 2) Connect the AC adapter connector to the scanner's DC inlet. 3. Attach the ADF paper chute. Hold the ADF paper chute and insert its tabs into the corresponding slots in the scanner as shown in the next figure below. Let the ADF paper chute down to fit into position. The Side guides of the ADF paper chute have to face up. ADF paper chute 2 1 Tab Side guide 3) Plug the AC cable into an outlet. If you want to plug it into a two-slot outlet, use the supplied adapter plug. ATTENTION Before plugging the adapter plug into an outlet, be sure to establish a ground. HINT The Function Number Display and LED of the operator panel on the scanner may flash for an instant when the AC cable is plugged into an outlet. This is a phenomenon due to the initial diagnosis, but not a failure. 3
-
 1
1 -
2
-
 3
3 -
 4
4 -
 5
5 -
 6
6 -
 7
7 -
 8
8 -
 9
9 -
 10
10 -
 11
11 -
 12
12 -
 13
13 -
14
-
15
-
16
-
17
-
18
-
19
-
20
 |
 |