Garmin GPSMAP 6012 Owner's Manual - Page 77
Networked Device Configuration, Assigning a Name to a Garmin Marine Network Device
 |
View all Garmin GPSMAP 6012 manuals
Add to My Manuals
Save this manual to your list of manuals |
Page 77 highlights
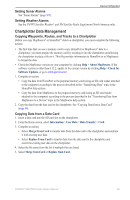
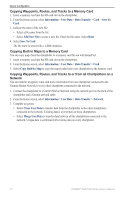
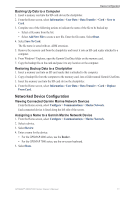
Device Configuration Backing Up Data to a Computer 1. Insert a memory card into the SD card slot on the chartplotter. 2. From the Home screen, select Information > User Data > Data Transfer > Card > Save to Card. 3. Complete one of the following actions to indicate the name of the file to be backed up: • Select a file name from the list. • Select Add New File to create a new file. Enter the file name. Select Done. 4. Select Save To Card. The file name is saved with an .ADM extension. 5. Remove the memory card from the chartplotter and insert it into an SD card reader attached to a computer. 6. From Windows® Explorer, open the Garmin\UserData folder on the memory card. 7. Copy the backup file on the card and paste it to any location on the computer. Restoring Backup Data to a Chartplotter 1. Insert a memory card into an SD card reader that is attached to the computer. 2. Copy a backup file from the computer to the memory card, into a folder named Garmin\UserData. 3. Insert the memory card into the SD card slot on the chartplotter. 4. From the Home screen, select Information > User Data > Data Transfer > Card > Replace From Card. Networked Device Configuration Viewing Connected Garmin Marine Network Devices From the Home screen, select Configure > Communications > Marine Network. Each connected device is listed along the left side of the screen. Assigning a Name to a Garmin Marine Network Device 1. From the Home screen, select Configure > Communications > Marine Network. 2. Select a device. 3. Select Review. 4. Enter a name for the device: • For the GPSMAP 6000 series, use the Rocker. • For the GPSMAP 7000 series, use the on-screen keyboard. 5. Select Done. GPSMAP® 6000/7000 Series Owner's Manual 71
-
 1
1 -
2
-
3
-
4
-
5
-
6
-
7
-
8
-
9
-
10
-
11
-
12
-
13
-
14
-
15
-
16
-
17
-
18
-
19
-
20
-
21
-
22
-
23
-
24
-
25
-
26
-
27
-
28
-
29
-
30
-
31
-
32
-
33
-
34
-
35
-
36
-
37
-
38
-
39
-
40
-
41
-
42
-
43
-
44
-
45
-
46
-
47
-
48
-
49
-
50
-
51
-
52
-
53
-
54
-
55
-
56
-
57
-
58
-
59
-
60
-
61
-
62
-
63
-
64
-
65
-
66
-
67
-
68
-
69
-
70
-
71
-
 72
72 -
 73
73 -
 74
74 -
 75
75 -
 76
76 -
 77
77 -
 78
78 -
 79
79 -
 80
80 -
 81
81 -
 82
82 -
83
-
84
-
85
-
86
-
87
-
88
-
89
-
90
-
91
-
92
-
93
-
94
-
95
-
96
-
97
-
98
-
99
-
100
-
101
-
102
-
103
-
104
-
105
-
106
-
107
-
108
-
109
-
110
-
111
-
112
-
113
-
114
-
115
-
116
-
117
-
118
-
119
-
120
-
121
-
122
-
123
-
124
-
125
-
126
-
127
-
128
-
129
-
130
-
131
-
132
 |
 |