Garmin Zumo 550 Owner's Manual - Page 57
Mounting on Your Dashboard, Mount, Removing the zūmo from - mounts
 |
UPC - 753759061753
View all Garmin Zumo 550 manuals
Add to My Manuals
Save this manual to your list of manuals |
Page 57 highlights
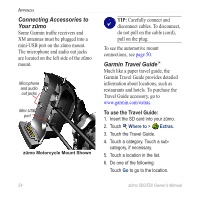
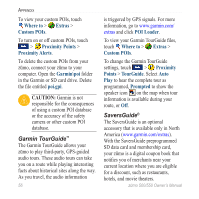
Mounting on Your Dashboard Use the enclosed mounting disk to mount your zūmo on the dashboard and to comply with state regulations. Note: The permanent mounting adhesive is extremely difficult to remove after it is installed. 1. Clean and dry the dashboard where you want to place the disk. 2. Remove the backing from the permanent mounting adhesive on the bottom of the disk. 3. Place the disk on the dashboard. 4. Remove the clear plastic cover from the top of the disk. 5. Place the suction cup part of the automotive mount on top of the disk. 6. Flip the suction lever down (toward the disk). 7. Follow steps 2-4 on page 50. Appendix Removing the zūmo from the Mount To remove the zūmo from the mount, flip up the lever on the mount. Lift out the zūmo. You can separate the suction cup from the automotive mount. Turn the mount as far as you can to the right or left. Apply pressure in that direction until the mount snaps off the arm. Note: Reconnecting the suction cup to the automotive mount requires significant force. Press the ball end firmly into the socket. To remove the suction cup from the windshield or mounting disk, flip the suction lever up. Pull the tab on the suction cup toward you. zūmo 500/550 Owner's Manual 51
-
 1
1 -
2
-
3
-
4
-
5
-
6
-
7
-
8
-
9
-
10
-
11
-
12
-
13
-
14
-
15
-
16
-
17
-
18
-
19
-
20
-
21
-
22
-
23
-
24
-
25
-
26
-
27
-
28
-
29
-
30
-
31
-
32
-
33
-
34
-
35
-
36
-
37
-
38
-
39
-
40
-
41
-
42
-
43
-
44
-
45
-
46
-
47
-
48
-
49
-
50
-
51
-
 52
52 -
 53
53 -
 54
54 -
 55
55 -
 56
56 -
 57
57 -
 58
58 -
 59
59 -
 60
60 -
 61
61 -
 62
62 -
63
-
64
-
65
-
66
-
67
-
68
-
69
-
70
-
71
-
72
-
73
-
74
 |
 |
