Gateway E-9232T Gateway E-9232T Server User Guide - Page 29
Installing the bezel assembly, Important
 |
View all Gateway E-9232T manuals
Add to My Manuals
Save this manual to your list of manuals |
Page 29 highlights
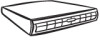
www.gateway.com Installing the bezel assembly Important If you have installed any new drives in the external drive bays, make sure to remove the corresponding filler panels in the bezel before installing it. To install the bezel assembly: 1 Insert the tabs on the left side of the bezel into the slots in the left side of the computer. 2 Swing the right side of the bezel in to insert the tabs on the right side of the bezel into the slots on the right side of the computer. 3 Press the right side of the bezel firmly until it snaps into place. 23
-
 1
1 -
2
-
3
-
4
-
5
-
6
-
7
-
8
-
9
-
10
-
11
-
12
-
13
-
14
-
15
-
16
-
17
-
18
-
19
-
20
-
21
-
22
-
23
-
 24
24 -
 25
25 -
 26
26 -
 27
27 -
 28
28 -
 29
29 -
 30
30 -
 31
31 -
 32
32 -
 33
33 -
 34
34 -
35
-
36
-
37
-
38
-
39
-
40
-
41
-
42
-
43
-
44
-
45
-
46
-
47
-
48
-
49
-
50
-
51
-
52
-
53
-
54
-
55
-
56
-
57
-
58
-
59
-
60
-
61
-
62
-
63
-
64
-
65
-
66
-
67
-
68
-
69
-
70
-
71
-
72
-
73
-
74
-
75
-
76
-
77
-
78
-
79
-
80
-
81
-
82
-
83
-
84
-
85
-
86
-
87
-
88
-
89
-
90
-
91
-
92
-
93
-
94
-
95
-
96
 |
 |

www.gateway.com
23
Installing the bezel assembly
To install the bezel assembly:
1
Insert the tabs on the left side of the bezel into the slots in the left side of the computer.
2
Swing the right side of the bezel in to insert the tabs on the right side of the bezel into
the slots on the right side of the computer.
3
Press the right side of the bezel firmly until it snaps into place.
Important
If you have installed any new drives in the external drive bays, make sure to remove
the corresponding filler panels in the bezel before installing it.