Gateway E-9232T Gateway E-9232T Server User Guide - Page 33
Installing or replacing a hard drive
 |
View all Gateway E-9232T manuals
Add to My Manuals
Save this manual to your list of manuals |
Page 33 highlights
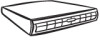
www.gateway.com Installing or replacing a hard drive Important To install a hard drive in the bottom external 3.5-inch drive bay, follow the instructions in "To install a drive in an external drive bay:" on page 25. Use these instructions to install or replace a hard drive. To install a hard drive in an internal drive bay: 1 Follow the instructions in "Preventing static electricity discharge" on page 18. 2 Follow the instructions in "Opening the server case" on page 19. 3 If you are replacing a drive, go to Step 4. - OR If you are adding a new drive to an available drive bay, slide the green drive retainer lever toward the front of the drive bay, then go to Step 6. 4 Disconnect the old drive's cables from the front of the drive. 5 Slide the green drive retainer lever toward the front of the drive bay, then pull the drive out of the bay. Drive retainer lever 6 Set any jumpers on the new drive. See the drive's documentation for further instructions. 7 Slide the new drive into the drive bay as far as it will go, then slide the green drive retainer lever toward the back of the drive bay to lock the drive into the bay. Tip If the green drive retainer lever will not slide back all the way to lock the drive into place, move the drive slightly, until the lever can be moved back enough to lock the drive into place. 8 Connect the power and data cables. 9 Follow the instructions in "Closing the server case" on page 24. 10 Format and partition the drive as necessary. 27
-
 1
1 -
2
-
3
-
4
-
5
-
6
-
7
-
8
-
9
-
10
-
11
-
12
-
13
-
14
-
15
-
16
-
17
-
18
-
19
-
20
-
21
-
22
-
23
-
24
-
25
-
26
-
27
-
 28
28 -
 29
29 -
 30
30 -
 31
31 -
 32
32 -
 33
33 -
 34
34 -
 35
35 -
 36
36 -
 37
37 -
 38
38 -
39
-
40
-
41
-
42
-
43
-
44
-
45
-
46
-
47
-
48
-
49
-
50
-
51
-
52
-
53
-
54
-
55
-
56
-
57
-
58
-
59
-
60
-
61
-
62
-
63
-
64
-
65
-
66
-
67
-
68
-
69
-
70
-
71
-
72
-
73
-
74
-
75
-
76
-
77
-
78
-
79
-
80
-
81
-
82
-
83
-
84
-
85
-
86
-
87
-
88
-
89
-
90
-
91
-
92
-
93
-
94
-
95
-
96
 |
 |
