GE JXGB90S Use and Care Manual
GE JXGB90S - Profile Gas Cooktop Module Manual
 |
UPC - 084691143420
View all GE JXGB90S manuals
Add to My Manuals
Save this manual to your list of manuals |
GE JXGB90S manual content summary:
- GE JXGB90S | Use and Care Manual - Page 1
Gas Downdraft Cooktop ge.com Safety Instructions . . . .2-5 Operating Instructions Accessories 7 Controls 8, 9 Cookware 9 Electric Ignition 8 Features 6 Griddle 14 Grill Module 10-13 Surface Burner Modules 6, 8-10 Ventilation System 6, 9 Installation Owner's Manual Instructions 18-29 - GE JXGB90S | Use and Care Manual - Page 2
Consumer Support Troubleshooting Tips Care and Cleaning Operating Instructions Safety Instructions D IMPORTANT SAFETY INFORMATION. READ ALL INSTRUCTIONS BEFORE USING. WARNING! For your safety, the information in this manual must be followed to minimize the risk of fire or explosion, electric shock, - GE JXGB90S | Use and Care Manual - Page 3
for use with either type of gas. See the Installation Instructions. Your model is factory adjusted for use with natural gas. s Do not attempt to repair or replace any part of your cooktop unless it is specifically recommended in this manual. All other service should be referred to a qualified - GE JXGB90S | Use and Care Manual - Page 4
Consumer Support Troubleshooting Tips Care and Cleaning Operating Instructions Safety Instructions IMPORTANT SAFETY INFORMATION. READ ALL INSTRUCTIONS BEFORE USING. SAFETY PRECAUTIONS s Always keep dish towels, dishcloths, pot holders and other linens a safe distance from your cooktop. s Do not - GE JXGB90S | Use and Care Manual - Page 5
Safety Instructions Operating Instructions Care and Cleaning Troubleshooting Tips Consumer Support ge.com WARNING! SURFACE BURNERS Use proper pan size-avoid pans that are unstable or easily tipped. Select cookware having flat bottoms large enough to cover burner grate. To avoid spillovers, make - GE JXGB90S | Use and Care Manual - Page 6
Consumer Support Troubleshooting Tips Care and Cleaning Operating Instructions Safety Instructions Features of your cooktop. Throughout this manual, features and appearance may vary from your model. 1 2 3 4 5 67 Feature Index 1 Grill Module (optional) 2 Vent (fan operates automatically when - GE JXGB90S | Use and Care Manual - Page 7
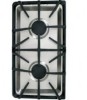
Instructions Care and Cleaning Troubleshooting Tips Consumer Support Cooktop accessories. Throughout this manual, features and appearance may vary from your model. Grill Model JXGG90L Consists of a black grill grate and a grill burner. ge.com Sealed Burner Module Models JXGB90B (black), JXGB90S - GE JXGB90S | Use and Care Manual - Page 8
Consumer Support Troubleshooting Tips Care and Cleaning Operating Instructions Safety Instructions Using the gas surface burners. Throughout this manual, features and appearance may vary from your model. Electric Ignition Your surface burners are lit by electric ignition, eliminating the need for - GE JXGB90S | Use and Care Manual - Page 9
Instructions Operating Instructions Care and Cleaning Troubleshooting Tips Consumer Support Using your cooktop. ge burners. Aluminum: Medium-weight two types of glass cookware: those for oven use only and those for cooktop on a gas cooktop. Stainless while the grill burner module is in use. - GE JXGB90S | Use and Care Manual - Page 10
Consumer Support Troubleshooting Tips Care and Cleaning Operating Instructions Safety Instructions Surface burner and grill modules. Throughout this manual, features and appearance may vary from your model. Sealed Burner Module To Install the Sealed Burner Module: 1. Make sure that all control - GE JXGB90S | Use and Care Manual - Page 11
Instructions Operating Instructions Care and Cleaning Troubleshooting Tips Consumer Support Grilling. ge.com Using the Grill • The vent fan will turn on automatically and operate continuously while the grill burner module flare-up problems. • Allowing flame for a second or two. This is a normal - GE JXGB90S | Use and Care Manual - Page 12
Consumer Support Troubleshooting Tips Care and Cleaning Operating Instructions Safety Instructions Grilling. Grilling Tips • With your increase your enjoyment of the equipment. Be sure to follow directions in this manual for using the grill. • Suggested cooking times and control settings are - GE JXGB90S | Use and Care Manual - Page 13
Safety Instructions Operating Instructions Care and Cleaning Troubleshooting Tips Consumer Support Grilling guide. ge.com Preheat the grill on high for 5 to 10 minutes for best flavor. Type Control Setting Cooking Time Procedure Meat Steak (1/2″-3/4″) Rare Medium Well Steak (1″- - GE JXGB90S | Use and Care Manual - Page 14
Consumer Support Troubleshooting Tips Care and Cleaning Operating Instructions Safety Instructions Griddle. Griddle Accessory Using MODULE OR GRIDDLE IF THE VENTILATION SYSTEM IS NOT OPERATIONAL. Griddle Guide NOTE: These are suggested guides for control settings and times. Factors such as low gas - GE JXGB90S | Use and Care Manual - Page 15
Instructions Operating Instructions Care and Cleaning Troubleshooting Tips Consumer Support Care and cleaning of the cooktop. ge.com Before Cleaning Before cleaning any part of your cooktop, be sure all controls are off and DISCONNECT ELECTRICAL POWER TO THE COOKTOP Cooktop cooktop instructions - GE JXGB90S | Use and Care Manual - Page 16
Support Troubleshooting Tips Care and Cleaning Operating Instructions Safety Instructions Care and cleaning of the cooktop. Grill Burner The grill burner oven for two hours. NOTE: Check to be sure all burner ports are mild household detergents. NOTE: On models with a white vent grille, stubborn - GE JXGB90S | Use and Care Manual - Page 17
Safety Instructions Operating Instructions Care and Cleaning Troubleshooting Tips Consumer Support ge.com Igniters It is important to keep igniter port openings on burners clear and free of obstructions to avoid ignition failure and possible gas buildup. If the port openings are blocked, use a - GE JXGB90S | Use and Care Manual - Page 18
in the Important Safety Instuctions section in the front of this Owner's Manual. Read them carefully. • Be sure your cooktop is installed properly by a qualified installer or service technician. • The cooktop must be electrically grounded in accordance with local codes, or in their absence, with the - GE JXGB90S | Use and Care Manual - Page 19
cord • LP Conversion (attached to the electrical box) Burner Grate Grease Jar Vent Grille Shipping Tape Cooktop with Side Hold-Down Bolts (2) Sealed Burner Module Sealed Burner Caps (2) Vent Guard and Mounting Nuts (4) Sheet Metal Screws (7) Gas Pressure Regulator Vent Filter Blower Assembly - GE JXGB90S | Use and Care Manual - Page 20
Where possible, 6″ (15.2 cm) is recommended for motor/blower service. Side Clearance-Grills installed near a side wall should allow a GE. Recommended wall caps and transitions must be used for proper operation and installation. Select appropriate duct cutout. (See ducting installation instructions - GE JXGB90S | Use and Care Manual - Page 21
13″ (33 cm). EXCEPTION: Installation of a listed microwave oven or cooking appliance over the cooktop shall conform to the installation instructions packed with that appliance. Working areas adjacent to the cooktop should have an 18″ (45.7 cm) minimum clearance between the countertop and the bottom - GE JXGB90S | Use and Care Manual - Page 22
opening must clear the front support rail on the cabinet, and the rear of the opening must clear the rear support of the cabinet. Chamfer all walls. The cooktop must be disconnected from the power supply before any servicing is carried out. 3″ (7.6 cm) Min. Gas pipe location Electrical outlet 12″ - GE JXGB90S | Use and Care Manual - Page 23
Installation Instructions PREPARATION 6 PREPARE FOR DUCTWORK NOTE: Ductwork MUST be vented outside. DO NOT series. Inside wall cabinet Outside wall cabinet 7 BLOWER TO DUCTWORK ALIGNMENT In general, the use of flexible ducting is discouraged because it can cause severely restricted airflow - GE JXGB90S | Use and Care Manual - Page 24
as a guide. 3. Using good quality ducting material, install per these instructions. A few minutes and pennies spent now will pay long term dividends for the life of the cooktop. 9 INSTALL THE DUCTWORK • Ducting must conform to local code materials. • IMPORTANT: Save for local electrical inspector - GE JXGB90S | Use and Care Manual - Page 25
Installation Instructions DUCTWORK CALCULATIONS Calculate Total Equivalent Ductwork Length Duct Pieces Equivalent Number Equivalent Length* x Used = Length tests and reflect requirements for good venting performance with any downdraft cooktop. † Measure and list feet of straight duct used. Count - GE JXGB90S | Use and Care Manual - Page 26
Installation Instructions INSTALL THE COOKTOP 10 PREPARE THE COOKTOP Remove the vent grille, vent filter, sealed burner module and the tape from the burner caps. 10 PREPARE THE COOKTOP (cont.) Rotate the cooktop and plenum forward and carefully set it on its back edge on the styrofoam packing. - GE JXGB90S | Use and Care Manual - Page 27
TO CHECK FOR GAS LEAKS! Do not use the cooktop until all connections have been leak tested. Perform leak test per the following instructions: 1. Purchase a cooktop from the gas supply piping system by closing the individual manual shut-off valve to the cooktop during any pressure testing of the gas - GE JXGB90S | Use and Care Manual - Page 28
Instructions INSTALL THE COOKTOP 12 INSTALL THE COOKTOP Lower the cooktop into the countertop opening, guiding it into position. 15 CONNECT THE DUCTWORK Connect the ductwork prepared earlier to the blower transition duct. 13 SECURE THE COOKTOP Tighten the tie-down bolts to secure the cooktop - GE JXGB90S | Use and Care Manual - Page 29
Instructions FINAL ASSEMBLY 17 ASSEMBLE THE COOKTOP Install the sealed burner module , on the supports in the vent gas line. Turn knob to OFF. Repeat the procedure for each burner. Adjust the air shutters (see LP Conversion Instructions). Adjust the low flame setting (see LP Conversion Instructions - GE JXGB90S | Use and Care Manual - Page 30
using LP (bottled) gas, all adjustments described in the following steps must be made before attempting burner adjustments or use of the cooktop. WARNING - This conversion kit shall be installed by a qualified service agency in accordance with the manufacturer's instructions and all applicable codes - GE JXGB90S | Use and Care Manual - Page 31
the nut from the pressure regulator with an adjustable wrench. Natural gas Nut TURN OFF GAS AND ELECTRIC SUPPLY BEFORE YOU BEGIN, TURN OFF THE GAS SUPPLY AT THE SHUT-OFF VALVE. DISCONNECT THE ELECTRICAL SUPPLY FROM THE COOKTOP. LP gas C Twist and remove the conversion plug from the inside of the - GE JXGB90S | Use and Care Manual - Page 32
the inscribed LP orifices in the holder in the front of the electric cover beneath the cooktop. D Install the inscribed LP orifices in place of the natural gas orifices. E Replace the burner modules and grates. F Keep all the spuds with your cooktop so you have them if you move or get a different - GE JXGB90S | Use and Care Manual - Page 33
Instructions 5 ADJUST THE LOW FLAME (SIMMER) SETTING The top burner Light two other burners and set the knobs to a medium to high setting. B Light the burner GAS To convert the cooktop back to natural gas, reverse the steps taken to convert to LP. Natural Gas 5″ W.C.P. Burner Output Rating in BTU - GE JXGB90S | Use and Care Manual - Page 34
Instructions Before you call for service... Troubleshooting Tips Save time and money! Review the charts on the following pages first and you may not need to call for service. Problem Burners do not light Possible Causes What To Do Plug on cooktop is not completely inserted in the electrical - GE JXGB90S | Use and Care Manual - Page 35
Safety Instructions Operating Instructions Care and Cleaning Troubleshooting Tips Consumer Support ge.com Problem Possible Causes What To Do Flames too high or too Adjust the low flame setting. 1 Light the top burners and low at the LOW setting continue turning all of Clockwise - GE JXGB90S | Use and Care Manual - Page 36
Consumer Support Troubleshooting Tips Care and Cleaning Operating Instructions Safety Instructions Notes. 36 - GE JXGB90S | Use and Care Manual - Page 37
to provide you with excellent service in a professional and timely manner. Place your confidence in GE and call us in the U.S. toll-free at 1.800.626.2224 for more information. *Most brands covered up to 15 years old in the continental U.S. SPP is a trademark of General Electric Company. ¡ Cut here - GE JXGB90S | Use and Care Manual - Page 38
yt ! Model Number Serial Number First Name Mr. s Ms. s Mrs. s Miss s Street Address Last Name Apt. # E-mail Address* Zip City State Code Date Placed In Use Month Day Year Phone _ _ Number GE Consumer & Industrial Appliances General Electric Company Louisville, KY 40225 ge.com - GE JXGB90S | Use and Care Manual - Page 39
Safety Instructions Operating Instructions Care and Cleaning Troubleshooting Tips Consumer Support GE Gas Cooktop Warranty. All warranty service provided by our Factory Service Centers, or an authorized Customer Care® technician. To schedule service, on-line, visit us at ge.com, or call 800.GE. - GE JXGB90S | Use and Care Manual - Page 40
normal business hours. Instructions contained in this manual cover procedures to be performed by any user. Other servicing generally should be referred to qualified service personnel. Caution must be exercised, since improper servicing may cause unsafe operation. Contact Us ge.com If you are - GE JXGB90S | Use and Care Manual - Page 41
con tiro descendente Estufa de cubierta a gas ge.com Instrucciones importantes de seguridad 2-5 Instrucciones de operación Accesorios 7 ón para uso con gas LP 30-34 Solucionar problemas 35-37 Apoyo al consumidor Apoyo al consumidor 40 Garantía 39 Manual del propietario e Instrucciones - GE JXGB90S | Use and Care Manual - Page 42
! Por su seguridad, se debe seguir la información de este manual para reducir el riesgo de incendio o explosión, choque eléctrico vapores o líquidos inflamables cerca de este o cualquier otro aparato. - SI HUELE A GAS n No trate de encender ningún aparato. n No toque ningún interruptor eléctrico - GE JXGB90S | Use and Care Manual - Page 43
ge.com Seguridad Operación Cuidado y limpieza Solucionar problemas Apoyo al consumidor AVISO de carbono, el formaldehido y el hollín, causados primordialmente por la combustión incompleta de gas natural o gas LP (Propano). Los quemadores bien ajustados, indicados por una llama azul en vez de - GE JXGB90S | Use and Care Manual - Page 44
ollas y utensilios de cocina apropiados para el tipo y cantidad de comida que se esté preparando. PRECAUCION: Unicamente para usarse como ventilación general. No se utilice para extraer por succión materiales o vapores peligrosos o explosivos. COCINE MUY BIEN TODAS LAS CARNES... Cocine muy bien - GE JXGB90S | Use and Care Manual - Page 45
ge.com Seguridad Operaci los plásticos alejados de todos los quemadores. n Si huele a gas, cierre la llave de paso del gas de la estufa y llame a un técnico de servicio especializado. que aparecen señaladas en este manual del propietario. LEA ESTAS INSTRUCCIONES DE SEGURIDAD CUIDADOSAMENTE. GUARDE - GE JXGB90S | Use and Care Manual - Page 46
Características de su estufa de cubierta. Su modelo puede tener otras características y apariencia que las ilustradas en este manual. 1 2 3 4 5 Operación Apoyo al consumidor Solucionar problemas Cuidado y limpieza 67 Indice de las características 1 Módulo del asador (opcional) 2 Rejilla de - GE JXGB90S | Use and Care Manual - Page 47
tener otras características y apariencia que las ilustradas en este manual. Asador Modelo JXGG90L Consta de una parrilla negra para asar y un quemador de asador. ge.com Módulo de quemadores sellados Modelos JXGB90B (negra), JXGB90S (acero inoxidable) y JXGB90W (blanca) El asador se puede retirar - GE JXGB90S | Use and Care Manual - Page 48
puede tener otras características y apariencia que las ilustradas en este manual. Ignición eléctrica Sus quemadores se encienden por ignición elé a medida que reduce el calor. El tamaño de la llama en un quemador de gas debe adaptarse al tipo de recipiente que esté usando. Si el quemador no se us - GE JXGB90S | Use and Care Manual - Page 49
con fondo plano. No use ollas tipo "wok" con fondo plano con un soporte. ge.com No utilice ollas tipo "wok" con arillos de soporte. Si coloca el arillo pueda usarse en estufas de gas. Acero inoxidable: Este metal por sí solo es un mal conductor de calor y por lo general se combina con cobre, - GE JXGB90S | Use and Care Manual - Page 50
tener otras características y apariencia que las ilustradas en este manual. Módulo de quemadores sellados Para instalar el módulo de quemadores puedan caer o dañar. NOTA: El módulo opcional de quemadores sellado JXGB90 puede reemplazar el quemador del asador. Módulo de asador El asador consta de - GE JXGB90S | Use and Care Manual - Page 51
Seguridad Operación Cuidado y limpieza Solucionar problemas Apoyo al consumidor Para asar. ge.com Cómo utilizar el asador • El ventilador se encenderá de forma automática y funcionará continuamente mientras el módulo del quemador del asador se encuentre en - GE JXGB90S | Use and Care Manual - Page 52
Las siguientes sugerencias son buenas reglas a seguir e incrementarán el placer de disfrutar de su equipo. Asegúrese de seguir las instrucciones de este manual en lo que se refiere al uso del asador. • Los tiempos de cocción y los ajustes de control sugeridos son aproximados debido a las variaciones - GE JXGB90S | Use and Care Manual - Page 53
Seguridad Operación Cuidado y limpieza Solucionar problemas Apoyo al consumidor Guía para asar. ge.com Precaliente el asador en alto de 5 a 10 minutos para obtener un mejor sabor. Tipo Ajuste de control Tiempo de cocción Procedimiento Carne Bistec [1/2″-3/4″ (12,7- - GE JXGB90S | Use and Care Manual - Page 54
la plancha para asar NOTA: Estas son guías sugeridas para los ajustes de control y tiempos. Hay factores, como la baja presión del gas, que pueden afectar los tiempos y ajustes de control que proporcionan los mejores resultados. Precaliente 5 a 10 minutos al ajuste indicado. Tipo de alimento Tocino - GE JXGB90S | Use and Care Manual - Page 55
Seguridad Operación Cuidado y limpieza Solucionar problemas Apoyo al consumidor Cuidado y limpieza. ge.com Antes de limpiar Antes de limpiar cualquier parte de la estufa, asegúrese ón del distribuidor más cercano, llame a nuestro número gratuito: Centro de piezas nacional 800.626.2002 ge.com 15 - GE JXGB90S | Use and Care Manual - Page 56
Seguridad Cuidado y limpieza. Quemador del asador El quemador del asador deberá limpiarse siempre después de usarse. Puede limpiarse con una fibra no abrasiva o en la lavavajillas. Enjuague y seque perfectamente bien antes de volver a utilizarlo. Para manchas muy pegadas, primero deberá limpiarse - GE JXGB90S | Use and Care Manual - Page 57
ge.com Ignitores Es importante mantener las aberturas del puerto de ignitores en los quemadores libres de obstrucciones para evitar fallas en la ignición y posible acumulación de gas la chispa y se debe mantener limpia y seca para encender el gas de forma adecuada. Use una toalla de papel seca o un - GE JXGB90S | Use and Care Manual - Page 58
GE.CARES (800.432.2737) o visite nuestro sitio Web: ge.com En el Estado de Massachusetts: • Este producto lo debe instalar un plomero con licencia o un instalador de gas. • Al usar válvulas de cierre de gas daños a la propiedad. Consulte este manual. Para asistencia o información adicional, consulte - GE JXGB90S | Use and Care Manual - Page 59
de los quemadores sellados • Recipiente para grasa • Tapas del quemador selladas (2) • Regulador de la presión de gas • Cable eléctrico con conexión a tierra de 120 voltios • Conversión para uso con gas LP (pegado a la caja eléctrica) Parrilla de los quemadores Rejilla de ventilación Cinta de env - GE JXGB90S | Use and Care Manual - Page 60
• Tubería de metal flexible [de diámetro interior igual a la línea de abastecimiento de gas de 3/4″ ó 1/2″ (19,1 mm ó 12,7 mm)] • Adaptador cónico de unión para cuando el equipo se instala de manera diferente a la recomendada por GE. Deben utilizarse las protecciones para cables de la pared y los - GE JXGB90S | Use and Care Manual - Page 61
Instrucciones de instalación PREPARACIÓN ESPACIO MÍNIMO REQUERIDO Cuando instale una estufa de doble unidad de tiro en combinación con otra estufa de tiro, conserve entre las unidades el espacio mínimo que se muestra. Instalarlas demasiado cerca afectará su funcionamiento. 18″ 45,7 cm 43⁄ 8″ 11,1 - GE JXGB90S | Use and Care Manual - Page 62
deberá permanecer en serie con la línea de abastecimiento, sin importar que si usa gas natural o LP. Para una operación correcta, la presion máxima de entrada hacia la tubería de abastecimiento de gas cerrando su llave de paso individual manual durante cualquier prueba de presión del sistema - GE JXGB90S | Use and Care Manual - Page 63
Arriba en la pared interior hacia el techo o colgado Península o isla Directamente al exterior Peninsula 7 ALINEACIÓN DE LOS CONDUCTOS DEL SOPLADOR En general, no instamos al uso de conductos flexibles porque éste puede causar severas restricciones del flujo de aire. Sin embargo, si la salida del - GE JXGB90S | Use and Care Manual - Page 64
instrucciones, planee la trayectoria del ducto. • Instale el ducto. CONSIDERACIONES GENERALES: 1. Utilice una tubería de metal de buena calidad, galvanizada, muy bajo. Consulte la sección Preparación para el ducto de este manual para ver que otro tipo de tubería puede elegir. Los códigos locales - GE JXGB90S | Use and Care Manual - Page 65
Instrucciones de instalación CÁLCULOS DE LOS DUCTOS Calcule el total de longitud equivalente de los ductos Longitud Número Longitud Pedazos de conducto equivaente* x usado = equivalente Ducto recto de 6″ de diámetro 1′ x ( )† = pies Ducto recto de 31⁄4″ x 10″ 1′ x ( )† = pies Codo de 90° - GE JXGB90S | Use and Care Manual - Page 66
Instrucciones de instalación INSTALACIÓN DE LA ESTUFA 10 PREPARE LA ESTUFA Remueva la rejilla de ventilación, el filtro de ventilación, el módulo de los quemadores sellados y la cinta de las tapas del quemador. Voltee la estufa (boca arriba) y con cuidado colóquela en el embalaje de espuma de - GE JXGB90S | Use and Care Manual - Page 67
otra posición afectará la presión de salida del regulador. Esta flecha indica que la dirección del flujo del gas es correcta. • Instale una válvula de cierre manual de la tubería de gas en una ubicación de fácil acceso. 11 INSTALACIÓN Y CONEXIÓN DEL REGULADOR DE PRESIÓN (cont.) NOTA: En vez de - GE JXGB90S | Use and Care Manual - Page 68
Instrucciones de instalación INSTALACIÓN DE LA ESTUFA 12 INSTALE LA ESTUFA Baje la estufa hacia la abertura en la encimera y colóquela en su posición. 15 CONECTE LOS CONDUCTOS Conecte los conductos preparados más temprano al conducto de transición del soplador. 13 ASEGURE LA ESTUFA Apriete los - GE JXGB90S | Use and Care Manual - Page 69
de chispear cuando el quemador se encienda. La primera prueba podría requerir algún tiempo, mientras el aire circula a través de la línea de gas. Gire la perilla a OFF (APAGADO). Repita el procedimiento para cada quemador. Ajuste los obturadores de aire (Consulte las Instrucciones de conversión a LP - GE JXGB90S | Use and Care Manual - Page 70
Instrucciones de Estufa de cubierta a gas conversión a LP ¿Preguntas? Llame a 800.GE.CARES (800.432.2737) o visite nuestro sitio Web: ge.com ANTES DE COMENZAR Lea estas instrucciones completa y cuidadosamente. • IMPORTANTE - Guarde estas instrucciones para el uso del inspector local. • IMPORTANTE - GE JXGB90S | Use and Care Manual - Page 71
estufa del sistema de tuberías de suministro de gas cerrando la válvula de desconexión manual individual de la estufa durante cualquier prueba de presión del sistema de tubería de suministro de gas a presiones iguales o mayores de 1/2 psig. CIERRE EL GAS Y DESCONECTE EL SUMINISTRO ELÉCTRICO ANTES DE - GE JXGB90S | Use and Care Manual - Page 72
los accesorios con su estufa en caso de que usted se mude u obtenga una conexión diferente de gas. Gas LP (Propano) de 10″ W.C.P. Índice de salida del quemador en BTU/HR Localización BTUs Tamaño del orificio Inscripción Posterior izquierdo (LR) 9100 0,0354 LP Frontal izquierdo (LF) 9100 - GE JXGB90S | Use and Care Manual - Page 73
á una chispa y el quemador se encenderá. La primera prueba podría requerir algún tiempo, para que el aire sea purgado de las tuberías de gas. Después de la ignición, gire la perilla de control hasta la posición HI y espere hasta que la llama se regularice. C Inspeccione para determinar si - GE JXGB90S | Use and Care Manual - Page 74
opuesta a las agujas del reloj. 6 CÓMO CONVERTIR OTRA VEZ A GAS NATURAL Para convertir la estufa de regreso a gas natural, reverse los pasos tomados para convertir a LP. Gas Natural de 5″ W.C.P. Índice de salida del quemador en BTU/HR Localización BTUs Tamano del orificio Inscripción Posterior - GE JXGB90S | Use and Care Manual - Page 75
tabla primero y quizás no tenga que llamar para solicitar servicio. ge.com Problema Los quemadores no encienden Causas posibles Qué hacer El del quemador deberían verse como en B o C, dependiendo del tipo de gas que use. NOTA: El quemador de asador mostrará llamas anaranjadas debido a derrames - GE JXGB90S | Use and Care Manual - Page 76
Seguridad Operación Antes de llamar para solicitar servicio... Solucionar problemas Problema Las llamas son demasiado altas o bajas en el nivel LOW (bajo) Causas posibles Qué hacer Ajuste el nivel de la llama baja. 1 Encienda los quemadores superiores y continúe En la dirección de las agujas - GE JXGB90S | Use and Care Manual - Page 77
Seguridad Operación ge.com Problema El ventilador no funciona Causas posibles Qué hacer El cable está conectado • Revise las conexiones. Conecte la electricidad incorrectamente o la energía en la - GE JXGB90S | Use and Care Manual - Page 78
Notas. 38 Apoyo al consumidor Solucionar problemas Cuidado y limpieza Operación Seguridad - GE JXGB90S | Use and Care Manual - Page 79
Por el período de: GE reemplazará: Un año A partir de la fecha de la compra original Cualquier parte de la estufa de cubierta a gas que falle debido a defectos en local o la oficina del Prucurador (Attorney General) en su localidad. Garante: General Electric Company. Louisville, KY 40225 39 - GE JXGB90S | Use and Care Manual - Page 80
durante horas normales de oficina. GE Consumer Home Services estará aún ahí cuando su garantía termine. Piezas y accesorios ge.com Aquellos individuos con la en este manual cubren los procedimientos a seguir por cualquier usuario. Cualquier otra reparación debería, por regla general, referirse a
-
 1
1 -
 2
2 -
 3
3 -
 4
4 -
 5
5 -
 6
6 -
 7
7 -
8
-
9
-
10
-
11
-
12
-
13
-
14
-
15
-
16
-
17
-
18
-
19
-
20
-
21
-
22
-
23
-
24
-
25
-
26
-
27
-
28
-
29
-
30
-
31
-
32
-
33
-
34
-
35
-
36
-
37
-
38
-
39
-
40
-
41
-
42
-
43
-
44
-
45
-
46
-
47
-
48
-
49
-
50
-
51
-
52
-
53
-
54
-
55
-
56
-
57
-
58
-
59
-
60
-
61
-
62
-
63
-
64
-
65
-
66
-
67
-
68
-
69
-
70
-
71
-
72
-
73
-
74
-
75
-
76
-
77
-
78
-
79
-
80
 |
 |

PGP990
ge.com
4226-0072-00
49-80558
08-08 JR
Owner’s Manual
& Installation
Instructions
Cooktop
Safety Instructions
. . . .2–5
Operating Instructions
Accessories . . . . . . . . . . . . . . . . . .7
Controls . . . . . . . . . . . . . . . . . . . 8, 9
Cookware
. . . . . . . . . . . . . . . . . . . 9
Electric Ignition . . . . . . . . . . . . . . 8
Features . . . . . . . . . . . . . . . . . . . . . 6
Griddle . . . . . . . . . . . . . . . . . . . . . .14
Grill Module . . . . . . . . . . . . .10–13
Surface Burner
Modules . . . . . . . . . . . . . . . 6, 8–10
Ventilation System . . . . . . . . 6, 9
Care and Cleaning
Control Knobs and
Control Panel Seal . . . . . . . . . . 15
Grease Jar . . . . . . . . . . . . . . . . . 15
Griddle Accessory . . . . . . . . . . 17
Grill Burner . . . . . . . . . . . . . . . . . 16
Grill Grate . . . . . . . . . . . . . . . . . . 16
Igniters . . . . . . . . . . . . . . . . . . . . . .17
Porcelain Burner Basin . . . . . 17
Porcelain Cooktop . . . . . . . . . . 15
Sealed Burner Module
. . . . . 17
Stainless Steel Surfaces . . . . .15
Vent Grille and Filter . . . . . . . . 16
Installation
Instructions
. . . . . . . . . .18–29
LP Conversion
. . . . . . .30–33
Troubleshooting
Tips
. . . . . . . . . . . . . . . . . . . .34, 35
Consumer Support
Consumer Support
. . . . . . . . .40
Product Registration . . . .37, 38
Warranty . . . . . . . . . . . . . . . . . . .39
Gas Downdraft
Write the model and serial
numbers here:
Model #
__________________
Serial #
__________________
Find these numbers on a label
under the cooktop.
Printed in Korea