Gigabyte GA-2CEWH User Manual - Page 12
Step1-2: Installing Cooling Fan
 |
View all Gigabyte GA-2CEWH manuals
Add to My Manuals
Save this manual to your list of manuals |
Page 12 highlights
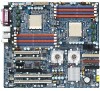
GA-2CEWH Motherboard Step1-2: Installing Cooling Fan Step 1. Attach th cooling fan clip to the processor scoket. Align the heatsink assembly with the support frame mating with the backer plate standoffs as shown in Figure 5&6. Step 2. Coonect the processor fan cable to the processor fan connector. Note: ** We recommend you to buy the kind of cooling fan which is shown in Figure 8. This type of cooling fan will provide the best performance for heat releasing. Figure 5&6 Alignment of Heatsink Assembly with Standoffs Figure 7 Connecting CPU FAN connector 12
-
 1
1 -
2
-
3
-
4
-
5
-
6
-
 7
7 -
 8
8 -
 9
9 -
 10
10 -
 11
11 -
 12
12 -
 13
13 -
 14
14 -
 15
15 -
 16
16 -
 17
17 -
18
-
19
-
20
-
21
-
22
-
23
-
24
-
25
-
26
-
27
-
28
-
29
-
30
-
31
-
32
-
33
-
34
-
35
-
36
-
37
-
38
-
39
-
40
-
41
-
42
-
43
-
44
-
45
-
46
-
47
-
48
-
49
-
50
-
51
-
52
-
53
-
54
-
55
-
56
-
57
-
58
-
59
-
60
-
61
-
62
-
63
-
64
-
65
-
66
-
67
-
68
-
69
-
70
-
71
-
72
-
73
-
74
-
75
-
76
-
77
-
78
-
79
-
80
-
81
-
82
 |
 |

12
GA-2CEWH Motherboard
Step1-2: Installing Cooling Fan
Step 1.
Attach th cooling fan clip to the processor scoket. Align the heatsink assembly with the support
frame mating with the backer plate standoffs as shown in Figure 5&6.
Step 2.
Coonect the processor fan cable to the processor fan connector.
Note: ** We recommend you to buy the kind of cooling fan which is shown in Figure 8. This type of cooling
fan will provide the best performance for heat releasing.
Figure 5&6 Alignment of Heatsink Assembly with Standoffs
Figure 7 Connecting CPU FAN connector