Gigabyte GA-6PXSVL Manual - Page 14
from the power outlet to prevent damage to the CPU.
 |
View all Gigabyte GA-6PXSVL manuals
Add to My Manuals
Save this manual to your list of manuals |
Page 14 highlights
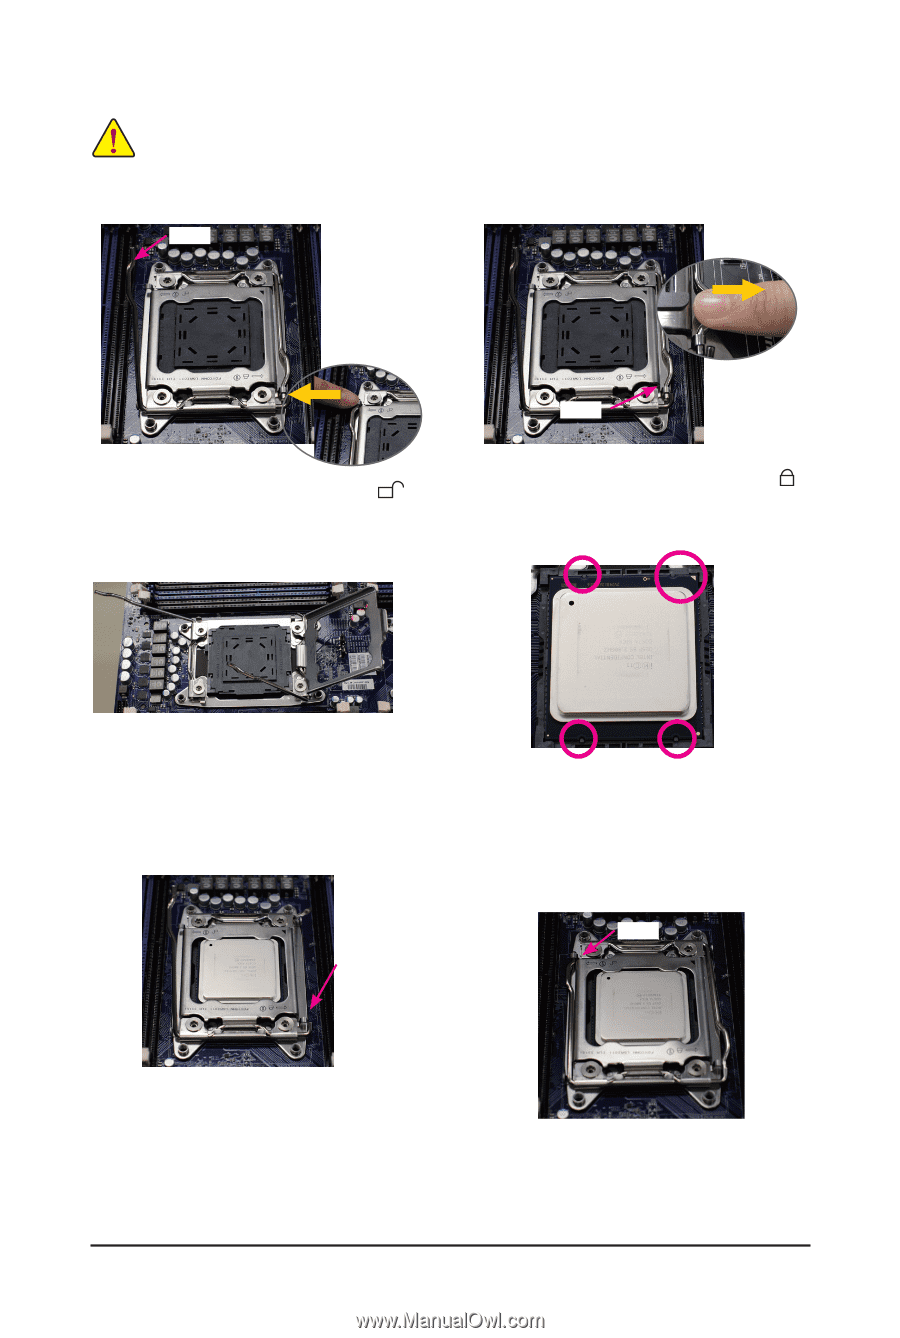
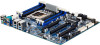
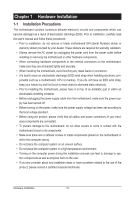
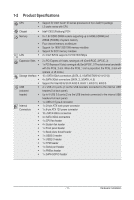
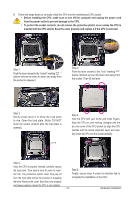
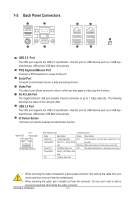
B. Follow the steps below to correctly install the CPU into the motherboard CPU socket. •• Before installing the CPU, make sure to turn off the computer and unplug the power cord from the power outlet to prevent damage to the CPU. •• To protect the socket contacts, do not remove the protective plastic cover unless the CPU is inserted into the CPU socket. Save the cover properly and replace it if the CPU is removed. Lever A Step 1: Push the lever closest to the "unlock" marking " " (below referred as lever A) down and away from the socket to release it. Lever B Step 2: Push the lever closest to the "lock" marking " " (below referred as lever B) down and away from the socket. Then lift the lever. Step 3: Gently press lever A to allow the load plate to rise. Open the load plate. (Note: DO NOT touch the socket contacts after the load plate is opened.) Lever B Step 4: Hold the CPU with your thumb and index fingers. Align the CPU pin one marking (triangle) with the pin one corner of the CPU socket (or align the CPU notches with the socket alignment keys) and carefully insert the CPU into the socket vertically. Lever A Step 5: Once the CPU is properly inserted, carefully replace the load plate. Then secure lever B under its retention tab. The protective plastic cover may pop off from the load plate during the process of engaging the lever. Remove the cover. Save the cover properly and always replace it when the CPU is not installed. Step 6: Finally, secure lever A under its retention tab to complete the installation of the CPU. - 14 - Hardware Installation
-
 1
1 -
2
-
3
-
4
-
5
-
6
-
7
-
8
-
 9
9 -
 10
10 -
 11
11 -
 12
12 -
 13
13 -
 14
14 -
 15
15 -
 16
16 -
 17
17 -
 18
18 -
 19
19 -
20
-
21
-
22
-
23
-
24
-
25
-
26
-
27
-
28
-
29
-
30
-
31
-
32
-
33
-
34
-
35
-
36
-
37
-
38
-
39
-
40
-
41
-
42
-
43
-
44
-
45
-
46
-
47
-
48
-
49
-
50
-
51
-
52
-
53
-
54
-
55
-
56
-
57
-
58
-
59
-
60
-
61
-
62
-
63
-
64
-
65
-
66
-
67
-
68
-
69
-
70
-
71
-
72
-
73
-
74
-
75
-
76
-
77
-
78
-
79
-
80
-
81
-
82
 |
 |