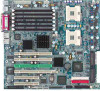
Gigabyte GA-8IPXDR-E User Manual - Page 14
this completes the installation. - manual
 |
View all Gigabyte GA-8IPXDR-E manuals
Add to My Manuals
Save this manual to your list of manuals |
Page 14 highlights
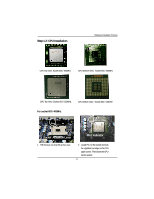
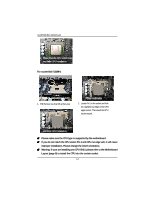
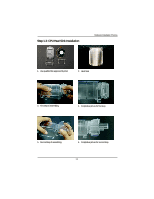
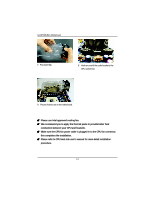
GA-8IPXDR-E(C) Motherboard 7. Fan assembly. 8. Hook one end of the cooler bracket to the CPU socket first. 9. Picture of device set on the motherboard. 0 Please use Intel approved cooling fan. 0 We recommend you to apply the thermal paste to provide better heat conduction between your CPU and heatsink. 0 Make sure the CPU fan power cable is plugged in to the CPU fan connector, this completes the installation. 0 Please refer to CPU heat sink user's manual for more detail installation procedure. 14
-
 1
1 -
2
-
3
-
4
-
5
-
6
-
7
-
8
-
 9
9 -
 10
10 -
 11
11 -
 12
12 -
 13
13 -
 14
14 -
 15
15 -
 16
16 -
 17
17 -
 18
18 -
 19
19 -
20
-
21
-
22
-
23
-
24
-
25
-
26
-
27
-
28
-
29
-
30
-
31
-
32
-
33
-
34
-
35
-
36
-
37
-
38
-
39
-
40
-
41
-
42
-
43
-
44
-
45
-
46
-
47
-
48
-
49
-
50
-
51
-
52
-
53
-
54
-
55
-
56
-
57
-
58
-
59
-
60
-
61
-
62
-
63
-
64
-
65
-
66
-
67
-
68
-
69
-
70
 |
 |
14
GA-8IPXDR-E(C) Motherboard
Please use Intel approved cooling fan.
We recommend you to apply the thermal paste to provide better heat
conduction between your CPU and heatsink.
Make sure the CPU fan power cable is plugged in to the CPU fan connector,
this completes the installation.
Please refer to CPU heat sink user’s manual for more detail installation
procedure.
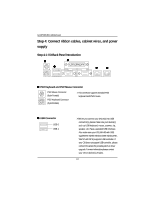
8.
Hook one end of the cooler bracket to the
CPU socket first.
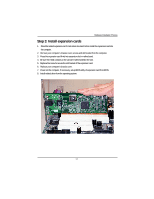
7.
Fan assembly.
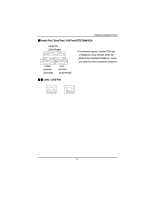
9.
Picture of device set on the motherboard.