Gigabyte GA-8IPXDR-E User Manual - Page 16
Installation Step
 |
View all Gigabyte GA-8IPXDR-E manuals
Add to My Manuals
Save this manual to your list of manuals |
Page 16 highlights
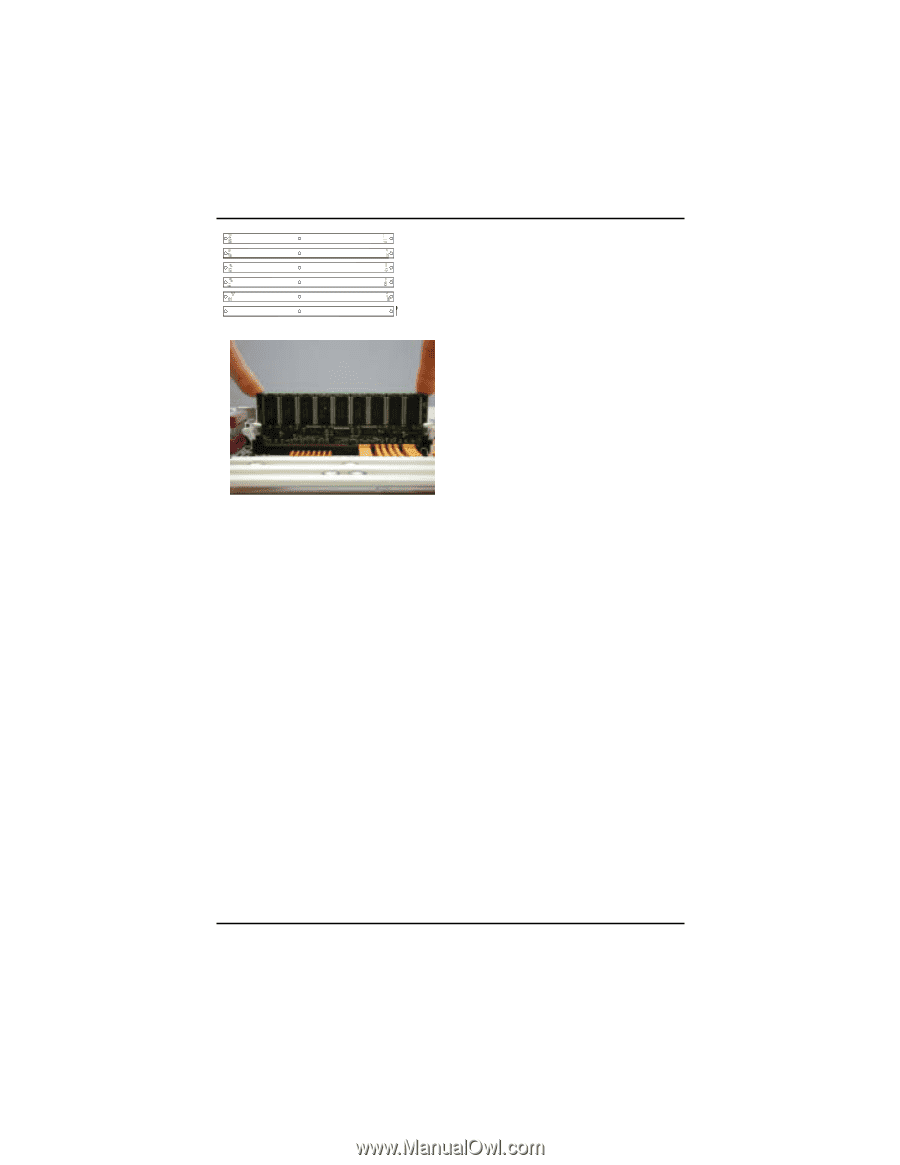
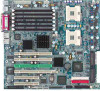
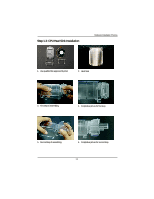
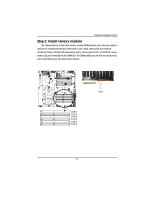
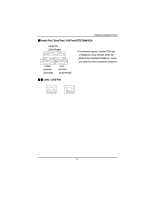
GA-8IPXDR-E(C) Motherboard J4 (B-1) J1 (A-1) J5 (B-2) J2 (A-2) J6 (B-3) J3 (A-3) Installation Step: 1. The DIMM slot has a notch, so the DIMM memory module can only fit in one direction. 2. Insert the DIMM memory module vertically into the DIMM slot. Then push it down. 3. Close the plastic clip at both edges of theDIMM slots to lock the DIMM module. 4. When installing the memoryin the DIMM module, please insert them pair by pair. You must follow the slot number order to insert the DIMM into DIMM module. The installation number sequence are J3J6 -- J2J5 -- J1J4. If you only insert one pair, you must insert it in J3/J6 slot. 5. If you want to install X4, X8 device width DDR DIMMs simultaneously, please populated x4 device width DIMMs at the farthest DIMMs away from MCH. 6. It is not not recommended to use DDR X4, X8 type of mixture installation. 7. DIMMs must be populated in pairs, and the DIMMs in a pair must be identical. 8. Reverse the installation steps when you wish to remove the DIMM module. 16
-
 1
1 -
2
-
3
-
4
-
5
-
6
-
7
-
8
-
9
-
10
-
 11
11 -
 12
12 -
 13
13 -
 14
14 -
 15
15 -
 16
16 -
 17
17 -
 18
18 -
 19
19 -
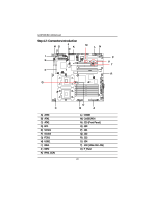 20
20 -
 21
21 -
22
-
23
-
24
-
25
-
26
-
27
-
28
-
29
-
30
-
31
-
32
-
33
-
34
-
35
-
36
-
37
-
38
-
39
-
40
-
41
-
42
-
43
-
44
-
45
-
46
-
47
-
48
-
49
-
50
-
51
-
52
-
53
-
54
-
55
-
56
-
57
-
58
-
59
-
60
-
61
-
62
-
63
-
64
-
65
-
66
-
67
-
68
-
69
-
70
 |
 |