Gigabyte X299X AORUS MASTER User Manual - Page 115
Appendix, 6-1 Configuring Audio Input and Output
 |
View all Gigabyte X299X AORUS MASTER manuals
Add to My Manuals
Save this manual to your list of manuals |
Page 115 highlights
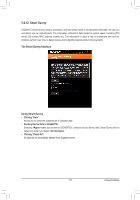
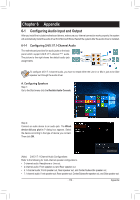
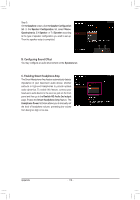
Chapter 6 Appendix 6-1 Configuring Audio Input and Output After you install the included motherboard drivers, make sure your Internet connection works properly. the system will automatically install the audio driver from Microsoft Store. Restart the system after the audio driver is installed. 6-1-1 Configuring 2/4/5.1/7.1-Channel Audio The motherboard provides five audio jacks on the back panel which support 2/4/5.1/7.1-channel (Note) audio. The picture to the right shows the default audio jack assignments. Center/Subwoofer Speaker Out Rear Speaker Out Line In Front Speaker Out Mic In To configure 4/5.1/7.1-channel audio, you have to retask either the Line in or Mic in jack to be Side speaker out through the audio driver. A. Configuring Speakers Step 1: Go to the Start menu click the Realtek Audio Console. Step 2: Connect an audio device to an audio jack. The Which device did you plut in ? dialog box appears. Select the device according to the type of device you connect. Then click OK. (Note) 2/4/5.1/7.1-Channel Audio Configurations: Refer to the following for multi-channel speaker configurations. •• 2-channel audio: Headphone or Line out. •• 4-channel audio: Front speaker out and Rear speaker out. •• 5.1-channel audio: Front speaker out, Rear speaker out, and Center/Subwoofer speaker out. •• 7.1-channel audio: Front speaker out, Rear speaker out, Center/Subwoofer speaker out, and Side speaker out. - 115 - Appendix
-
 1
1 -
2
-
3
-
4
-
5
-
6
-
7
-
8
-
9
-
10
-
11
-
12
-
13
-
14
-
15
-
16
-
17
-
18
-
19
-
20
-
21
-
22
-
23
-
24
-
25
-
26
-
27
-
28
-
29
-
30
-
31
-
32
-
33
-
34
-
35
-
36
-
37
-
38
-
39
-
40
-
41
-
42
-
43
-
44
-
45
-
46
-
47
-
48
-
49
-
50
-
51
-
52
-
53
-
54
-
55
-
56
-
57
-
58
-
59
-
60
-
61
-
62
-
63
-
64
-
65
-
66
-
67
-
68
-
69
-
70
-
71
-
72
-
73
-
74
-
75
-
76
-
77
-
78
-
79
-
80
-
81
-
82
-
83
-
84
-
85
-
86
-
87
-
88
-
89
-
90
-
91
-
92
-
93
-
94
-
95
-
96
-
97
-
98
-
99
-
100
-
101
-
102
-
103
-
104
-
105
-
106
-
107
-
108
-
109
-
 110
110 -
 111
111 -
 112
112 -
 113
113 -
 114
114 -
 115
115 -
 116
116 -
 117
117 -
 118
118 -
 119
119 -
 120
120 -
121
-
122
-
123
-
124
-
125
-
126
-
127
-
128
-
129
-
130
-
131
-
132
 |
 |
