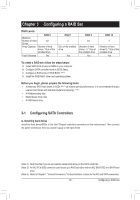
Gigabyte X299X AORUS MASTER User Manual - Page 66
B. Configuring SATA controller mode in BIOS Setup, C-1. UEFI RAID Configuration, SATA Controllers
 |
View all Gigabyte X299X AORUS MASTER manuals
Add to My Manuals
Save this manual to your list of manuals |
Page 66 highlights
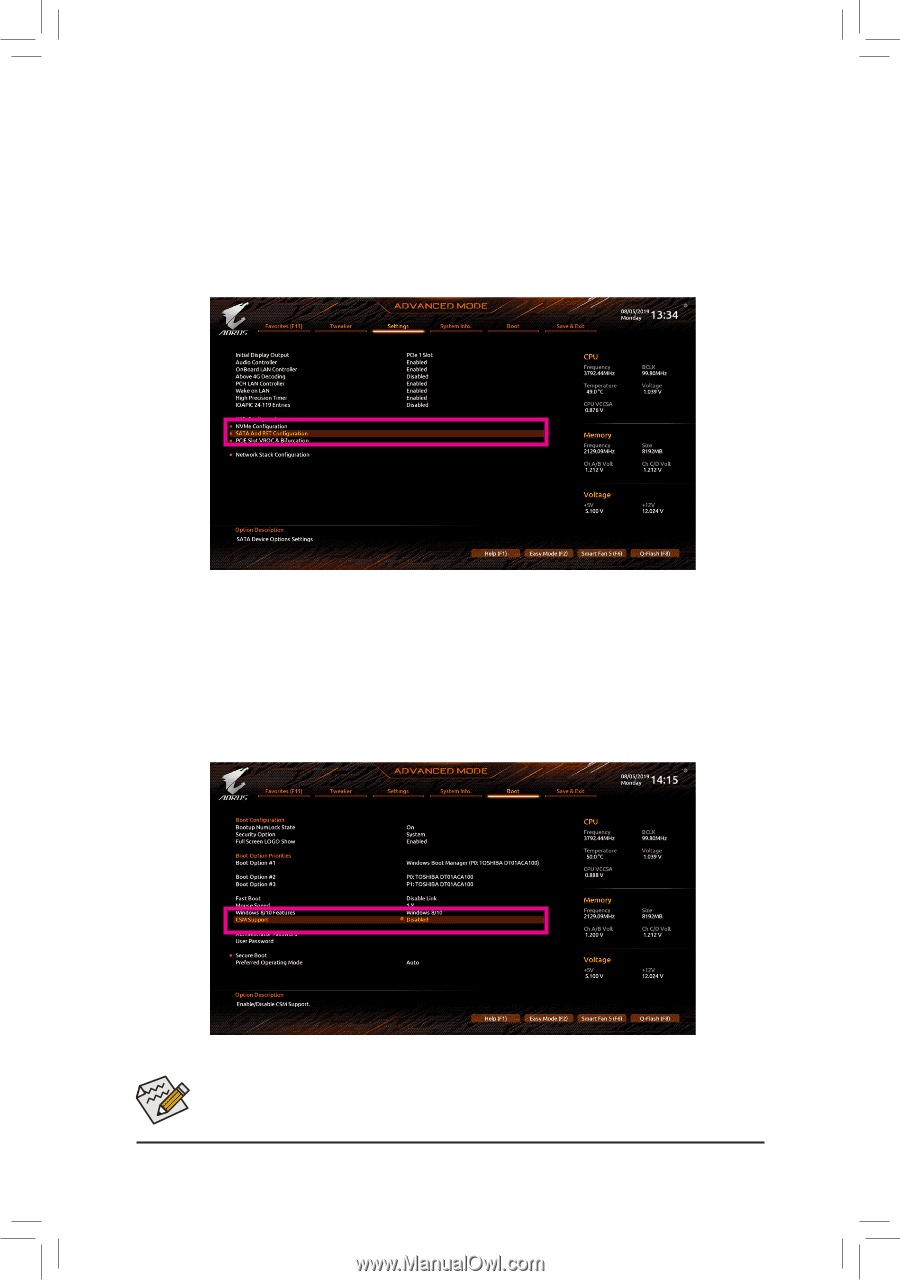
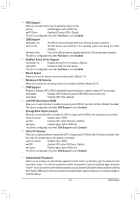
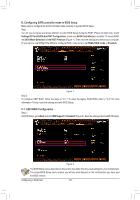
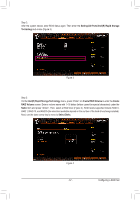
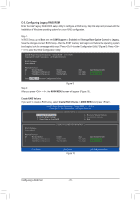
B. Configuring SATA controller mode in BIOS Setup Make sure to configure the SATA controller mode correctly in system BIOS Setup. Step: Turn on your computer and press to enter BIOS Setup during the POST (Power-On Self-Test). Under Settings\IO Ports\SATA And RST Configuration, make sure SATA Controller(s) is enabled. To create RAID, set SATA Mode Selection to Intel RST Premium (Figure 1). Then save the settings and restart your computer. (If you want to use NVMe PCIe SSDs to configure RAID, make sure to set NVMe RAID mode to Enabled.) Figure 1 Step 2: To configure UEFI RAID, follow the steps in "C-1." To enter the legacy RAID ROM, refer to "C-2" for more information. Finally, save the settings and exit BIOS Setup. C-1. UEFI RAID Configuration Step 1: In BIOS Setup, go to Boot and set CSM Support to Disabled (Figure 2). Save the changes and exit BIOS Setup. Figure 2 The BIOS Setup menus described in this section may differ from the exact settings for your motherboard. The actual BIOS Setup menu options you will see shall depend on the motherboard you have and the BIOS version. Configuring a RAID Set - 66 -
-
 1
1 -
2
-
3
-
4
-
5
-
6
-
7
-
8
-
9
-
10
-
11
-
12
-
13
-
14
-
15
-
16
-
17
-
18
-
19
-
20
-
21
-
22
-
23
-
24
-
25
-
26
-
27
-
28
-
29
-
30
-
31
-
32
-
33
-
34
-
35
-
36
-
37
-
38
-
39
-
40
-
41
-
42
-
43
-
44
-
45
-
46
-
47
-
48
-
49
-
50
-
51
-
52
-
53
-
54
-
55
-
56
-
57
-
58
-
59
-
60
-
 61
61 -
 62
62 -
 63
63 -
 64
64 -
 65
65 -
 66
66 -
 67
67 -
 68
68 -
 69
69 -
 70
70 -
 71
71 -
72
-
73
-
74
-
75
-
76
-
77
-
78
-
79
-
80
-
81
-
82
-
83
-
84
-
85
-
86
-
87
-
88
-
89
-
90
-
91
-
92
-
93
-
94
-
95
-
96
-
97
-
98
-
99
-
100
-
101
-
102
-
103
-
104
-
105
-
106
-
107
-
108
-
109
-
110
-
111
-
112
-
113
-
114
-
115
-
116
-
117
-
118
-
119
-
120
-
121
-
122
-
123
-
124
-
125
-
126
-
127
-
128
-
129
-
130
-
131
-
132
 |
 |