HTC EVO View 4G User Manual (Honeycomb) - Page 45
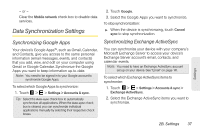
Data Synchronization Settings, Synchronizing Google Apps, Synchronizing Exchange ActiveSync
 |
View all HTC EVO View 4G manuals
Add to My Manuals
Save this manual to your list of manuals |
Page 45 highlights
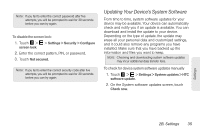
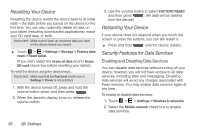
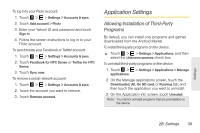
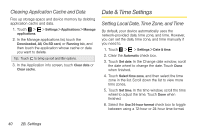
- or - Clear the Mobile network check box to disable data services. Data Synchronization Settings Synchronizing Google Apps Your device's Google Apps™, such as Gmail, Calendar, and Contacts, give you access to the same personal information (email messages, events, and contacts) that you add, view, and edit on your computer using Gmail or Google Calendar. Synchronize the Google Apps you want to keep information up-to-date. Note: You need to be signed in to your Google account to synchronize Google Apps. To select which Google Apps to synchronize: 1. Touch > > Settings > Accounts & sync. Tip: Select the Auto-sync check box to automatically synchronize all applications. When the Auto-sync check box is cleared, you can synchronize individual applications manually by selecting their respective check boxes. 2. Touch Google. 3. Select the Google Apps you want to synchronize. To stop synchronization: ᮣ When the device is synchronizing, touch Cancel sync to stop synchronization. Synchronizing Exchange ActiveSync You can synchronize your device with your company's Microsoft Exchange Server to access your device's Exchange Server account's email, contacts, and calendar events. Note: You need to have an Exchange ActiveSync account set up on your device. See "Email" on page 141. To select which Exchange ActiveSync items to synchronize: 1. Touch > > Settings > Accounts & sync > Exchange ActiveSync. 2. Select the Exchange ActiveSync items you want to synchronize. Settings 2B. Settings 37
-
 1
1 -
2
-
3
-
4
-
5
-
6
-
7
-
8
-
9
-
10
-
11
-
12
-
13
-
14
-
15
-
16
-
17
-
18
-
19
-
20
-
21
-
22
-
23
-
24
-
25
-
26
-
27
-
28
-
29
-
30
-
31
-
32
-
33
-
34
-
35
-
36
-
37
-
38
-
39
-
 40
40 -
 41
41 -
 42
42 -
 43
43 -
 44
44 -
 45
45 -
 46
46 -
 47
47 -
 48
48 -
 49
49 -
 50
50 -
51
-
52
-
53
-
54
-
55
-
56
-
57
-
58
-
59
-
60
-
61
-
62
-
63
-
64
-
65
-
66
-
67
-
68
-
69
-
70
-
71
-
72
-
73
-
74
-
75
-
76
-
77
-
78
-
79
-
80
-
81
-
82
-
83
-
84
-
85
-
86
-
87
-
88
-
89
-
90
-
91
-
92
-
93
-
94
-
95
-
96
-
97
-
98
-
99
-
100
-
101
-
102
-
103
-
104
-
105
-
106
-
107
-
108
-
109
-
110
-
111
-
112
-
113
-
114
-
115
-
116
-
117
-
118
-
119
-
120
-
121
-
122
-
123
-
124
-
125
-
126
-
127
-
128
-
129
-
130
-
131
-
132
-
133
-
134
-
135
-
136
-
137
-
138
-
139
-
140
-
141
-
142
-
143
-
144
-
145
-
146
-
147
-
148
-
149
-
150
-
151
-
152
-
153
-
154
-
155
-
156
-
157
-
158
-
159
-
160
-
161
-
162
-
163
-
164
-
165
-
166
-
167
-
168
-
169
-
170
-
171
-
172
-
173
-
174
-
175
-
176
-
177
-
178
-
179
-
180
-
181
-
182
-
183
-
184
-
185
-
186
-
187
-
188
-
189
-
190
-
191
-
192
-
193
-
194
-
195
-
196
-
197
-
198
-
199
-
200
-
201
-
202
-
203
-
204
-
205
-
206
-
207
-
208
-
209
-
210
-
211
-
212
-
213
-
214
-
215
-
216
-
217
-
218
-
219
-
220
-
221
-
222
-
223
-
224
-
225
-
226
-
227
-
228
-
229
 |
 |