HTC Verizon Wireless XV6800 User Manual - Page 114
Capture Settings menu, Capture Mode menu, Advanced menu, Review Duration
 |
View all HTC Verizon Wireless XV6800 manuals
Add to My Manuals
Save this manual to your list of manuals |
Page 114 highlights
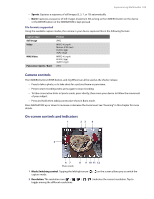
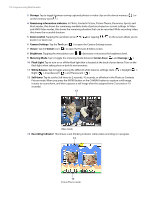
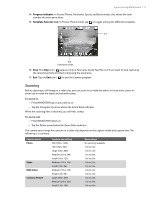
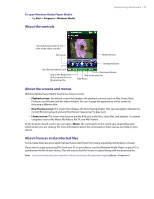
114 Experiencing Multimedia Capture Settings menu • Resolution. Select the desired image or video size. • Quality. Select the JPEG image quality level for all captured still images. You can choose from Basic, Normal, Fine, and Super Fine. • Metering Mode. Select a metering mode to allow the camera to measure the amount of light in the center and around the image and calculate the best-fit exposure value before capturing. Choose either Center Area to measure light using the center area of the image or Average to measure light using the area all around the image. • Storage. Select where you want to save your files. You can either save the files to the main memory or to a storage card. Capture Mode menu • Mode. Switch between different capture modes such as Photo, Video, Contacts Picture, and more. For more information about these modes, see "Capture modes" earlier in this chapter. Advanced menu Tap the left/right icon in this bar to switch between the menu pages in the Advanced menu. • Capture Format. Select the desired file format. • Shutter Sound. Choose whether or not you want the camera to make a shutter sound when you press the CAMERA button, the ENTER button, or Jog Wheel to take photos or record video clips. • Grid (Photo mode only). Choose whether or not to show a grid on the Camera screen. Showing a grid helps you frame and center your subject more easily and accurately. Grid • Keep Backlight. Choose whether to turn the backlight on or off while using the camera. This overrides your device backlight settings while you are using the camera. • Review Duration. Set a time length for displaying the captured image/video on the Review screen before automatically saving it and returning to the live Camera screen. Select No Limit if you do not want to impose a time limit. Select No Review to immediately return to the live Camera screen after capturing.
-
 1
1 -
2
-
3
-
4
-
5
-
6
-
7
-
8
-
9
-
10
-
11
-
12
-
13
-
14
-
15
-
16
-
17
-
18
-
19
-
20
-
21
-
22
-
23
-
24
-
25
-
26
-
27
-
28
-
29
-
30
-
31
-
32
-
33
-
34
-
35
-
36
-
37
-
38
-
39
-
40
-
41
-
42
-
43
-
44
-
45
-
46
-
47
-
48
-
49
-
50
-
51
-
52
-
53
-
54
-
55
-
56
-
57
-
58
-
59
-
60
-
61
-
62
-
63
-
64
-
65
-
66
-
67
-
68
-
69
-
70
-
71
-
72
-
73
-
74
-
75
-
76
-
77
-
78
-
79
-
80
-
81
-
82
-
83
-
84
-
85
-
86
-
87
-
88
-
89
-
90
-
91
-
92
-
93
-
94
-
95
-
96
-
97
-
98
-
99
-
100
-
101
-
102
-
103
-
104
-
105
-
106
-
107
-
108
-
 109
109 -
 110
110 -
 111
111 -
 112
112 -
 113
113 -
 114
114 -
 115
115 -
 116
116 -
 117
117 -
 118
118 -
 119
119 -
120
-
121
-
122
-
123
-
124
-
125
-
126
-
127
-
128
-
129
-
130
-
131
-
132
-
133
-
134
-
135
-
136
-
137
-
138
-
139
-
140
-
141
-
142
-
143
-
144
-
145
-
146
 |
 |