Harman Kardon AVR 350 Owners Manual - Page 33
Initial Setup
 |
View all Harman Kardon AVR 350 manuals
Add to My Manuals
Save this manual to your list of manuals |
Page 33 highlights
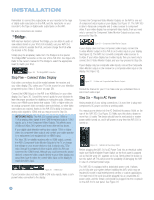
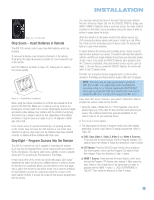
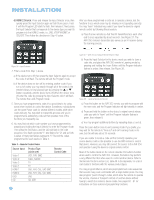
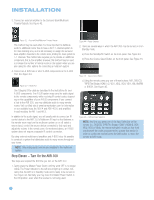
INITIAL SETUP Before you begin enjoying your new receiver, a few adjustments should be made to configure the AVR 350 to match your actual system. Make sure that you have connected a video display to one of the video monitor outputs on the receiver. When you turn on your display and the AVR, you should see a blue screen. A message may appear briefly at the bottom of the screen. This message is part of the on-screen display system, and is referred to as the "semi-OSD". The semi-OSD is activated any time you send a command to the AVR, and any time the AVR detects a change in the incoming signal. Semi-OSD messages are overlaid on top of any video signal, so that you may continue to watch your program while making adjustments to the AVR. If the semi-OSD messages become distracting, deactivate them from the System Setup menu. See page 60. Although it's possible to configure the AVR using only the remote and the semi-OSD messages, we recommend that you use the full-screen menu system, known as the "full OSD". Using the On-Screen Menu System The full-OSD system is accessed by pressing the OSD Button on the remote. See Figure 47. While the full-OSD system is in use, it isn't possible to see any video programming. In addition, an OSD ON message will appear on the front panel of the receiver to remind you to use a video display. Figure 48 - OSD System When you first select a menu, the first setting line will be highlighted (see Figure 49). Figure 49 - Input Setup Menu If you wish to change that setting, press the Set Button. The setting name and its value will appear in blue type with arrows to the left and right, indicating that you may use the ‹/› Buttons to scroll through the available values. See Figure 50. When the desired value appears, press the Set Button to select it. Figure 47 - Navigation Buttons NOTE: The ‹/› and Set Buttons on the front panel have no effect on the OSD system. The OSD system consists of six main menus: Input Setup, Surround Setup, Speaker Setup, Multiroom Setup, Video Setup and System Setup. Navigation tabs for each menu appear on the left side of the screen. When you first press the OSD Button, the Input Setup menu will be visible (see Figure 48), since its tab is at the top of the screen. However, you must press the Set Button to select the Input Setup menu so that you can make any necessary adjustments. If you wish to select another menu, use the ⁄/¤ Buttons to highlight the tab for the desired menu, and press the Set Button to select it. Figure 50 - Changing a Setting Use the ⁄/¤ Buttons to navigate to other settings within the menu. When you have finished making all adjustments in that menu, press the ‹ Button to return to the navigation tabs, and use the ⁄/¤ Buttons to select the tab for another menu. We recommend that most users follow the instructions in this INITIAL SETUP section to configure a basic home theater system. You may return to these menus at any time to make additional adjustments. Thanks to the EzSet/EQ system, most of the menu adjustments may be saved until you have become more familiar with the AVR, and are therefore described in the Advanced Functions section. 33
-
 1
1 -
2
-
3
-
4
-
5
-
6
-
7
-
8
-
9
-
10
-
11
-
12
-
13
-
14
-
15
-
16
-
17
-
18
-
19
-
20
-
21
-
22
-
23
-
24
-
25
-
26
-
27
-
 28
28 -
 29
29 -
 30
30 -
 31
31 -
 32
32 -
 33
33 -
 34
34 -
 35
35 -
 36
36 -
 37
37 -
 38
38 -
39
-
40
-
41
-
42
-
43
-
44
-
45
-
46
-
47
-
48
-
49
-
50
-
51
-
52
-
53
-
54
-
55
-
56
-
57
-
58
-
59
-
60
-
61
-
62
-
63
-
64
-
65
-
66
-
67
-
68
-
69
-
70
-
71
-
72
-
73
-
74
-
75
-
76
 |
 |
