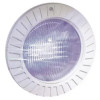
Hayward ColorLogic 4.0 LED Pool Light 120v/50 ft. Cable Plastic ColorLogic-Ins - Page 4
Installation
 |
View all Hayward ColorLogic 4.0 LED Pool Light 120v/50 ft. Cable Plastic manuals
Add to My Manuals
Save this manual to your list of manuals |
Page 4 highlights
Installation NOTE: For installation of Hayward fixture housings (niches), see installation instructions provided with the fixture housing. Install Fixture Housing The light fixture must be installed in or on a wall of the pool or spa with the top of the lens opening not less than 18 inches (46 cm) below the normal water level of the pool except when the fixture is installed in an area of the swimming pool that is not used for swimming and the lens is adequately guarded to prevent any person from contacting it. Select a location for the light fixture(s) that will give optimum light dispersion for the pool or spa design. Install Junction Box And Conduit Select a suitable location for the junction box (Hayward SP680, SP681, or UL listed equivalent) not less than 48 inches (1.22 m) from the edge of the pool or spa. Run conduit from the niche up to the junction box such that the junction box is not less than 8 inches (20 cm) above the maximum pool or spa water level, or not less than 4 inches (10 cm) above the ground, whichever is greater. Additional conduit should be run from the junction box to the power supply, switch panel, pool/spa controller, etc. Snake the 3-conductor cord, and a #8 AWG copper ground wire (when non-metallic conduit is used) through the conduit outlet of the fixture housing (niche), into the conduit, and up to the junction box. DO NOT CUT EXCESS CORD. Leave adequate cord coiled up in the niche so that the light fixture will be able to be raised to the pool deck for servicing. Cut off extra cord at the junction box. 3 USE ONLY HAYWARD GENUINE REPLACEMENT PARTS
-
 1
1 -
 2
2 -
 3
3 -
 4
4 -
 5
5 -
 6
6 -
 7
7 -
 8
8 -
 9
9 -
 10
10 -
11
-
12
-
13
-
14
-
15
-
16
-
17
-
18
-
19
-
20
-
21
-
22
-
23
-
24
-
25
-
26
-
27
-
28
 |
 |
