HP 1320 HP LaserJet 1160 and 1320 Series - User Guide - Page 22
Printer Properties (driver), To install printer software for all other operating systems - laserjet installation software
 |
UPC - 829160406831
View all HP 1320 manuals
Add to My Manuals
Save this manual to your list of manuals |
Page 22 highlights
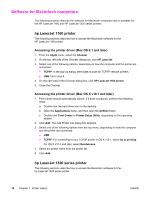
Note Note Note 4. Select the port that the printer is connected to, and click Next. 5. Click Have Disk. Click Browse. 6. On the CD-ROM, browse to the driver you want to install as follows: a. Select your language from the directory list, and double-click. b. Select drivers from the directory list, and double-click. c. Select your operating system from the directory list, and double-click. d. Select the driver from the directory list, and double-click. e. Click OK to select the INF file. f. Click HP LaserJet 1160 or HP LaserJet 1320 series printer, and click OK to begin the installation. 7. Follow the on-screen instructions to complete the software installation. To install printer software for Windows XP (64-bit) and Windows Server 2003 See the operating system documentation for instructions on installing a printer driver. To install printer software for all other operating systems Insert the software CD that came with the printer into the computer CD-ROM drive. Follow the on-screen installation instructions. If the Welcome screen does not open, click Start on the Windows task bar, click Run, type Z:\setup (where Z is your CD drive letter), and click OK. Printer Properties (driver) Printer Properties control the printer. You can change the default settings, such as media size and type, printing multiple pages on a single sheet of media (N-up printing), resolution, and watermarks. You can access the printer Properties in the following ways: ● Through the software application that you are using to print. This only changes the settings for the current software application. ● Through the Windows operating system. This changes the default settings for all future print jobs. Because many software applications use a different method of accessing the printer Properties, the following section describes the most common methods used in Windows 98, 2000, Me, and Windows XP. To only change the settings for the current software application Although the steps can vary between software applications, this is the most common method. 1. From the File menu in the software application, click Print. 2. On the Print dialog, click Properties. 3. Change the settings, and click OK. 12 Chapter 1 Printer basics ENWW
-
 1
1 -
2
-
3
-
4
-
5
-
6
-
7
-
8
-
9
-
10
-
11
-
12
-
13
-
14
-
15
-
16
-
 17
17 -
 18
18 -
 19
19 -
 20
20 -
 21
21 -
 22
22 -
 23
23 -
 24
24 -
 25
25 -
 26
26 -
 27
27 -
28
-
29
-
30
-
31
-
32
-
33
-
34
-
35
-
36
-
37
-
38
-
39
-
40
-
41
-
42
-
43
-
44
-
45
-
46
-
47
-
48
-
49
-
50
-
51
-
52
-
53
-
54
-
55
-
56
-
57
-
58
-
59
-
60
-
61
-
62
-
63
-
64
-
65
-
66
-
67
-
68
-
69
-
70
-
71
-
72
-
73
-
74
-
75
-
76
-
77
-
78
-
79
-
80
-
81
-
82
-
83
-
84
-
85
-
86
-
87
-
88
-
89
-
90
-
91
-
92
-
93
-
94
-
95
-
96
-
97
-
98
-
99
-
100
-
101
-
102
-
103
-
104
-
105
-
106
-
107
-
108
-
109
-
110
-
111
-
112
-
113
-
114
-
115
-
116
-
117
-
118
-
119
-
120
-
121
-
122
-
123
-
124
-
125
-
126
-
127
-
128
-
129
-
130
-
131
-
132
-
133
-
134
-
135
-
136
-
137
-
138
-
139
-
140
-
141
-
142
-
143
-
144
-
145
-
146
-
147
-
148
-
149
-
150
-
151
-
152
-
153
-
154
-
155
-
156
-
157
-
158
-
159
-
160
-
161
-
162
-
163
-
164
-
165
-
166
-
167
-
168
-
169
-
170
-
171
-
172
-
173
-
174
-
175
-
176
-
177
-
178
-
179
-
180
-
181
-
182
-
183
-
184
 |
 |