HP 2133 HP 2133 Mini-Note PC and HP 2140 Mini-Note PC - Maintenance and Servic - Page 58
Remove the Phillips PM2.0×5.0 screw, to the left to release it from the drive
 |
UPC - 884420156444
View all HP 2133 manuals
Add to My Manuals
Save this manual to your list of manuals |
Page 58 highlights
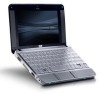
If you have model 2133, remove the hard drive or solid-state drive: 1. Disconnect the drive cable (1) from the connector on the system board (2). 2. Remove the Phillips PM2.0×5.0 screw (1) and the two PM2.0×5.0 screws (2) that secure the drive to the computer. NOTE: The screw highlighted by callout (1) is captive in hard drives, non-captive in solid state drives. 3. Grasp the Mylar tab (3) on the drive and slide the drive (4) to the left to release it from the drive bay. 4. Remove the drive (5) from the drive bay. 50 Chapter 4 Removal and replacement procedures
-
 1
1 -
2
-
3
-
4
-
5
-
6
-
7
-
8
-
9
-
10
-
11
-
12
-
13
-
14
-
15
-
16
-
17
-
18
-
19
-
20
-
21
-
22
-
23
-
24
-
25
-
26
-
27
-
28
-
29
-
30
-
31
-
32
-
33
-
34
-
35
-
36
-
37
-
38
-
39
-
40
-
41
-
42
-
43
-
44
-
45
-
46
-
47
-
48
-
49
-
50
-
51
-
52
-
 53
53 -
 54
54 -
 55
55 -
 56
56 -
 57
57 -
 58
58 -
 59
59 -
 60
60 -
 61
61 -
 62
62 -
 63
63 -
64
-
65
-
66
-
67
-
68
-
69
-
70
-
71
-
72
-
73
-
74
-
75
-
76
-
77
-
78
-
79
-
80
-
81
-
82
-
83
-
84
-
85
-
86
-
87
-
88
-
89
-
90
-
91
-
92
-
93
-
94
-
95
-
96
-
97
-
98
-
99
-
100
-
101
-
102
-
103
-
104
-
105
-
106
-
107
-
108
-
109
-
110
-
111
-
112
-
113
-
114
-
115
-
116
-
117
-
118
-
119
-
120
-
121
-
122
-
123
-
124
-
125
-
126
-
127
-
128
-
129
-
130
 |
 |

If you have model 2133, remove the hard drive or solid-state drive:
1.
Disconnect the drive cable
(1)
from the connector on the system board
(2)
.
2.
Remove the Phillips PM2.0×5.0 screw
(1)
and the two PM2.0×5.0 screws
(2)
that secure the drive
to the computer.
NOTE:
The screw highlighted by callout
(1)
is captive in hard drives, non-captive in solid state
drives.
3.
Grasp the Mylar tab
(3)
on the drive and slide the drive
(4)
to the left to release it from the drive
bay.
4.
Remove the drive
(5)
from the drive bay.
50
Chapter 4
Removal and replacement procedures