HP 2133 HP 2133 Mini-Note PC and HP 2140 Mini-Note PC - Maintenance and Servic - Page 80
To remove the display assembly for model 2133, straight up and remove it.
 |
UPC - 884420156444
View all HP 2133 manuals
Add to My Manuals
Save this manual to your list of manuals |
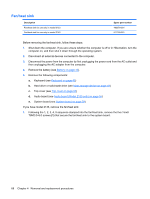
Page 80 highlights
To remove the display assembly for model 2133: 1. Remove the wireless antenna cables (1) from the clips and routing channels built into the base enclosure. CAUTION: The display assembly will be unsupported when the following screws are removed. To prevent damage to the display assembly, support it before removing the screws. 2. Remove the two T8M2.5×5.0 screws (2) and the four Torx8 T8M2.5×10.0 screws (3) that secure the display assembly to the computer. 3. Lift the display assembly (4) straight up and remove it. To remove the display assembly for model 2140: 1. Remove the wireless antenna cables (1) from the clips and routing channels built into the base enclosure. CAUTION: The display assembly will be unsupported when the following screws are removed. To prevent damage to the display assembly, support it before removing the screws. 2. Remove the four silver Phillips PM3.0×3.0 screws (2), the silver Phillips PM 4.5×8.0 screw (3), and the black Phillips PM 2.0×8.0 screw (4) that secures the display assembly to the computer. 72 Chapter 4 Removal and replacement procedures
-
 1
1 -
2
-
3
-
4
-
5
-
6
-
7
-
8
-
9
-
10
-
11
-
12
-
13
-
14
-
15
-
16
-
17
-
18
-
19
-
20
-
21
-
22
-
23
-
24
-
25
-
26
-
27
-
28
-
29
-
30
-
31
-
32
-
33
-
34
-
35
-
36
-
37
-
38
-
39
-
40
-
41
-
42
-
43
-
44
-
45
-
46
-
47
-
48
-
49
-
50
-
51
-
52
-
53
-
54
-
55
-
56
-
57
-
58
-
59
-
60
-
61
-
62
-
63
-
64
-
65
-
66
-
67
-
68
-
69
-
70
-
71
-
72
-
73
-
74
-
 75
75 -
 76
76 -
 77
77 -
 78
78 -
 79
79 -
 80
80 -
 81
81 -
 82
82 -
 83
83 -
 84
84 -
 85
85 -
86
-
87
-
88
-
89
-
90
-
91
-
92
-
93
-
94
-
95
-
96
-
97
-
98
-
99
-
100
-
101
-
102
-
103
-
104
-
105
-
106
-
107
-
108
-
109
-
110
-
111
-
112
-
113
-
114
-
115
-
116
-
117
-
118
-
119
-
120
-
121
-
122
-
123
-
124
-
125
-
126
-
127
-
128
-
129
-
130
 |
 |
