HP 6100 HP 4x00/6x00/8x00 Enterprise Virtual Array User Guide (5697-0733, Marc - Page 76
Adding the disk to a disk group, Handling fiber optic cables, In HP Command View EVA
 |
View all HP 6100 manuals
Add to My Manuals
Save this manual to your list of manuals |
Page 76 highlights
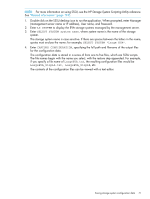
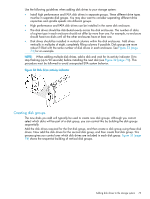
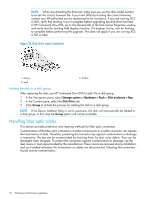
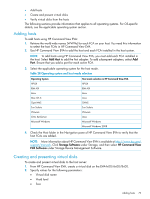
NOTE: When downloading the firmware, make sure you use the disk model number to locate the correct firmware file. If you have difficulty locating the correct firmware, contact your HP-authorized service representative for assistance. If you are running XCS 6.000, verify that leveling is not in progress before upgrading the disk drive firmware. In HP Command View EVA, go to the General tab of the Disk Group Properties window and verify that the Leveling field displays Inactive. If it displays Active, wait for leveling to complete before performing the upgrade. This does not apply if you are running XCS 6.100 or later. Figure 36 Disk drive status indicators 1. Activity 3. Fault 2. Online Adding the disk to a disk group After replacing the disk, use HP Command View EVA to add it to a disk group. 1. In the Navigation pane, select Storage system > Hardware > Rack > Disk enclosure > Bay 2. In the Content pane, select the Disk Drive tab. 3. Click Group to initiate the process for adding the disk to a disk group. NOTE: If the Device Addition Policy is set to automatic, the disk will automatically be added to a disk group. In this case the Group option will not be available. Handling fiber optic cables This section provides protection and cleaning methods for fiber optic connectors. Contamination of the fiber optic connectors on either a transceiver or a cable connector can impede the transmission of data. Therefore, protecting the connector tips against contamination or damage is imperative. The tips can be contaminated by touching them, by dust, or by debris. They can be damaged when dropped. To protect the connectors against contamination or damage, use the dust covers or dust caps provided by the manufacturer. These covers are removed during installation, and are installed whenever the transceivers or cables are disconnected. Cleaning the connectors should remove contamination. 76 Enterprise Virtual Array operation
-
 1
1 -
2
-
3
-
4
-
5
-
6
-
7
-
8
-
9
-
10
-
11
-
12
-
13
-
14
-
15
-
16
-
17
-
18
-
19
-
20
-
21
-
22
-
23
-
24
-
25
-
26
-
27
-
28
-
29
-
30
-
31
-
32
-
33
-
34
-
35
-
36
-
37
-
38
-
39
-
40
-
41
-
42
-
43
-
44
-
45
-
46
-
47
-
48
-
49
-
50
-
51
-
52
-
53
-
54
-
55
-
56
-
57
-
58
-
59
-
60
-
61
-
62
-
63
-
64
-
65
-
66
-
67
-
68
-
69
-
70
-
 71
71 -
 72
72 -
 73
73 -
 74
74 -
 75
75 -
 76
76 -
 77
77 -
 78
78 -
 79
79 -
 80
80 -
 81
81 -
82
-
83
-
84
-
85
-
86
-
87
-
88
-
89
-
90
-
91
-
92
-
93
-
94
-
95
-
96
-
97
-
98
-
99
-
100
-
101
-
102
-
103
-
104
-
105
-
106
-
107
-
108
-
109
-
110
-
111
-
112
-
113
-
114
-
115
-
116
-
117
-
118
-
119
-
120
-
121
-
122
-
123
-
124
-
125
-
126
-
127
-
128
-
129
-
130
-
131
-
132
-
133
-
134
-
135
-
136
-
137
-
138
-
139
-
140
-
141
-
142
-
143
-
144
-
145
-
146
-
147
-
148
-
149
-
150
-
151
-
152
-
153
-
154
-
155
-
156
-
157
-
158
-
159
-
160
-
161
-
162
-
163
-
164
-
165
-
166
-
167
-
168
-
169
-
170
-
171
-
172
-
173
-
174
-
175
-
176
-
177
-
178
-
179
-
180
-
181
-
182
-
183
-
184
-
185
 |
 |