HP 9000 rp7440 nPartition Administrator's Guide, Second Edition - Page 176
Removing (Deleting) an nPartition, Partition, Create Partition, Log off parmgr
 |
View all HP 9000 rp7440 manuals
Add to My Manuals
Save this manual to your list of manuals |
Page 176 highlights
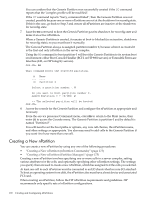
2. Run the Partition Manager task wizard for creating a new nPartition. From Partition Manager Version 1.0, select the Partition→Create Partition action. From Partition Manager Version 2.0, select the nPartition→Create nPartition action. Partition Manager guides you through the steps it requires for creating a new nPartition. 3. Exit Partition Manager. From Partition Manager Version 1.0, select the File→Exit action. From Partition Manager Version 2.0, select Log off parmgr or exit the Web browser when finished. Removing (Deleting) an nPartition You can remove an nPartition by using any one of the following procedures: • "Deleting an nPartition (nPartition Commands)" (page 176) • "Deleting an nPartition (Partition Manager)" (page 179) Deleting an nPartition causes all cells (and any I/O resources connected to the cells) that were assigned to the nPartition to be unassigned. As a result, all of these cells become available resources which can be assigned to any nPartition in the server complex. When removing an active nPartition, you must complete the procedure by performing a shutdown for reconfig (the HP-UX shutdown -R -H command or Windows shutdown /s command) as soon as possible after initiating the nPartition removal. When using the Original nPartition Commands or Partition Manager Version 1.0, you can delete only the local nPartition and inactive remote nPartitions. Procedure 6-4 Deleting an nPartition (nPartition Commands) From the command line, use the parremove command to delete (remove) an nPartition. 176 Creating and Configuring nPartitions
-
 1
1 -
2
-
3
-
4
-
5
-
6
-
7
-
8
-
9
-
10
-
11
-
12
-
13
-
14
-
15
-
16
-
17
-
18
-
19
-
20
-
21
-
22
-
23
-
24
-
25
-
26
-
27
-
28
-
29
-
30
-
31
-
32
-
33
-
34
-
35
-
36
-
37
-
38
-
39
-
40
-
41
-
42
-
43
-
44
-
45
-
46
-
47
-
48
-
49
-
50
-
51
-
52
-
53
-
54
-
55
-
56
-
57
-
58
-
59
-
60
-
61
-
62
-
63
-
64
-
65
-
66
-
67
-
68
-
69
-
70
-
71
-
72
-
73
-
74
-
75
-
76
-
77
-
78
-
79
-
80
-
81
-
82
-
83
-
84
-
85
-
86
-
87
-
88
-
89
-
90
-
91
-
92
-
93
-
94
-
95
-
96
-
97
-
98
-
99
-
100
-
101
-
102
-
103
-
104
-
105
-
106
-
107
-
108
-
109
-
110
-
111
-
112
-
113
-
114
-
115
-
116
-
117
-
118
-
119
-
120
-
121
-
122
-
123
-
124
-
125
-
126
-
127
-
128
-
129
-
130
-
131
-
132
-
133
-
134
-
135
-
136
-
137
-
138
-
139
-
140
-
141
-
142
-
143
-
144
-
145
-
146
-
147
-
148
-
149
-
150
-
151
-
152
-
153
-
154
-
155
-
156
-
157
-
158
-
159
-
160
-
161
-
162
-
163
-
164
-
165
-
166
-
167
-
168
-
169
-
170
-
 171
171 -
 172
172 -
 173
173 -
 174
174 -
 175
175 -
 176
176 -
 177
177 -
 178
178 -
 179
179 -
 180
180 -
 181
181 -
182
-
183
-
184
-
185
-
186
-
187
-
188
-
189
-
190
-
191
-
192
-
193
-
194
-
195
-
196
-
197
-
198
-
199
-
200
-
201
-
202
-
203
-
204
-
205
-
206
-
207
-
208
-
209
-
210
-
211
-
212
-
213
-
214
-
215
-
216
-
217
-
218
-
219
-
220
-
221
-
222
-
223
-
224
-
225
-
226
-
227
-
228
-
229
-
230
-
231
-
232
-
233
-
234
-
235
-
236
-
237
-
238
-
239
-
240
-
241
-
242
-
243
-
244
-
245
-
246
-
247
-
248
-
249
-
250
-
251
-
252
-
253
-
254
-
255
-
256
-
257
-
258
-
259
-
260
-
261
-
262
-
263
-
264
-
265
-
266
 |
 |
