HP Brocade 8/24c Brocade Web Tools Administrator's Guide v6.1.0 (53-1000606-02 - Page 163
Viewing and configuring EX_Ports
 |
View all HP Brocade 8/24c manuals
Add to My Manuals
Save this manual to your list of manuals |
Page 163 highlights
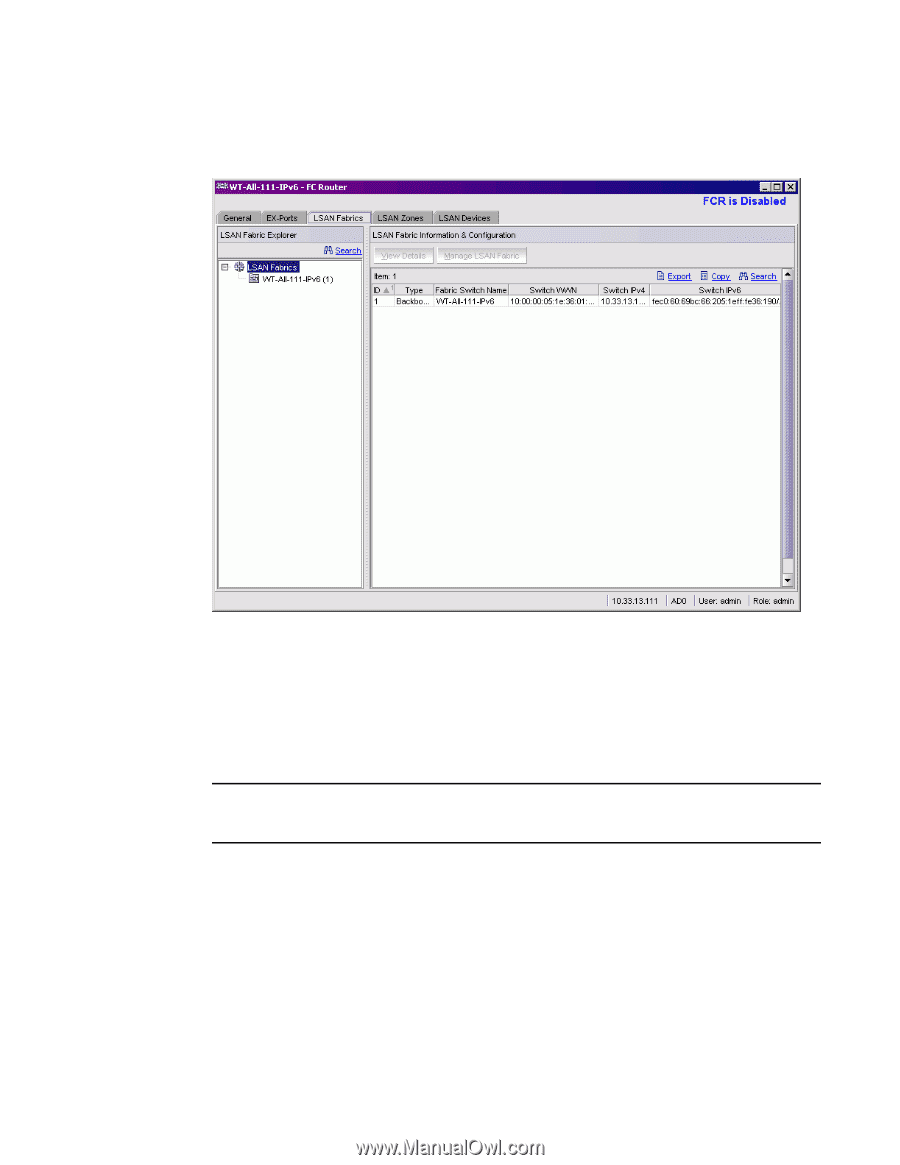
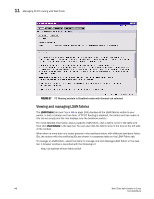
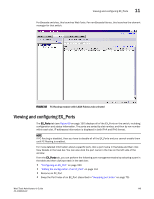
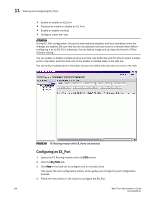
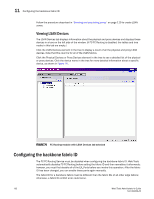
Viewing and configuring EX_Ports 11 For Brocade switches, this launches Web Tools. For non-Brocade fabrics, this launches the element manager for that switch. FIGURE 68 FC Routing module with LSAN Fabrics tab selected Viewing and configuring EX_Ports The EX_Ports tab (see Figure 69 on page 150) displays all of the EX_Ports on the switch, including configuration and status information. The ports are sorted by slot number, and then by row number within each slot. IP addresses information is displayed in both IPv4 and IPv6 format. NOTE If FC Routing is disabled, then you have to disable all of the EX_Ports and you cannot enable them until FC Routing is enabled. For more detailed information about a specific port, click a port name in the table and then click View Details in the task bar. You can also click the port name in the tree on the left side of the window. From the EX_Ports tab, you can perform the following port management tasks by selecting a port in the table and then clicking a task in the task bar: • "Configuring an EX_Port" on page 150 • "Editing the configuration of an EX_Port" on page 151 • Rename an EX_Port • Swap the Port Index of an EX_Port (described in "Swapping port index" on page 75) Web Tools Administrator's Guide 149 53-1000606-02
-
 1
1 -
2
-
3
-
4
-
5
-
6
-
7
-
8
-
9
-
10
-
11
-
12
-
13
-
14
-
15
-
16
-
17
-
18
-
19
-
20
-
21
-
22
-
23
-
24
-
25
-
26
-
27
-
28
-
29
-
30
-
31
-
32
-
33
-
34
-
35
-
36
-
37
-
38
-
39
-
40
-
41
-
42
-
43
-
44
-
45
-
46
-
47
-
48
-
49
-
50
-
51
-
52
-
53
-
54
-
55
-
56
-
57
-
58
-
59
-
60
-
61
-
62
-
63
-
64
-
65
-
66
-
67
-
68
-
69
-
70
-
71
-
72
-
73
-
74
-
75
-
76
-
77
-
78
-
79
-
80
-
81
-
82
-
83
-
84
-
85
-
86
-
87
-
88
-
89
-
90
-
91
-
92
-
93
-
94
-
95
-
96
-
97
-
98
-
99
-
100
-
101
-
102
-
103
-
104
-
105
-
106
-
107
-
108
-
109
-
110
-
111
-
112
-
113
-
114
-
115
-
116
-
117
-
118
-
119
-
120
-
121
-
122
-
123
-
124
-
125
-
126
-
127
-
128
-
129
-
130
-
131
-
132
-
133
-
134
-
135
-
136
-
137
-
138
-
139
-
140
-
141
-
142
-
143
-
144
-
145
-
146
-
147
-
148
-
149
-
150
-
151
-
152
-
153
-
154
-
155
-
156
-
157
-
 158
158 -
 159
159 -
 160
160 -
 161
161 -
 162
162 -
 163
163 -
 164
164 -
 165
165 -
 166
166 -
 167
167 -
 168
168 -
169
-
170
-
171
-
172
-
173
-
174
-
175
-
176
-
177
-
178
-
179
-
180
-
181
-
182
-
183
-
184
-
185
-
186
-
187
-
188
-
189
-
190
-
191
-
192
-
193
-
194
-
195
-
196
-
197
-
198
-
199
-
200
-
201
-
202
-
203
-
204
-
205
-
206
-
207
-
208
-
209
-
210
-
211
-
212
-
213
-
214
-
215
-
216
-
217
-
218
-
219
-
220
-
221
-
222
-
223
-
224
-
225
-
226
-
227
-
228
-
229
-
230
-
231
-
232
-
233
-
234
-
235
-
236
-
237
-
238
-
239
-
240
-
241
-
242
-
243
-
244
-
245
-
246
-
247
-
248
-
249
-
250
-
251
-
252
-
253
-
254
-
255
-
256
-
257
-
258
-
259
-
260
-
261
-
262
-
263
-
264
-
265
 |
 |