HP C4345 User Guide - Page 206
The fax test failed, Cause, Solution, What to check
 |
UPC - 883585470938
View all HP C4345 manuals
Add to My Manuals
Save this manual to your list of manuals |
Page 206 highlights
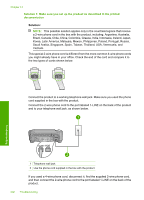
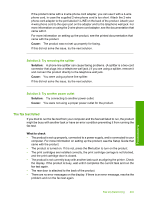
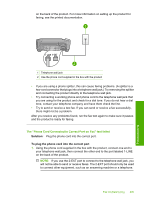
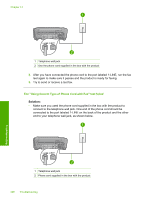
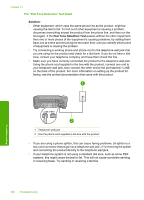
If the product came with a 2-wire phone cord adapter, you can use it with a 4-wire phone cord, in case the supplied 2-wire phone cord is too short. Attach the 2-wire phone cord adapter to the port labeled 1-LINE on the back of the product. Attach your 4-wire phone cord to the open port on the adapter and to the telephone wall jack. For more information on using the 2-wire phone cord adapter, see the documentation that came with it. For more information on setting up the product, see the printed documentation that came with the product. Cause: The product was not set up properly for faxing. If this did not solve the issue, try the next solution. Solution 2: Try removing the splitter Solution: A phone line splitter can cause faxing problems. (A splitter is a two-cord connector that plugs into a telephone wall jack.) If you are using a splitter, remove it and connect the product directly to the telephone wall jack. Cause: You were using a phone line splitter. If this did not solve the issue, try the next solution. Solution 3: Try another power outlet Solution: Try connecting to another power outlet. Cause: You were not using a proper power outlet for the product. The fax test failed If you tried to run the fax test from your computer and the fax test failed to run, the product might be busy with another task or have an error condition preventing it from running the fax test. What to check • The product is set up properly, connected to a power supply, and is connected to your computer. For more information on setting up the product, see the Setup Guide that came with the product. • The product is turned on. If it is not, press the On button to turn on the product. • The print cartridges are installed correctly, the print cartridge carriage is not blocked, and the print cartridge door is closed. • The product is not currently busy with another task such as aligning the printer. Check the display. If the product is busy, wait until it completes the current task and run the fax test again. • The rear door is attached to the back of the product. • There are no error messages on the display. If there is an error message, resolve the problem and run the fax test again. Fax troubleshooting 203 Troubleshooting
-
 1
1 -
2
-
3
-
4
-
5
-
6
-
7
-
8
-
9
-
10
-
11
-
12
-
13
-
14
-
15
-
16
-
17
-
18
-
19
-
20
-
21
-
22
-
23
-
24
-
25
-
26
-
27
-
28
-
29
-
30
-
31
-
32
-
33
-
34
-
35
-
36
-
37
-
38
-
39
-
40
-
41
-
42
-
43
-
44
-
45
-
46
-
47
-
48
-
49
-
50
-
51
-
52
-
53
-
54
-
55
-
56
-
57
-
58
-
59
-
60
-
61
-
62
-
63
-
64
-
65
-
66
-
67
-
68
-
69
-
70
-
71
-
72
-
73
-
74
-
75
-
76
-
77
-
78
-
79
-
80
-
81
-
82
-
83
-
84
-
85
-
86
-
87
-
88
-
89
-
90
-
91
-
92
-
93
-
94
-
95
-
96
-
97
-
98
-
99
-
100
-
101
-
102
-
103
-
104
-
105
-
106
-
107
-
108
-
109
-
110
-
111
-
112
-
113
-
114
-
115
-
116
-
117
-
118
-
119
-
120
-
121
-
122
-
123
-
124
-
125
-
126
-
127
-
128
-
129
-
130
-
131
-
132
-
133
-
134
-
135
-
136
-
137
-
138
-
139
-
140
-
141
-
142
-
143
-
144
-
145
-
146
-
147
-
148
-
149
-
150
-
151
-
152
-
153
-
154
-
155
-
156
-
157
-
158
-
159
-
160
-
161
-
162
-
163
-
164
-
165
-
166
-
167
-
168
-
169
-
170
-
171
-
172
-
173
-
174
-
175
-
176
-
177
-
178
-
179
-
180
-
181
-
182
-
183
-
184
-
185
-
186
-
187
-
188
-
189
-
190
-
191
-
192
-
193
-
194
-
195
-
196
-
197
-
198
-
199
-
200
-
 201
201 -
 202
202 -
 203
203 -
 204
204 -
 205
205 -
 206
206 -
 207
207 -
 208
208 -
 209
209 -
 210
210 -
 211
211 -
212
-
213
-
214
-
215
-
216
-
217
-
218
-
219
-
220
-
221
-
222
-
223
-
224
-
225
-
226
-
227
-
228
-
229
-
230
-
231
-
232
-
233
-
234
-
235
-
236
-
237
-
238
-
239
-
240
-
241
-
242
-
243
-
244
-
245
-
246
-
247
-
248
-
249
-
250
-
251
-
252
-
253
-
254
-
255
-
256
-
257
-
258
-
259
-
260
-
261
-
262
-
263
-
264
-
265
-
266
-
267
-
268
-
269
-
270
-
271
-
272
-
273
-
274
-
275
-
276
-
277
-
278
-
279
-
280
-
281
-
282
-
283
-
284
-
285
-
286
-
287
-
288
-
289
-
290
-
291
-
292
-
293
-
294
-
295
-
296
-
297
-
298
-
299
-
300
-
301
-
302
-
303
-
304
-
305
-
306
-
307
-
308
-
309
-
310
-
311
-
312
-
313
-
314
-
315
-
316
-
317
 |
 |
