HP Cluster Platform Hardware Kits v2010 ProCurve 1U Rack Mount Bracket Install - Page 3
Preparing for Installation
 |
View all HP Cluster Platform Hardware Kits v2010 manuals
Add to My Manuals
Save this manual to your list of manuals |
Page 3 highlights
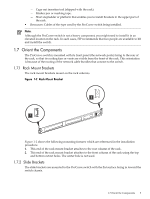
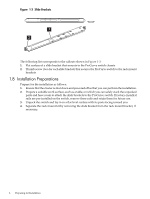
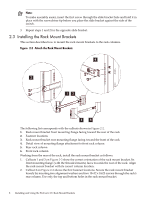
1 Preparing for Installation 1.1 Audience This guide is intended for HP service representatives and other persons trained to install hardware options in HP 10000 Series racks. Such persons are expected to understand the hazards of working in this environment and to take suitable precautions to minimize danger to themselves and others. 1.2 Documentation Resources You can download the documentation for components referenced in this installation guide from the following locations: • HP 10000 Series Rack, (Documentation option): http://h18004.www1.hp.com/products/servers/proliantstorage/racks • High Performance Computing http://docs.hp.com/en/highperfcomp.html • ProCurve Networking http://www.hp.com/rnd/products/index.htm • XC Cluster Options http://www.hp.com/techservers/clusters/xc_clusters.html 1.3 Overview of the Installation Procedure To install the ProCurve 1U rack mount bracket, follow these steps: 1. Verify kit contents 2. Orient the kit parts relative to the rack 3. Prepare for installation and gather required resources 4. Identify the installation location 5. Mount the rack mount brackets in the rack 6. Attach the slide brackets to the ProCurve switch 7. Slide the ProCurve switch into the rack The installation procedure should take no more than 15-20 minutes to complete. 1.4 Kit Description This document describes how to install the ProCurve 1U Rack Mount Bracket in an HP 10000 series rack. The rack mount kit consists of a pair of rack mount brackets and slide brackets that are designed to mount and stabilize an HP ProCurve switch in an HP 10000 series rack. 1.5 Kit Contents Verify that kit contains the following components: 1.1 Audience 3
-
 1
1 -
 2
2 -
 3
3 -
 4
4 -
 5
5 -
 6
6 -
 7
7 -
 8
8 -
 9
9 -
10
-
11
-
12
-
13
-
14
 |
 |
