HP Color LaserJet CM1015/CM1017 HP Color LaserJet CM1015/CM1017 MFP Series - S - Page 152
Network setup, Microsoft Windows installation instructions for networked computers
 |
View all HP Color LaserJet CM1015/CM1017 manuals
Add to My Manuals
Save this manual to your list of manuals |
Page 152 highlights
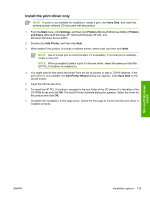
Microsoft Windows install ● Network setup ● Microsoft Windows installation instructions for networked computers Network setup Set up, turn on, and connect the HP Color LaserJet CM1017 MFP to the network before installing the software. NOTE The HP Color LaserJet CM1015 MFP does not support network connections. 1. Connect the HP Color LaserJet CM1017 MFP to the network. 2. Turn on the HP Color LaserJet CM1017 MFP. NOTE If the power-up sequence is not completed in this order, the installer discovery utility fails to recognize the product. It can take a few minutes for the device to obtain a TCP/IP address. 3. To print a configuration page from the HP Color LaserJet CM1017 MFP, press Menu. Press the v button until Reports appears on the control panel. Press the OK button. Press the v button until Config report appears on the control panel. Press the OK button. 4. To complete the product installation, install the HP Color LaserJet CM1017 MFP software. Use the information from the test pages to specify the network variables during installation. Microsoft Windows installation instructions for networked computers Each computer that has the HP Color LaserJet CM1017 MFP software installed can use all of the product features that are available over a network connection. To install the HP Color LaserJet CM1017 MFP software on networked Microsoft Windows operating systems, use the following instructions: NOTE Administrator privileges are required to install the software. 1. Quit all open programs. 2. Insert the HP Color LaserJet CM1017 MFP software CD into the CD-ROM drive. NOTE If the CD-ROM does not start automatically, click Start, click Run, and then browse to and double-click the AUTORUN.EXE file in the root directory of the CD. 3. Click Install software and follow the onscreen prompts. 4. When prompted by the Installer software to select how the printer will be connected, select Connected via the network, and then click Next. Follow the onscreen instructions. 5. If prompted to restart the computer, click Yes. 130 Chapter 3 Install Microsoft Windows printing-system components ENWW
-
 1
1 -
2
-
3
-
4
-
5
-
6
-
7
-
8
-
9
-
10
-
11
-
12
-
13
-
14
-
15
-
16
-
17
-
18
-
19
-
20
-
21
-
22
-
23
-
24
-
25
-
26
-
27
-
28
-
29
-
30
-
31
-
32
-
33
-
34
-
35
-
36
-
37
-
38
-
39
-
40
-
41
-
42
-
43
-
44
-
45
-
46
-
47
-
48
-
49
-
50
-
51
-
52
-
53
-
54
-
55
-
56
-
57
-
58
-
59
-
60
-
61
-
62
-
63
-
64
-
65
-
66
-
67
-
68
-
69
-
70
-
71
-
72
-
73
-
74
-
75
-
76
-
77
-
78
-
79
-
80
-
81
-
82
-
83
-
84
-
85
-
86
-
87
-
88
-
89
-
90
-
91
-
92
-
93
-
94
-
95
-
96
-
97
-
98
-
99
-
100
-
101
-
102
-
103
-
104
-
105
-
106
-
107
-
108
-
109
-
110
-
111
-
112
-
113
-
114
-
115
-
116
-
117
-
118
-
119
-
120
-
121
-
122
-
123
-
124
-
125
-
126
-
127
-
128
-
129
-
130
-
131
-
132
-
133
-
134
-
135
-
136
-
137
-
138
-
139
-
140
-
141
-
142
-
143
-
144
-
145
-
146
-
 147
147 -
 148
148 -
 149
149 -
 150
150 -
 151
151 -
 152
152 -
 153
153 -
 154
154 -
 155
155 -
 156
156 -
 157
157 -
158
-
159
-
160
-
161
-
162
-
163
-
164
-
165
-
166
-
167
-
168
-
169
-
170
-
171
-
172
-
173
-
174
-
175
-
176
-
177
-
178
-
179
-
180
-
181
-
182
-
183
-
184
-
185
-
186
-
187
-
188
-
189
-
190
-
191
-
192
-
193
-
194
-
195
-
196
-
197
-
198
-
199
-
200
-
201
-
202
-
203
-
204
-
205
-
206
-
207
-
208
-
209
-
210
-
211
-
212
-
213
-
214
-
215
-
216
-
217
-
218
-
219
-
220
-
221
-
222
-
223
-
224
-
225
-
226
-
227
-
228
-
229
-
230
-
231
-
232
-
233
-
234
-
235
-
236
-
237
-
238
-
239
-
240
-
241
-
242
-
243
-
244
-
245
-
246
-
247
-
248
-
249
-
250
-
251
-
252
-
253
-
254
-
255
-
256
-
257
-
258
-
259
-
260
-
261
-
262
-
263
-
264
-
265
-
266
-
267
-
268
-
269
-
270
-
271
-
272
-
273
-
274
-
275
-
276
-
277
-
278
-
279
-
280
-
281
-
282
-
283
-
284
-
285
-
286
-
287
-
288
-
289
-
290
-
291
-
292
-
293
-
294
-
295
-
296
-
297
-
298
-
299
-
300
-
301
-
302
-
303
-
304
-
305
-
306
-
307
-
308
-
309
-
310
-
311
-
312
-
313
-
314
-
315
-
316
-
317
-
318
-
319
-
320
-
321
-
322
-
323
-
324
-
325
-
326
-
327
-
328
-
329
-
330
-
331
-
332
-
333
-
334
-
335
-
336
-
337
-
338
 |
 |
