HP Dc5850 Hardware Reference Guide - dc5850 Microtower Models - Page 40
CAUTION, Connecting the Hard Drive Cables
 |
UPC - 884962022993
View all HP Dc5850 manuals
Add to My Manuals
Save this manual to your list of manuals |
Page 40 highlights
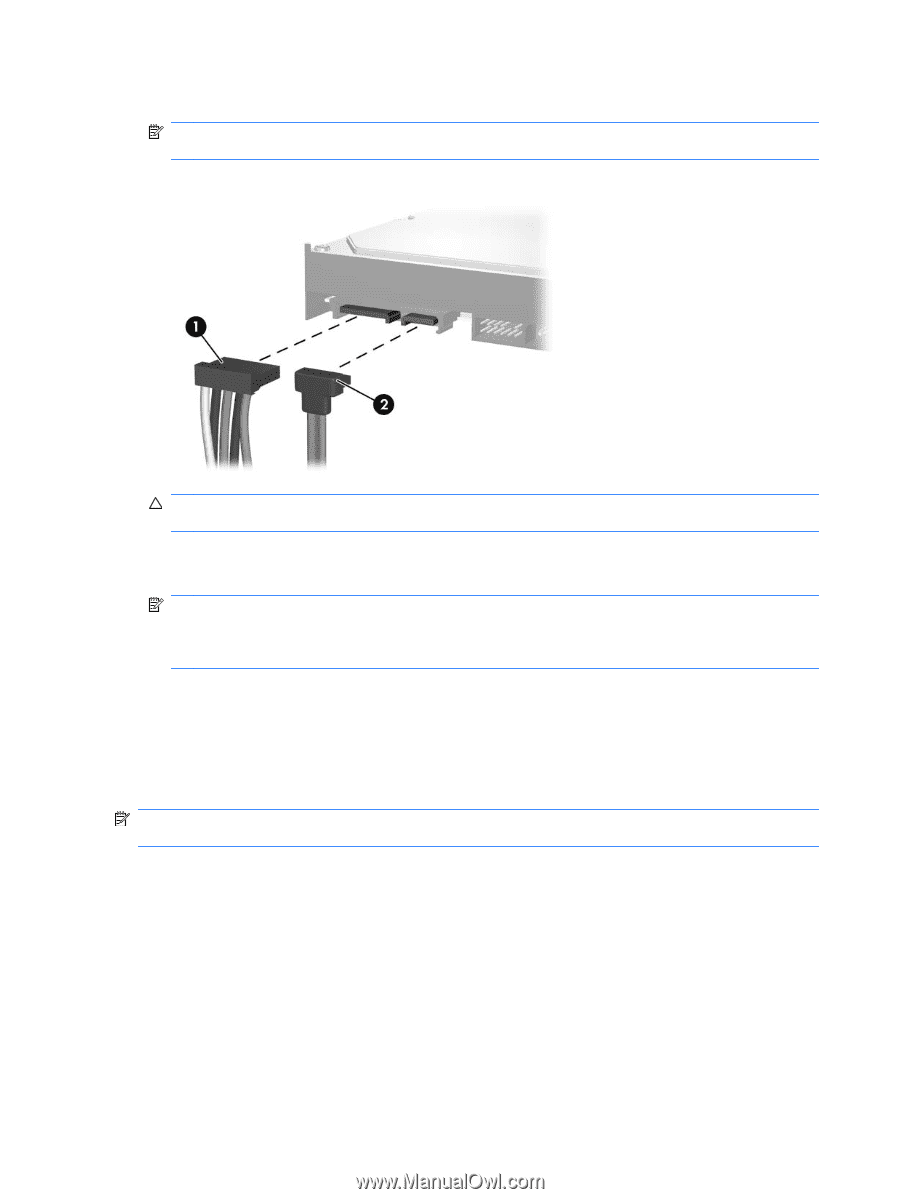
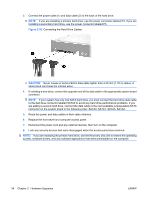
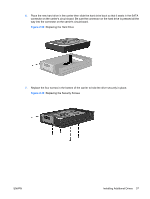
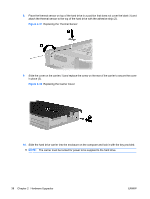
3. Connect the power cable (1) and data cable (2) to the back of the hard drive. NOTE: If you are installing a primary hard drive, use the power connector labeled P4. If you are installing a secondary hard drive, use the power connector labeled P3. Figure 2-30 Connecting the Hard Drive Cables CAUTION: Never crease or bend a SATA data cable tighter than a 30 mm (1.18 in) radius. A sharp bend can break the internal wires. 4. If installing a new drive, connect the opposite end of the data cable to the appropriate system board connector. NOTE: If your system has only one SATA hard drive, you must connect the hard drive data cable to the dark blue connector labeled SATA0 to avoid any hard drive performance problems. If you are adding a second hard drive, connect the data cable to the next available (unpopulated) SATA connector on the system board in the following order: SATA0, SATA1, SATA3, SATA2. 5. Route the power and data cables in their cable retainers. 6. Replace the front bezel and computer access panel. 7. Reconnect the power cord and any external devices, then turn on the computer. 8. Lock any security devices that were disengaged when the access panel was removed. NOTE: If you are replacing the primary hard drive, use the Recovery Disc Set to restore the operating system, software drivers, and any software applications that were preinstalled on the computer. 34 Chapter 2 Hardware Upgrades ENWW
-
 1
1 -
2
-
3
-
4
-
5
-
6
-
7
-
8
-
9
-
10
-
11
-
12
-
13
-
14
-
15
-
16
-
17
-
18
-
19
-
20
-
21
-
22
-
23
-
24
-
25
-
26
-
27
-
28
-
29
-
30
-
31
-
32
-
33
-
34
-
 35
35 -
 36
36 -
 37
37 -
 38
38 -
 39
39 -
 40
40 -
 41
41 -
 42
42 -
 43
43 -
 44
44 -
 45
45 -
46
-
47
-
48
-
49
-
50
-
51
-
52
-
53
-
54
-
55
-
56
-
57
-
58
 |
 |