HP Dc5850 Hardware Reference Guide - dc5850 Microtower Models - Page 53
Front Bezel Security, C-6
 |
UPC - 884962022993
View all HP Dc5850 manuals
Add to My Manuals
Save this manual to your list of manuals |
Page 53 highlights
4. Insert the plug end of the security cable into the lock (1) and push the button in (2) to engage the lock. Use the key provided to disengage the lock. Figure C-6 Engaging the Lock Front Bezel Security The front bezel can be locked in place by installing a security screw provided by HP. The security screw is located on the fan duct inside the chassis. To lock the front bezel, remove the security screw from the fan duct (1) and install it through the chassis frame into the front bezel (2). Figure C-7 Installing the Front Bezel Security Screw ENWW Installing a Security Lock 47
-
 1
1 -
2
-
3
-
4
-
5
-
6
-
7
-
8
-
9
-
10
-
11
-
12
-
13
-
14
-
15
-
16
-
17
-
18
-
19
-
20
-
21
-
22
-
23
-
24
-
25
-
26
-
27
-
28
-
29
-
30
-
31
-
32
-
33
-
34
-
35
-
36
-
37
-
38
-
39
-
40
-
41
-
42
-
43
-
44
-
45
-
46
-
47
-
 48
48 -
 49
49 -
 50
50 -
 51
51 -
 52
52 -
 53
53 -
 54
54 -
 55
55 -
 56
56 -
 57
57 -
 58
58
 |
 |
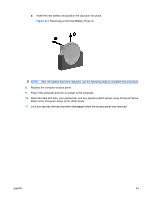
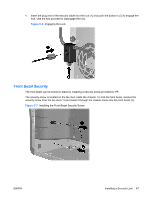
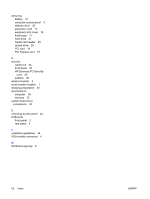
4.
Insert the plug end of the security cable into the lock (1) and push the button in (2) to engage the
lock. Use the key provided to disengage the lock.
Figure C-6
Engaging the Lock
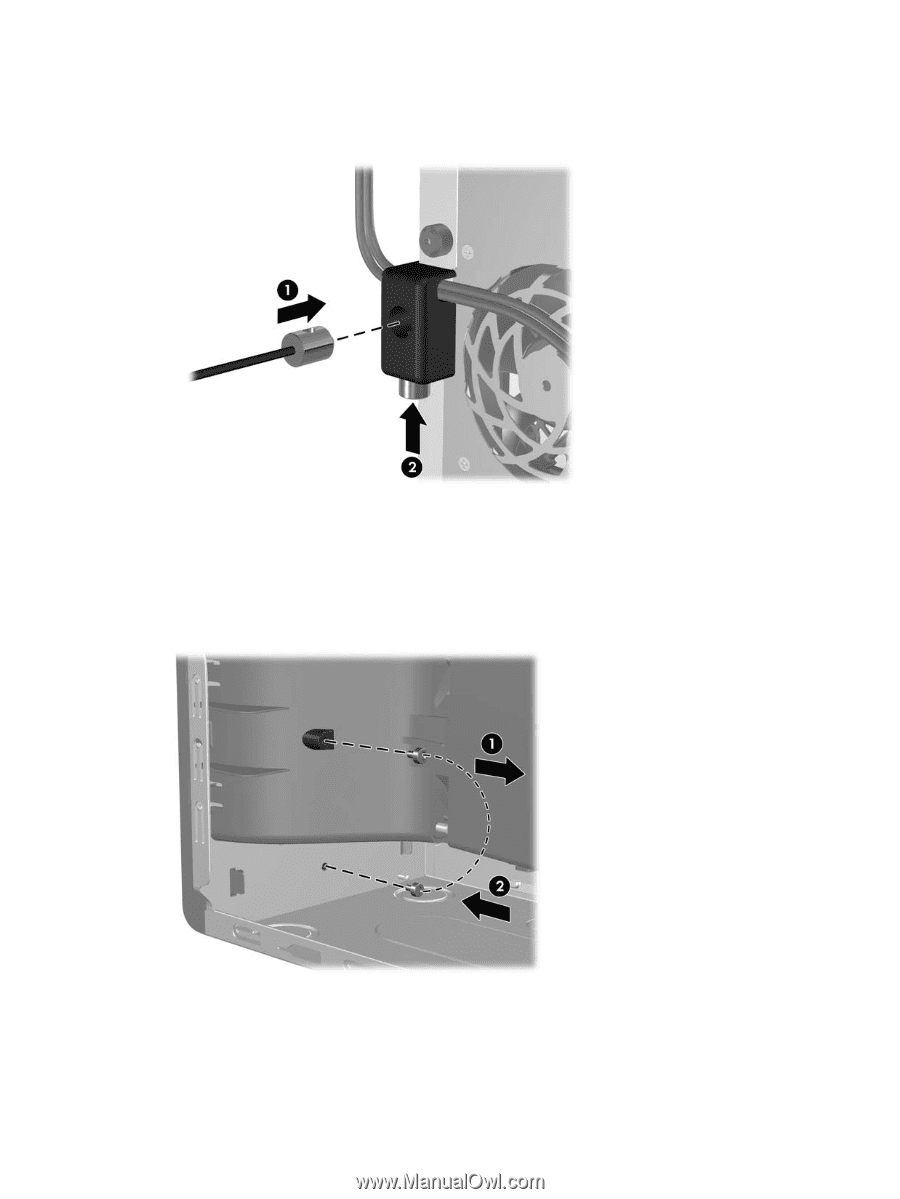
Front Bezel Security
The front bezel can be locked in place by installing a security screw provided by HP.
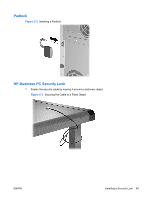
The security screw is located on the fan duct inside the chassis. To lock the front bezel, remove the
security screw from the fan duct (1) and install it through the chassis frame into the front bezel (2).
Figure C-7
Installing the Front Bezel Security Screw
ENWW
Installing a Security Lock
47