HP Designjet 350c HP Designjet 330 and 350C Plotters - Users Guide - Page 113
HP DesignJet 350C.
 |
View all HP Designjet 350c manuals
Add to My Manuals
Save this manual to your list of manuals |
Page 113 highlights
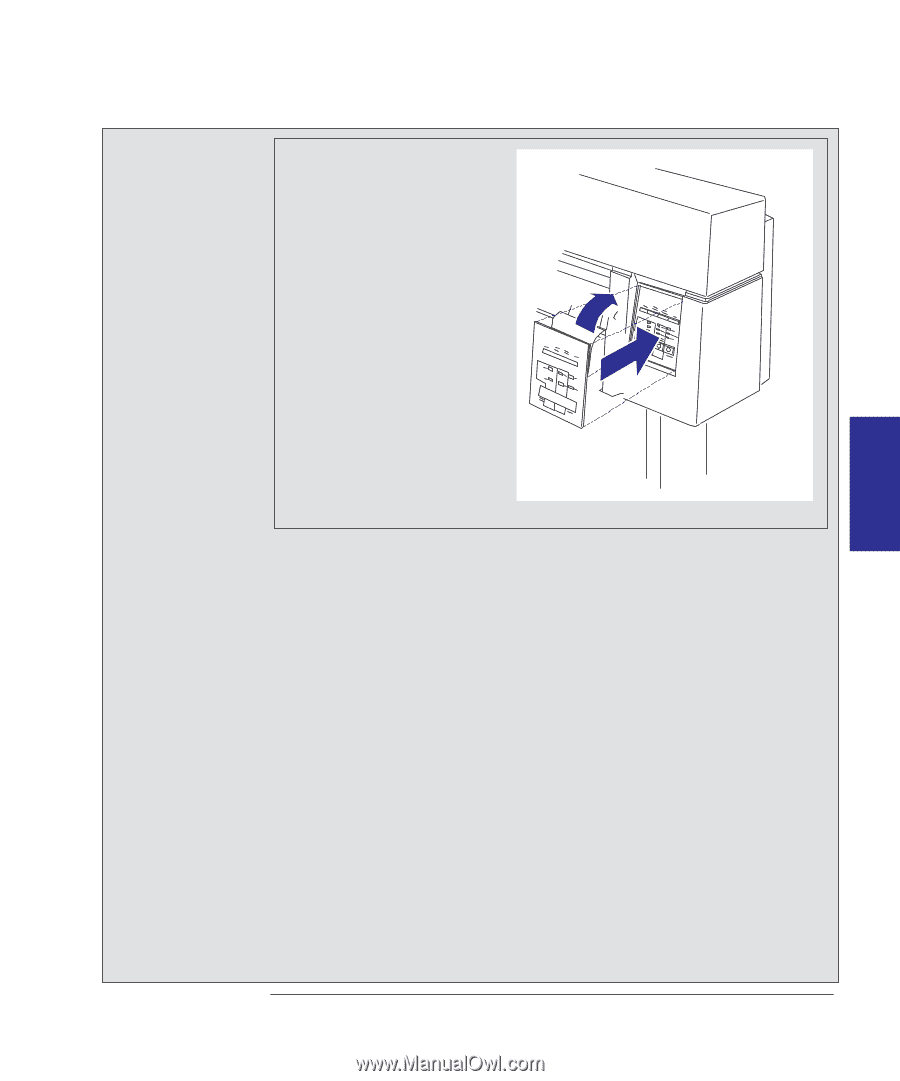
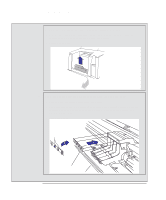
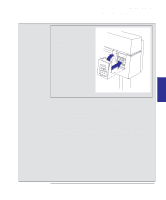
RECONFIG- 6 URATION Reconfiguring your plotter To upgrade the HP DesignJet 330 with color 13 From the upgrade kit, take the new overlay for the front panel. 1 Peel the adhesive layer from the back. 2 Fix it over the top of the old front panel. 1 2 1915 14 Switch ON the plotter. 15 From the upgrade kit, take the three new colored cartridges (yellow, cyan and magenta) and, together with the black cartridge you removed earlier, install them in the plotter's four vacant cartridge stalls. This procedure is explained in full from page 7-5 - remember to follow the instructions for the 350C, not the 330! Be sure to match the colors of the cartridges with the colors of the dots. 16 Print a Setup Sheet to confirm that the plotter has correctly read the new ROM SIMM and has reconfigured itself to be an HP DesignJet 350C For instructions on how to print a Setup Sheet, see the section "Configure the plotter" starting on page 1-19. The place to look is at the top of the setup sheet, which should now read "HP DesignJet 350C". 17 Finally, reconfigure the print driver(s) you are using to indicate that your device is no longer an HP DesignJet 330 plotter, but now an HP DesignJet 350C plotter. Drivers for AutoCAD and for Microsoft Windows applications are supplied as part of your upgrade kit. 6-11
-
 1
1 -
2
-
3
-
4
-
5
-
6
-
7
-
8
-
9
-
10
-
11
-
12
-
13
-
14
-
15
-
16
-
17
-
18
-
19
-
20
-
21
-
22
-
23
-
24
-
25
-
26
-
27
-
28
-
29
-
30
-
31
-
32
-
33
-
34
-
35
-
36
-
37
-
38
-
39
-
40
-
41
-
42
-
43
-
44
-
45
-
46
-
47
-
48
-
49
-
50
-
51
-
52
-
53
-
54
-
55
-
56
-
57
-
58
-
59
-
60
-
61
-
62
-
63
-
64
-
65
-
66
-
67
-
68
-
69
-
70
-
71
-
72
-
73
-
74
-
75
-
76
-
77
-
78
-
79
-
80
-
81
-
82
-
83
-
84
-
85
-
86
-
87
-
88
-
89
-
90
-
91
-
92
-
93
-
94
-
95
-
96
-
97
-
98
-
99
-
100
-
101
-
102
-
103
-
104
-
105
-
106
-
107
-
 108
108 -
 109
109 -
 110
110 -
 111
111 -
 112
112 -
 113
113 -
 114
114 -
 115
115 -
 116
116 -
 117
117 -
 118
118 -
119
-
120
-
121
-
122
-
123
-
124
-
125
-
126
-
127
-
128
-
129
-
130
-
131
-
132
-
133
-
134
-
135
-
136
-
137
-
138
-
139
-
140
-
141
-
142
-
143
-
144
-
145
-
146
-
147
-
148
-
149
-
150
-
151
-
152
-
153
-
154
-
155
-
156
-
157
-
158
-
159
-
160
-
161
-
162
-
163
-
164
-
165
-
166
-
167
-
168
-
169
-
170
-
171
-
172
-
173
-
174
-
175
-
176
-
177
-
178
-
179
-
180
-
181
-
182
-
183
-
184
 |
 |