HP Deskjet 5440 User Guide - (Macintosh) - Page 60
Paper Type/Quality, Paper Type
 |
View all HP Deskjet 5440 manuals
Add to My Manuals
Save this manual to your list of manuals |
Page 60 highlights
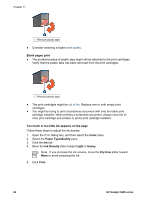
Chapter 11 Check the printer settings 1. Open the Page Setup dialog box. 2. In the Page Attributes pane, verify the following settings: - Paper Size: The appropriate paper size - Orientation: The appropriate orientation 3. Open the Print dialog box. 4. In the Paper Type/Quality pane, verify the following settings: - Paper Type: The appropriate photo paper type - Quality: Best or Maximum dpi 5. Use the HP Real Life technologies for photo enhancement. Colors are tinted or incorrect If colors in photos appear tinted or incorrect, follow these steps: 1. Verify that neither print cartridge is low on ink. If neither print cartridge is low on ink, proceed to step 2. 2. Align the print cartridges. 3. Reprint the photo. 4. If colors are still tinted or incorrect, calibrate the color. Both a photo print cartridge and a tri-color print cartridge must be installed for color calibration. 5. Reprint the photo. 6. If colors continue to appear tinted or incorrect, open the Print dialog box, select the Paper Type/Quality pane, and then select Color Options. 7. Adjust the colors. Here are some guidelines to follow: - If the colors are too yellow, move the Color Tone slider toward Cooler. - If the colors are too blue, move the Color Tone slider toward Warmer. 8. Reprint the photo. Horizontal lines appear on a photo If light or dark horizontal lines appear on photos, follow this procedure: 1. Clean the print cartridges. 2. Reprint the photo. 58 HP Deskjet 5400 series
-
 1
1 -
2
-
3
-
4
-
5
-
6
-
7
-
8
-
9
-
10
-
11
-
12
-
13
-
14
-
15
-
16
-
17
-
18
-
19
-
20
-
21
-
22
-
23
-
24
-
25
-
26
-
27
-
28
-
29
-
30
-
31
-
32
-
33
-
34
-
35
-
36
-
37
-
38
-
39
-
40
-
41
-
42
-
43
-
44
-
45
-
46
-
47
-
48
-
49
-
50
-
51
-
52
-
53
-
54
-
 55
55 -
 56
56 -
 57
57 -
 58
58 -
 59
59 -
 60
60 -
 61
61 -
 62
62 -
 63
63 -
 64
64 -
 65
65 -
66
-
67
-
68
-
69
-
70
-
71
-
72
-
73
-
74
-
75
-
76
-
77
-
78
-
79
-
80
 |
 |
