HP Deskjet F4400 User Guide - Page 76
Text is incorrect or missing, Cause, Solution, To adjust the brightness, HP Scanning, Lighten/Darken - scanner
 |
View all HP Deskjet F4400 manuals
Add to My Manuals
Save this manual to your list of manuals |
Page 76 highlights
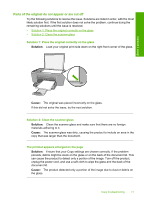
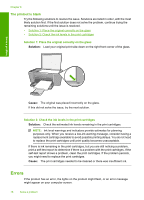
Solve a problem Chapter 8 as multiple columns from a newsletter, by putting the text in different frames (boxes) in the destination application. In the software, select the correct format so that the scanned text layout and formatting are retained. Cause: The scan document settings were incorrect. Scanned image shows dotted lines instead of text Solution: Make a black-and-white copy of the original and then scan the copy. Cause: If you used the Text image type to scan text that you plan to edit, the scanner might not recognize color text. The Text image type scans at 300 x 300 dpi, in black and white. If you are scanning an original that has graphics or artwork surrounding the text, the scanner might not recognize the text. Text is incorrect or missing Try the following solutions to resolve the issue. Solutions are listed in order, with the most likely solution first. If the first solution does not solve the problem, continue trying the remaining solutions until the issue is resolved. • Solution 1: Make sure that the brightness is set appropriately in the software • Solution 2: Make sure that the glass and the back of the document lid are clean • Solution 3: Make sure that the scan document settings are set to the correct optical character recognition (OCR) language Solution 1: Make sure that the brightness is set appropriately in the software Solution: Adjust the brightness in the software, and then rescan the original. To adjust the brightness 1. In the HP Scanning window, click Lighten/Darken in the Basic menu or the Tools panel. 2. Adjust the brightness indicators. Cause: The brightness was not set correctly in the software. If this did not solve the issue, try the next solution. Solution 2: Make sure that the glass and the back of the document lid are clean Solution: Turn off the product, unplug the power cord, and use a soft cloth to wipe the glass and the back of the document lid. Cause: The glass and the back of the document lid were not clean. If this did not solve the issue, try the next solution. 74 Solve a problem
-
 1
1 -
2
-
3
-
4
-
5
-
6
-
7
-
8
-
9
-
10
-
11
-
12
-
13
-
14
-
15
-
16
-
17
-
18
-
19
-
20
-
21
-
22
-
23
-
24
-
25
-
26
-
27
-
28
-
29
-
30
-
31
-
32
-
33
-
34
-
35
-
36
-
37
-
38
-
39
-
40
-
41
-
42
-
43
-
44
-
45
-
46
-
47
-
48
-
49
-
50
-
51
-
52
-
53
-
54
-
55
-
56
-
57
-
58
-
59
-
60
-
61
-
62
-
63
-
64
-
65
-
66
-
67
-
68
-
69
-
70
-
 71
71 -
 72
72 -
 73
73 -
 74
74 -
 75
75 -
 76
76 -
 77
77 -
 78
78 -
 79
79 -
 80
80 -
 81
81 -
82
-
83
-
84
-
85
-
86
-
87
-
88
-
89
-
90
-
91
-
92
-
93
-
94
-
95
-
96
-
97
-
98
-
99
-
100
-
101
-
102
-
103
-
104
-
105
-
106
-
107
-
108
-
109
-
110
-
111
-
112
 |
 |