HP Evo n1000v Compaq Notebook Series, Evo N1000 and Presario 1500 Maintenance - Page 96
Preparing the Computer for Disassembly
 |
View all HP Evo n1000v manuals
Add to My Manuals
Save this manual to your list of manuals |
Page 96 highlights
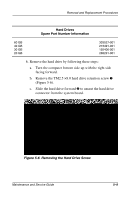
Removal and Replacement Procedures Section 5.16 5.17 5.18 5.19 5.20 5.21 5.22 5.23 Disassembly Sequence Chart (Continued) Description TouchPad and TouchButton Display release assembly Charger board Speaker assembly Top cover Fan System board Modem cable # of Screws Removed 4 on TouchPad models 5 on Dual Stick models 2 3 0 5 0 7 1 5.3 Preparing the Computer for Disassembly Perform the following steps before disassembling the computer: 1. Turn off the computer. 2. Disconnect the AC adapter and all external devices. 5-4 Maintenance and Service Guide
-
 1
1 -
2
-
3
-
4
-
5
-
6
-
7
-
8
-
9
-
10
-
11
-
12
-
13
-
14
-
15
-
16
-
17
-
18
-
19
-
20
-
21
-
22
-
23
-
24
-
25
-
26
-
27
-
28
-
29
-
30
-
31
-
32
-
33
-
34
-
35
-
36
-
37
-
38
-
39
-
40
-
41
-
42
-
43
-
44
-
45
-
46
-
47
-
48
-
49
-
50
-
51
-
52
-
53
-
54
-
55
-
56
-
57
-
58
-
59
-
60
-
61
-
62
-
63
-
64
-
65
-
66
-
67
-
68
-
69
-
70
-
71
-
72
-
73
-
74
-
75
-
76
-
77
-
78
-
79
-
80
-
81
-
82
-
83
-
84
-
85
-
86
-
87
-
88
-
89
-
90
-
 91
91 -
 92
92 -
 93
93 -
 94
94 -
 95
95 -
 96
96 -
 97
97 -
 98
98 -
 99
99 -
 100
100 -
 101
101 -
102
-
103
-
104
-
105
-
106
-
107
-
108
-
109
-
110
-
111
-
112
-
113
-
114
-
115
-
116
-
117
-
118
-
119
-
120
-
121
-
122
-
123
-
124
-
125
-
126
-
127
-
128
-
129
-
130
-
131
-
132
-
133
-
134
-
135
-
136
-
137
-
138
-
139
-
140
-
141
-
142
-
143
-
144
-
145
-
146
-
147
-
148
-
149
-
150
-
151
-
152
-
153
-
154
-
155
-
156
-
157
-
158
-
159
-
160
-
161
-
162
-
163
-
164
-
165
-
166
-
167
-
168
-
169
-
170
-
171
-
172
-
173
-
174
-
175
-
176
-
177
-
178
-
179
-
180
-
181
-
182
-
183
-
184
-
185
-
186
-
187
-
188
-
189
-
190
-
191
-
192
-
193
-
194
-
195
-
196
-
197
-
198
-
199
-
200
-
201
-
202
-
203
-
204
 |
 |

5–4
Maintenance and Service Guide
Removal and Replacement Procedures
5.3 Preparing the Computer for
Disassembly
Perform the following steps before disassembling the computer:
1. Turn off the computer.
2. Disconnect the AC adapter and all external devices.
Section
Description
# of Screws Removed
5.16
TouchPad and TouchButton
4 on TouchPad models
5 on Dual Stick models
5.17
Display release assembly
2
5.18
Charger board
3
5.19
Speaker assembly
0
5.20
Top cover
5
5.21
Fan
0
5.22
System board
7
5.23
Modem cable
1
Disassembly Sequence Chart
(Continued)