HP G72-257CL Compaq Presario CQ72 Notebook PC and HP G72 Notebook PC - Mainten - Page 112
When to back up, Backup suggestions, Start, All Programs, Recovery Manager, Advanced Options
 |
View all HP G72-257CL manuals
Add to My Manuals
Save this manual to your list of manuals |
Page 112 highlights
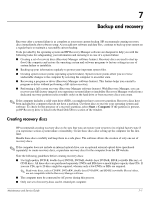
Backup and recovery ■ Number each disc before inserting it into the optical drive. ■ If necessary, exit the program before you have finished creating the recovery discs. The next time you open Recovery Manager, you are prompted to continue the disc creation process. To create a set of recovery discs: 1. Select Start > All Programs > Recovery Manager > Recovery Manager. Recovery Manager opens. 2. Click Advanced Options. ✎ If you are operating the computer on battery power, you are prompted to connect to AC power before you can go to the next step. 3. Click Recovery disc creation, and then click Next. 4. Follow the on-screen instructions. When to back up ■ On a regularly scheduled basis ✎ Set reminders to back up your information periodically. ■ Before the computer is repaired or restored ■ Before you add or modify hardware or software Backup suggestions ■ Create a set of recovery discs using Recovery Manager. ■ Create system restore points using the Windows System Restore feature, and periodically copy them to disc. ■ Store personal files in the Documents folder and back up this folder periodically. ■ Back up templates stored in their associated programs. ■ Save customized settings in a window, toolbar, or menu bar by taking a screen shot of your settings. The screen shot can be a time-saver if you have to reset your preferences. To copy the screen and paste it into a word-processing document: a. Display the screen. b. Copy the screen: To copy only the active window, press alt+fn+prt sc. To copy the entire screen, press fn+prt sc. c. Open a word-processing document, and then select Edit > Paste. 7-2 Maintenance and Service Guide
-
 1
1 -
2
-
3
-
4
-
5
-
6
-
7
-
8
-
9
-
10
-
11
-
12
-
13
-
14
-
15
-
16
-
17
-
18
-
19
-
20
-
21
-
22
-
23
-
24
-
25
-
26
-
27
-
28
-
29
-
30
-
31
-
32
-
33
-
34
-
35
-
36
-
37
-
38
-
39
-
40
-
41
-
42
-
43
-
44
-
45
-
46
-
47
-
48
-
49
-
50
-
51
-
52
-
53
-
54
-
55
-
56
-
57
-
58
-
59
-
60
-
61
-
62
-
63
-
64
-
65
-
66
-
67
-
68
-
69
-
70
-
71
-
72
-
73
-
74
-
75
-
76
-
77
-
78
-
79
-
80
-
81
-
82
-
83
-
84
-
85
-
86
-
87
-
88
-
89
-
90
-
91
-
92
-
93
-
94
-
95
-
96
-
97
-
98
-
99
-
100
-
101
-
102
-
103
-
104
-
105
-
106
-
 107
107 -
 108
108 -
 109
109 -
 110
110 -
 111
111 -
 112
112 -
 113
113 -
 114
114 -
 115
115 -
 116
116 -
 117
117 -
118
-
119
-
120
-
121
-
122
-
123
-
124
-
125
-
126
-
127
-
128
-
129
-
130
-
131
-
132
 |
 |