HP KVM CAT5 3x1x16 HP IP and Server Console Switches G2 User Guide - Page 29
Configuring the console switch, The user interfaces
 |
View all HP KVM CAT5 3x1x16 manuals
Add to My Manuals
Save this manual to your list of manuals |
Page 29 highlights
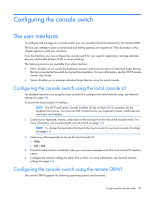
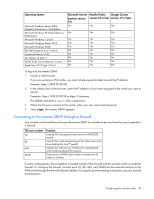
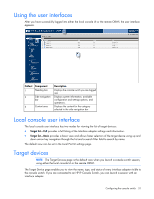
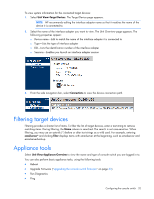
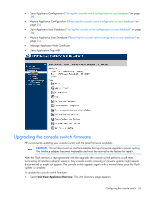
Configuring the console switch The user interfaces To configure and manage your console switch, you can use either the local console UI or the remote OBWI. The two user interfaces share a similar look and feel for optimal user experience. The information in this chapter applies to both user interfaces. From the interface, you can configure the console switch for your specific application, manage attached devices, and handle all basic KVM or serial switching. The following sessions are available from either interface: • KVM-Enables you to control the keyboard, monitor, and mouse functions of individual target devices that are connected to the switch during real-time operation. For more information, see the HP IP Console Viewer User Guide. • Serial-Enables you to manage individual target devices using the serial console. Configuring the console switch using the local console UI For detailed instructions on using the local console UI to configure the initial network setup, see Network settings (on page 36). To launch the local console UI interface: NOTE: The HP IP and Server Console Switches G2 do not have PS/2 connectors for the keyboard and mouse. You must use USB connections for your keyboard, mouse, media devices, and smart card readers. 1. Connect your keyboard, monitor, and mouse to the local port on the rear of the console switch. For more information, see Connecting the console switch (on page 19). NOTE: To change the keystrokes that launch the local console UI, see Local console UI settings (on page 41). 2. Select one of the keystrokes to launch the local console UI: o PrtSc o Ctrl + Ctrl 3. If local UI authentication is enabled, enter your username and password. The local console UI interface opens. 4. Configure the network settings for either IPv4 or IPv6. For more information, see General network settings (on page 36). Configuring the console switch using the remote OBWI The remote OBWI supports the following operating systems and browsers. Configuring the console switch 29
-
 1
1 -
2
-
3
-
4
-
5
-
6
-
7
-
8
-
9
-
10
-
11
-
12
-
13
-
14
-
15
-
16
-
17
-
18
-
19
-
20
-
21
-
22
-
23
-
 24
24 -
 25
25 -
 26
26 -
 27
27 -
 28
28 -
 29
29 -
 30
30 -
 31
31 -
 32
32 -
 33
33 -
 34
34 -
35
-
36
-
37
-
38
-
39
-
40
-
41
-
42
-
43
-
44
-
45
-
46
-
47
-
48
-
49
-
50
-
51
-
52
-
53
-
54
-
55
-
56
-
57
-
58
-
59
-
60
-
61
-
62
-
63
-
64
-
65
-
66
-
67
-
68
-
69
-
70
-
71
-
72
-
73
-
74
-
75
-
76
-
77
-
78
-
79
-
80
-
81
-
82
-
83
 |
 |
