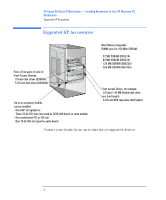
HP Kayak XA 05xx HP Kayak XA Series 05xx, Accessories Installation Guide For M - Page 5
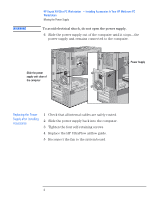
Moving the Power Supply, guide and lift it out of the PC Workstation's case.
 |
View all HP Kayak XA 05xx manuals
Add to My Manuals
Save this manual to your list of manuals |
Page 5 highlights
HP Kayak XA 05xx PC Workstation - Installing Accessories In Your HP Minitower PC Workstation Moving the Power Supply Moving the Power Supply 1 Disconnect the computer's power cord and any LAN cable. 2 Remove the computer's cover (see page 3). 3 Remove the fan connection to the system board. Fan connection to system board HP UltraFlow Airflow Guide Retaining button 4 Press the retaining buttons on each side of the HP UltraFlow airflow guide and lift it out of the PC Workstation's case. 5 Unscrew the four self-retaining screws at the back of the power supply. Unscrew the self-retaining screws English 5
-
 1
1 -
 2
2 -
 3
3 -
 4
4 -
 5
5 -
 6
6 -
 7
7 -
 8
8 -
 9
9 -
 10
10 -
 11
11 -
12
-
13
-
14
-
15
-
16
-
17
-
18
-
19
-
20
-
21
-
22
-
23
 |
 |

English
5
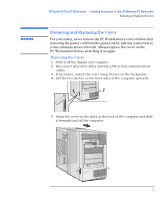
HP Kayak XA 05xx PC Workstation
— Installing Accessories In Your HP Minitower PC Workstation
Moving the Power Supply
Moving the Power Supply
1
Disconnect the computer’s power cord and any LAN cable.
2
Remove the computer’s cover (see page 3).
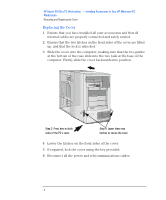
3
Remove the fan connection to the system board.
4
Press the retaining buttons on each side of the HP UltraFlow airflow
guide and lift it out of the PC Workstation’s case.
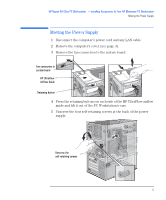
5
Unscrew the four self-retaining screws at the back of the power
supply.
HP UltraFlow
Airflow Guide
Retaining button
Fan connection to
system board
Unscrew the
self-retaining screws