HP Latex 3000 Users Guide - Page 34
Maintain the Internal Print Server
 |
View all HP Latex 3000 manuals
Add to My Manuals
Save this manual to your list of manuals |
Page 34 highlights
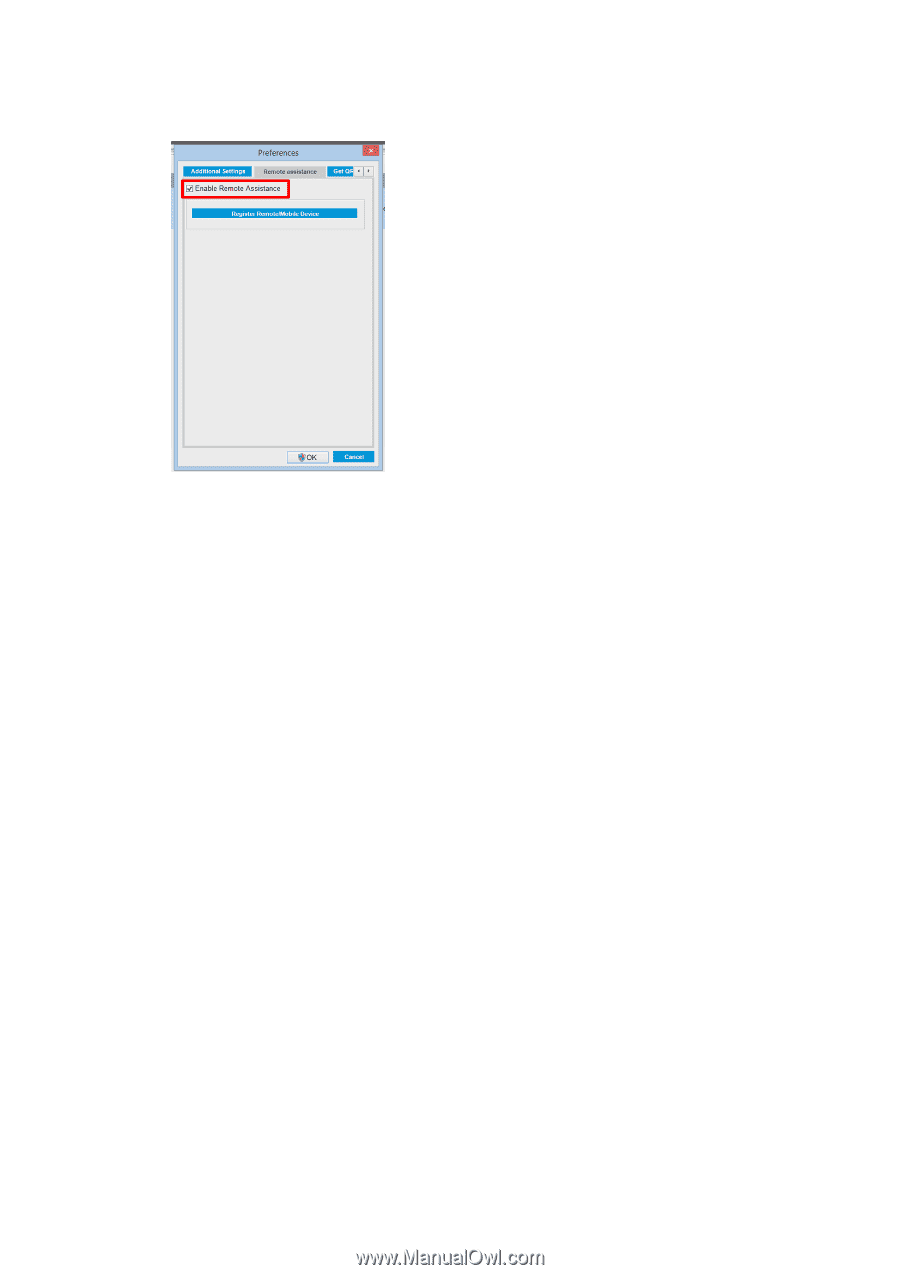
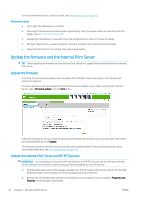
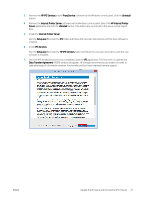
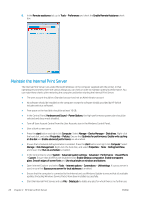
8. In the Remote assistance tab, go to Tools > Preferences and check the Enable Remote Assistance check box. Maintain the Internal Print Server The Internal Print Server runs under Microsoft Windows on the computer supplied with the printer. In that operating environment, there are various things you can check in order to maintain optimum performance. You can make these checks after restarting the computer and before starting the Internal Print Server. ● The user account should be a Standard account and not an Administrator account. ● No software should be installed on the computer except the software initially provided by HP (which includes antivirus software). ● Free space on the hard disk should be at least 10 GB. ● In the Control Panel, Hardware and Sound > Power Options, the high-performance power plan should be selected and sleep mode disabled. ● Turn off User Account Control from the User Accounts icon in the Windows Control Panel. ● User a blank screen saver. ● Press the start button and right-click Computer. Select Manage > Device Manager > Disk drives. Right-click the hard disk, and select Properties > Policies. Ensure that Optimize for performance, Enable write caching on the disk and Enable advanced performance are all enabled. ● Ensure that scheduled defragmentation is enabled. Press the start button and right-click Computer. Select Manage > Disk Management. Right-click the hard disk, and select Properties > Tools > Defragment Now, and ensure that Run on a schedule is enabled. ● In the Control Panel, select System > Advanced system settings > Advanced > Performance > Visual Effects > Custom. Ensure that all effects are disabled except Enable Desktop composition, Enable transparent glass, Smooth edges of screen fonts and Use visual styles on windows and buttons. ● Open Internet Explorer and select Tools > Internet options > Connections > LAN settings. If a proxy server is used, ensure that Bypass proxy server for local addresses is enabled. ● Ensure that the computer is connected to the Internet and use Windows Update to ensure that all available updates (including Windows Service Packs) have been installed successfully. ● Start the Internal Print Server, and use File > Delete job to delete any jobs for which there is no further use. 28 Chapter 2 HP Internal Print Server ENWW
-
 1
1 -
2
-
3
-
4
-
5
-
6
-
7
-
8
-
9
-
10
-
11
-
12
-
13
-
14
-
15
-
16
-
17
-
18
-
19
-
20
-
21
-
22
-
23
-
24
-
25
-
26
-
27
-
28
-
 29
29 -
 30
30 -
 31
31 -
 32
32 -
 33
33 -
 34
34 -
 35
35 -
 36
36 -
 37
37 -
 38
38 -
 39
39 -
40
-
41
-
42
-
43
-
44
-
45
-
46
-
47
-
48
-
49
-
50
-
51
-
52
-
53
-
54
-
55
-
56
-
57
-
58
-
59
-
60
-
61
-
62
-
63
-
64
-
65
-
66
-
67
-
68
-
69
-
70
-
71
-
72
-
73
-
74
-
75
-
76
-
77
-
78
-
79
-
80
-
81
-
82
-
83
-
84
-
85
-
86
-
87
-
88
-
89
-
90
-
91
-
92
-
93
-
94
-
95
-
96
-
97
-
98
-
99
-
100
-
101
-
102
-
103
-
104
-
105
-
106
-
107
-
108
-
109
-
110
-
111
-
112
-
113
-
114
-
115
-
116
-
117
-
118
-
119
-
120
-
121
-
122
-
123
-
124
-
125
-
126
-
127
-
128
-
129
-
130
-
131
-
132
-
133
-
134
-
135
-
136
-
137
-
138
-
139
-
140
-
141
-
142
-
143
-
144
-
145
-
146
-
147
-
148
-
149
-
150
-
151
-
152
-
153
-
154
-
155
-
156
-
157
-
158
-
159
-
160
-
161
-
162
-
163
-
164
-
165
-
166
-
167
-
168
-
169
-
170
-
171
-
172
-
173
-
174
-
175
-
176
-
177
-
178
-
179
-
180
-
181
-
182
-
183
-
184
-
185
-
186
-
187
-
188
-
189
-
190
-
191
-
192
-
193
-
194
-
195
-
196
-
197
-
198
-
199
-
200
-
201
-
202
-
203
-
204
-
205
-
206
-
207
-
208
-
209
-
210
-
211
-
212
-
213
-
214
-
215
-
216
-
217
-
218
-
219
-
220
-
221
-
222
-
223
-
224
-
225
-
226
-
227
-
228
-
229
-
230
-
231
-
232
-
233
-
234
-
235
-
236
-
237
-
238
-
239
-
240
-
241
-
242
-
243
-
244
-
245
-
246
-
247
-
248
-
249
-
250
-
251
-
252
-
253
-
254
-
255
-
256
-
257
-
258
-
259
-
260
-
261
-
262
-
263
-
264
-
265
-
266
-
267
-
268
-
269
-
270
-
271
-
272
-
273
-
274
-
275
-
276
-
277
-
278
-
279
-
280
-
281
-
282
-
283
-
284
-
285
-
286
-
287
-
288
-
289
-
290
-
291
-
292
-
293
-
294
-
295
-
296
-
297
-
298
-
299
-
300
-
301
-
302
-
303
-
304
-
305
-
306
-
307
-
308
-
309
-
310
-
311
-
312
-
313
-
314
-
315
-
316
-
317
-
318
-
319
-
320
-
321
-
322
-
323
-
324
-
325
-
326
-
327
-
328
-
329
-
330
-
331
-
332
-
333
-
334
-
335
-
336
-
337
-
338
-
339
-
340
-
341
-
342
-
343
-
344
-
345
-
346
-
347
-
348
-
349
-
350
-
351
-
352
-
353
-
354
-
355
-
356
-
357
-
358
-
359
-
360
-
361
-
362
-
363
-
364
-
365
-
366
-
367
-
368
-
369
-
370
-
371
-
372
-
373
-
374
-
375
-
376
-
377
-
378
-
379
-
380
-
381
-
382
-
383
-
384
-
385
-
386
-
387
-
388
-
389
-
390
-
391
-
392
-
393
-
394
-
395
-
396
-
397
-
398
-
399
-
400
-
401
-
402
-
403
-
404
-
405
-
406
-
407
-
408
-
409
-
410
-
411
-
412
-
413
-
414
-
415
-
416
-
417
-
418
-
419
-
420
-
421
-
422
-
423
-
424
-
425
-
426
-
427
-
428
-
429
 |
 |