HP Latex 3000 Users Guide - Page 403

sensor from working correctly.

Page 403 highlights

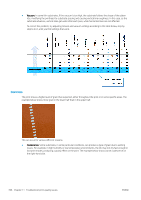
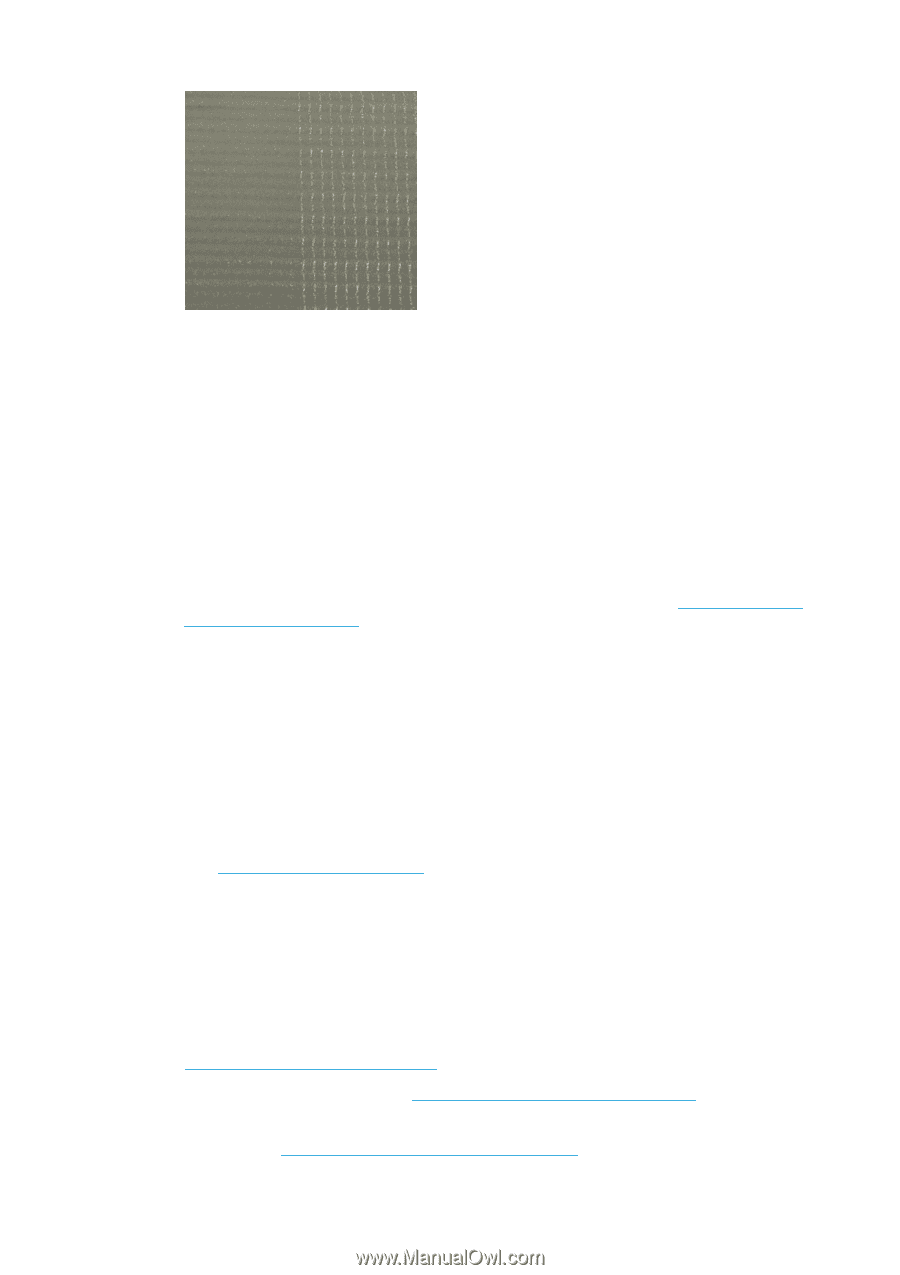
It is difficult to decide whether this kind of problem is due to wetting or to dot placement error (described below). The type of grain could be a clue: in the case of wetting issues, dots tend to aggregate into bigger dots, with empty spaces in between. A magnifying glass can be useful to examine the print in more detail. Here are some tips for solving this problem: - Increase the optimizer level. - Increase the drying power. - Increase the number of passes. - Change from 6 to 4 colors (less ink on the substrate). ● Printhead alignment. This is a clear contributor to grain. If printheads are not correctly aligned, the misplaced dots could correlate directly with the severity of the graininess. To check printhead alignment, print the printhead alignment diagnostics plot (see Printhead alignment diagnostics plot on page 175). As a general rule, the biggest contributors to grain caused by printhead alignment are (in this order): - Bidirectional alignment - Intra-color alignment (alignment between the two printheads of the same color) - Inter-color alignment (alignment between different colors) Here are some tips for solving this problem: - If the printhead alignment was done with a different substrate of different thickness, probably a new printhead alignment is needed. - Fine-tune the alignment by identifiying the offenders in the printhead alignment diagnostics plot. See Alignment procedure on page 172. ● Substrate advance. Before trying to adjust any parameter, make the following checks: - Check that no substrate-advance factor was set earlier that could prevent the substrate-advance sensor from working correctly. - Run the diagnostics to check that that the substrate-advance sensor is not dirty. Grain in a print can be increased by incorrect substrate advance, due to mispositioning of the dots. To check the substrate advance, go to the Internal Print Server and select Printer > Advance Calibration. See Substrate-advance test print on page 182. To correct the substrate advance, see Substrate-advance compensation on page 181. In most cases, this will solve the problem. However, you are recommended to run the OMAS Diagnostic Tests from the Print Care window as soon as the substrate is unloaded, to avoid having the same problem with other substrates. See Clean the substrate-advance sensor on page 204. ENWW Advanced print-quality troubleshooting 397
  • 1
  • 2
  • 3
  • 4
  • 5
  • 6
  • 7
  • 8
  • 9
  • 10
  • 11
  • 12
  • 13
  • 14
  • 15
  • 16
  • 17
  • 18
  • 19
  • 20
  • 21
  • 22
  • 23
  • 24
  • 25
  • 26
  • 27
  • 28
  • 29
  • 30
  • 31
  • 32
  • 33
  • 34
  • 35
  • 36
  • 37
  • 38
  • 39
  • 40
  • 41
  • 42
  • 43
  • 44
  • 45
  • 46
  • 47
  • 48
  • 49
  • 50
  • 51
  • 52
  • 53
  • 54
  • 55
  • 56
  • 57
  • 58
  • 59
  • 60
  • 61
  • 62
  • 63
  • 64
  • 65
  • 66
  • 67
  • 68
  • 69
  • 70
  • 71
  • 72
  • 73
  • 74
  • 75
  • 76
  • 77
  • 78
  • 79
  • 80
  • 81
  • 82
  • 83
  • 84
  • 85
  • 86
  • 87
  • 88
  • 89
  • 90
  • 91
  • 92
  • 93
  • 94
  • 95
  • 96
  • 97
  • 98
  • 99
  • 100
  • 101
  • 102
  • 103
  • 104
  • 105
  • 106
  • 107
  • 108
  • 109
  • 110
  • 111
  • 112
  • 113
  • 114
  • 115
  • 116
  • 117
  • 118
  • 119
  • 120
  • 121
  • 122
  • 123
  • 124
  • 125
  • 126
  • 127
  • 128
  • 129
  • 130
  • 131
  • 132
  • 133
  • 134
  • 135
  • 136
  • 137
  • 138
  • 139
  • 140
  • 141
  • 142
  • 143
  • 144
  • 145
  • 146
  • 147
  • 148
  • 149
  • 150
  • 151
  • 152
  • 153
  • 154
  • 155
  • 156
  • 157
  • 158
  • 159
  • 160
  • 161
  • 162
  • 163
  • 164
  • 165
  • 166
  • 167
  • 168
  • 169
  • 170
  • 171
  • 172
  • 173
  • 174
  • 175
  • 176
  • 177
  • 178
  • 179
  • 180
  • 181
  • 182
  • 183
  • 184
  • 185
  • 186
  • 187
  • 188
  • 189
  • 190
  • 191
  • 192
  • 193
  • 194
  • 195
  • 196
  • 197
  • 198
  • 199
  • 200
  • 201
  • 202
  • 203
  • 204
  • 205
  • 206
  • 207
  • 208
  • 209
  • 210
  • 211
  • 212
  • 213
  • 214
  • 215
  • 216
  • 217
  • 218
  • 219
  • 220
  • 221
  • 222
  • 223
  • 224
  • 225
  • 226
  • 227
  • 228
  • 229
  • 230
  • 231
  • 232
  • 233
  • 234
  • 235
  • 236
  • 237
  • 238
  • 239
  • 240
  • 241
  • 242
  • 243
  • 244
  • 245
  • 246
  • 247
  • 248
  • 249
  • 250
  • 251
  • 252
  • 253
  • 254
  • 255
  • 256
  • 257
  • 258
  • 259
  • 260
  • 261
  • 262
  • 263
  • 264
  • 265
  • 266
  • 267
  • 268
  • 269
  • 270
  • 271
  • 272
  • 273
  • 274
  • 275
  • 276
  • 277
  • 278
  • 279
  • 280
  • 281
  • 282
  • 283
  • 284
  • 285
  • 286
  • 287
  • 288
  • 289
  • 290
  • 291
  • 292
  • 293
  • 294
  • 295
  • 296
  • 297
  • 298
  • 299
  • 300
  • 301
  • 302
  • 303
  • 304
  • 305
  • 306
  • 307
  • 308
  • 309
  • 310
  • 311
  • 312
  • 313
  • 314
  • 315
  • 316
  • 317
  • 318
  • 319
  • 320
  • 321
  • 322
  • 323
  • 324
  • 325
  • 326
  • 327
  • 328
  • 329
  • 330
  • 331
  • 332
  • 333
  • 334
  • 335
  • 336
  • 337
  • 338
  • 339
  • 340
  • 341
  • 342
  • 343
  • 344
  • 345
  • 346
  • 347
  • 348
  • 349
  • 350
  • 351
  • 352
  • 353
  • 354
  • 355
  • 356
  • 357
  • 358
  • 359
  • 360
  • 361
  • 362
  • 363
  • 364
  • 365
  • 366
  • 367
  • 368
  • 369
  • 370
  • 371
  • 372
  • 373
  • 374
  • 375
  • 376
  • 377
  • 378
  • 379
  • 380
  • 381
  • 382
  • 383
  • 384
  • 385
  • 386
  • 387
  • 388
  • 389
  • 390
  • 391
  • 392
  • 393
  • 394
  • 395
  • 396
  • 397
  • 398
  • 399
  • 400
  • 401
  • 402
  • 403
  • 404
  • 405
  • 406
  • 407
  • 408
  • 409
  • 410
  • 411
  • 412
  • 413
  • 414
  • 415
  • 416
  • 417
  • 418
  • 419
  • 420
  • 421
  • 422
  • 423
  • 424
  • 425
  • 426
  • 427
  • 428
  • 429

It is difficult to decide whether this kind of problem is due to wetting or to dot placement error (described
below). The type of grain could be a clue: in the case of wetting issues, dots tend to aggregate into bigger
dots, with empty spaces in between. A magnifying glass can be useful to examine the print in more detail.
Here are some tips for solving this problem:
Increase the optimizer level.
Increase the drying power.
Increase the number of passes.
Change from 6 to 4 colors (less ink on the substrate).
Printhead alignment.
This is a clear contributor to grain. If printheads are not correctly aligned, the
misplaced dots could correlate directly with the severity of the graininess.
To check printhead alignment, print the printhead alignment diagnostics plot (see
Printhead alignment
diagnostics plot
on page
175
). As a general rule, the biggest contributors to grain caused by printhead
alignment are (in this order):
Bidirectional alignment
Intra-color alignment (alignment between the two printheads of the same color)
Inter-color alignment (alignment between different colors)
Here are some tips for solving this problem:
If the printhead alignment was done with a different substrate of different thickness, probably a new
printhead alignment is needed.
Fine-tune the alignment by identifiying the offenders in the printhead alignment diagnostics plot. See
Alignment procedure
on page
172
.
Substrate advance.
Before trying to adjust any parameter, make the following checks:
Check that no substrate-advance factor was set earlier that could prevent the substrate-advance
sensor from working correctly.
Run the diagnostics to check that that the substrate-advance sensor is not dirty.
Grain in a print can be increased by incorrect substrate advance, due to mispositioning of the dots.
To check the substrate advance, go to the Internal Print Server and select
Printer
>
Advance Calibration
. See
Substrate-advance test print
on page
182
.
To correct the substrate advance, see
Substrate-advance compensation
on page
181
. In most cases, this
will solve the problem. However, you are recommended to run the OMAS Diagnostic Tests from the Print
Care window as soon as the substrate is unloaded, to avoid having the same problem with other
substrates. See
Clean the substrate-advance sensor
on page
204
.
ENWW
Advanced print-quality troubleshooting
397