HP M3035xs HP LaserJet M3027/M3035 MFP - User Guide for Model Numbers CC476A/C - Page 101
Print on both sides of the paper, Print on Both Sides manually
 |
UPC - 883585038534
View all HP M3035xs manuals
Add to My Manuals
Save this manual to your list of manuals |
Page 101 highlights
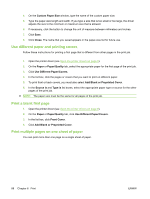
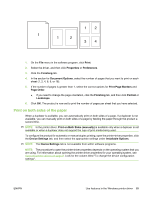
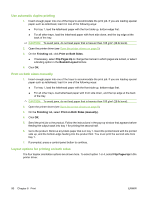
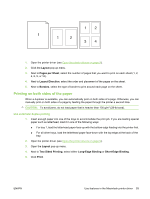
1. On the File menu in the software program, click Print. 2. Select the driver, and then click Properties or Preferences. 3. Click the Finishing tab. 4. In the section for Document Options, select the number of pages that you want to print on each sheet (1, 2, 4, 6, 9, or 16). 5. If the number of pages is greater than 1, select the correct options for Print Page Borders and Page Order. ● If you need to change the page orientation, click the Finishing tab, and then click Portrait or Landscape. 6. Click OK. The product is now set to print the number of pages per sheet that you have selected. Print on both sides of the paper When a duplexer is available, you can automatically print on both sides of a page. If a duplexer is not available, you can manually print on both sides of a page by feeding the paper through the product a second time. NOTE: In the printer driver, Print on Both Sides (manually) is available only when a duplexer is not available or when a duplexer does not support the type of print media being used. To configure the product for automatic or manual duplex printing, open the printer-driver properties, click the Device Settings tab, and then select the appropriate settings under Installable Options. NOTE: The Device Settings tab is not available from within software programs. NOTE: The procedure to open the printer-driver properties depends on the operating system that you are using. For information about opening the printer-driver properties for your operating system, see Open the printer drivers on page 9. Look for the column titled "To change the device configuration settings". ENWW Use features in the Windows printer driver 89
-
 1
1 -
2
-
3
-
4
-
5
-
6
-
7
-
8
-
9
-
10
-
11
-
12
-
13
-
14
-
15
-
16
-
17
-
18
-
19
-
20
-
21
-
22
-
23
-
24
-
25
-
26
-
27
-
28
-
29
-
30
-
31
-
32
-
33
-
34
-
35
-
36
-
37
-
38
-
39
-
40
-
41
-
42
-
43
-
44
-
45
-
46
-
47
-
48
-
49
-
50
-
51
-
52
-
53
-
54
-
55
-
56
-
57
-
58
-
59
-
60
-
61
-
62
-
63
-
64
-
65
-
66
-
67
-
68
-
69
-
70
-
71
-
72
-
73
-
74
-
75
-
76
-
77
-
78
-
79
-
80
-
81
-
82
-
83
-
84
-
85
-
86
-
87
-
88
-
89
-
90
-
91
-
92
-
93
-
94
-
95
-
 96
96 -
 97
97 -
 98
98 -
 99
99 -
 100
100 -
 101
101 -
 102
102 -
 103
103 -
 104
104 -
 105
105 -
 106
106 -
107
-
108
-
109
-
110
-
111
-
112
-
113
-
114
-
115
-
116
-
117
-
118
-
119
-
120
-
121
-
122
-
123
-
124
-
125
-
126
-
127
-
128
-
129
-
130
-
131
-
132
-
133
-
134
-
135
-
136
-
137
-
138
-
139
-
140
-
141
-
142
-
143
-
144
-
145
-
146
-
147
-
148
-
149
-
150
-
151
-
152
-
153
-
154
-
155
-
156
-
157
-
158
-
159
-
160
-
161
-
162
-
163
-
164
-
165
-
166
-
167
-
168
-
169
-
170
-
171
-
172
-
173
-
174
-
175
-
176
-
177
-
178
-
179
-
180
-
181
-
182
-
183
-
184
-
185
-
186
-
187
-
188
-
189
-
190
-
191
-
192
-
193
-
194
-
195
-
196
-
197
-
198
-
199
-
200
-
201
-
202
-
203
-
204
-
205
-
206
-
207
-
208
-
209
-
210
-
211
-
212
-
213
-
214
-
215
-
216
-
217
-
218
-
219
-
220
-
221
-
222
-
223
-
224
-
225
-
226
-
227
-
228
-
229
-
230
-
231
-
232
-
233
-
234
-
235
-
236
-
237
-
238
-
239
-
240
-
241
-
242
-
243
-
244
-
245
-
246
-
247
-
248
-
249
-
250
-
251
-
252
-
253
-
254
-
255
-
256
-
257
-
258
-
259
-
260
-
261
-
262
-
263
-
264
-
265
-
266
-
267
-
268
-
269
-
270
 |
 |
