HP M307 HP Photosmart M305/M307 digital camera with HP Instant Share - User's - Page 15
Macintosh, Double-click the installer icon, and then follow the on-screen - instructions
 |
UPC - 029160399625
View all HP M307 manuals
Add to My Manuals
Save this manual to your list of manuals |
Page 15 highlights
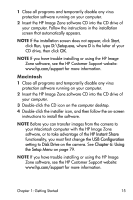
1 Close all programs and temporarily disable any virus protection software running on your computer. 2 Insert the HP Image Zone software CD into the CD drive of your computer. Follow the instructions in the installation screen that automatically appears. NOTE If the installation screen does not appear, click Start, click Run, type D:\Setup.exe, where D is the letter of your CD drive, then click OK. NOTE If you have trouble installing or using the HP Image Zone software, see the HP Customer Support website: www.hp.com/support for more information. Macintosh 1 Close all programs and temporarily disable any virus protection software running on your computer. 2 Insert the HP Image Zone software CD into the CD drive of your computer. 3 Double-click the CD icon on the computer desktop. 4 Double-click the installer icon, and then follow the on-screen instructions to install the software. NOTE Before you can transfer images from the camera to your Macintosh computer with the HP Image Zone software, or to take advantage of the HP Instant Share functionality, you must first change the USB Configuration setting to Disk Drive on the camera. See Chapter 6: Using the Setup Menu on page 79. NOTE If you have trouble installing or using the HP Image Zone software, see the HP Customer Support website: www.hp.com/support for more information. Chapter 1: Getting Started 15
-
 1
1 -
2
-
3
-
4
-
5
-
6
-
7
-
8
-
9
-
 10
10 -
 11
11 -
 12
12 -
 13
13 -
 14
14 -
 15
15 -
 16
16 -
 17
17 -
 18
18 -
 19
19 -
 20
20 -
21
-
22
-
23
-
24
-
25
-
26
-
27
-
28
-
29
-
30
-
31
-
32
-
33
-
34
-
35
-
36
-
37
-
38
-
39
-
40
-
41
-
42
-
43
-
44
-
45
-
46
-
47
-
48
-
49
-
50
-
51
-
52
-
53
-
54
-
55
-
56
-
57
-
58
-
59
-
60
-
61
-
62
-
63
-
64
-
65
-
66
-
67
-
68
-
69
-
70
-
71
-
72
-
73
-
74
-
75
-
76
-
77
-
78
-
79
-
80
-
81
-
82
-
83
-
84
-
85
-
86
-
87
-
88
-
89
-
90
-
91
-
92
-
93
-
94
-
95
-
96
-
97
-
98
-
99
-
100
-
101
-
102
-
103
-
104
-
105
-
106
-
107
-
108
-
109
-
110
-
111
-
112
-
113
-
114
-
115
-
116
-
117
-
118
-
119
-
120
-
121
-
122
-
123
-
124
-
125
-
126
-
127
-
128
-
129
-
130
-
131
-
132
-
133
-
134
-
135
-
136
-
137
-
138
-
139
-
140
-
141
-
142
-
143
-
144
-
145
-
146
-
147
-
148
-
149
-
150
-
151
-
152
-
153
-
154
 |
 |