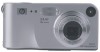
HP M307 HP Photosmart M305/M307 digital camera with HP Instant Share - User's - Page 65
Setting Up Destinations in the HP Instant Share Menu
 |
UPC - 029160399625
View all HP M307 manuals
Add to My Manuals
Save this manual to your list of manuals |
Page 65 highlights
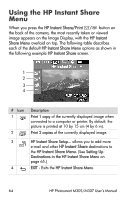
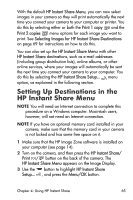
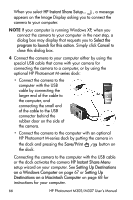
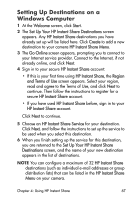
With the default HP Instant Share Menu, you can now select images in your camera so they will print automatically the next time you connect your camera to your computer or printer. You do this by selecting either or both the Print 1 copy and the Print 2 copies menu options for each image you want to print. See Selecting Images for HP Instant Share Destinations on page 69 for instructions on how to do this. You can also set up the HP Instant Share Menu with other HP Instant Share destinations, such as e-mail addresses (including group distribution lists), online albums, or other online services, where your images will automatically be sent the next time you connect your camera to your computer. You do this by selecting the HP Instant Share Setup... menu option, as explained in the following section. Setting Up Destinations in the HP Instant Share Menu NOTE You will need an Internet connection to complete this procedure on a Windows computer. Macintosh users, however, will not need an Internet connection. NOTE If you have an optional memory card installed in your camera, make sure that the memory card in your camera is not locked and has some free space on it. 1 Make sure that the HP Image Zone software is installed on your computer (see page 14). 2 Turn on the camera, and then press the HP Instant Share/ Print / button on the back of the camera. The HP Instant Share Menu appears on the Image Display. 3 Use the button to highlight HP Instant Share Setup... , and press the Menu/OK button. Chapter 4: Using HP Instant Share 65
-
 1
1 -
2
-
3
-
4
-
5
-
6
-
7
-
8
-
9
-
10
-
11
-
12
-
13
-
14
-
15
-
16
-
17
-
18
-
19
-
20
-
21
-
22
-
23
-
24
-
25
-
26
-
27
-
28
-
29
-
30
-
31
-
32
-
33
-
34
-
35
-
36
-
37
-
38
-
39
-
40
-
41
-
42
-
43
-
44
-
45
-
46
-
47
-
48
-
49
-
50
-
51
-
52
-
53
-
54
-
55
-
56
-
57
-
58
-
59
-
 60
60 -
 61
61 -
 62
62 -
 63
63 -
 64
64 -
 65
65 -
 66
66 -
 67
67 -
 68
68 -
 69
69 -
 70
70 -
71
-
72
-
73
-
74
-
75
-
76
-
77
-
78
-
79
-
80
-
81
-
82
-
83
-
84
-
85
-
86
-
87
-
88
-
89
-
90
-
91
-
92
-
93
-
94
-
95
-
96
-
97
-
98
-
99
-
100
-
101
-
102
-
103
-
104
-
105
-
106
-
107
-
108
-
109
-
110
-
111
-
112
-
113
-
114
-
115
-
116
-
117
-
118
-
119
-
120
-
121
-
122
-
123
-
124
-
125
-
126
-
127
-
128
-
129
-
130
-
131
-
132
-
133
-
134
-
135
-
136
-
137
-
138
-
139
-
140
-
141
-
142
-
143
-
144
-
145
-
146
-
147
-
148
-
149
-
150
-
151
-
152
-
153
-
154
 |
 |