HP OMEN 15.6 User Guide - Page 35
Connecting video devices using an HDMI cable, Setting up HDMI audio
 |
View all HP OMEN 15.6 manuals
Add to My Manuals
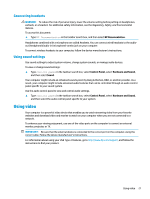
Save this manual to your list of manuals |
Page 35 highlights
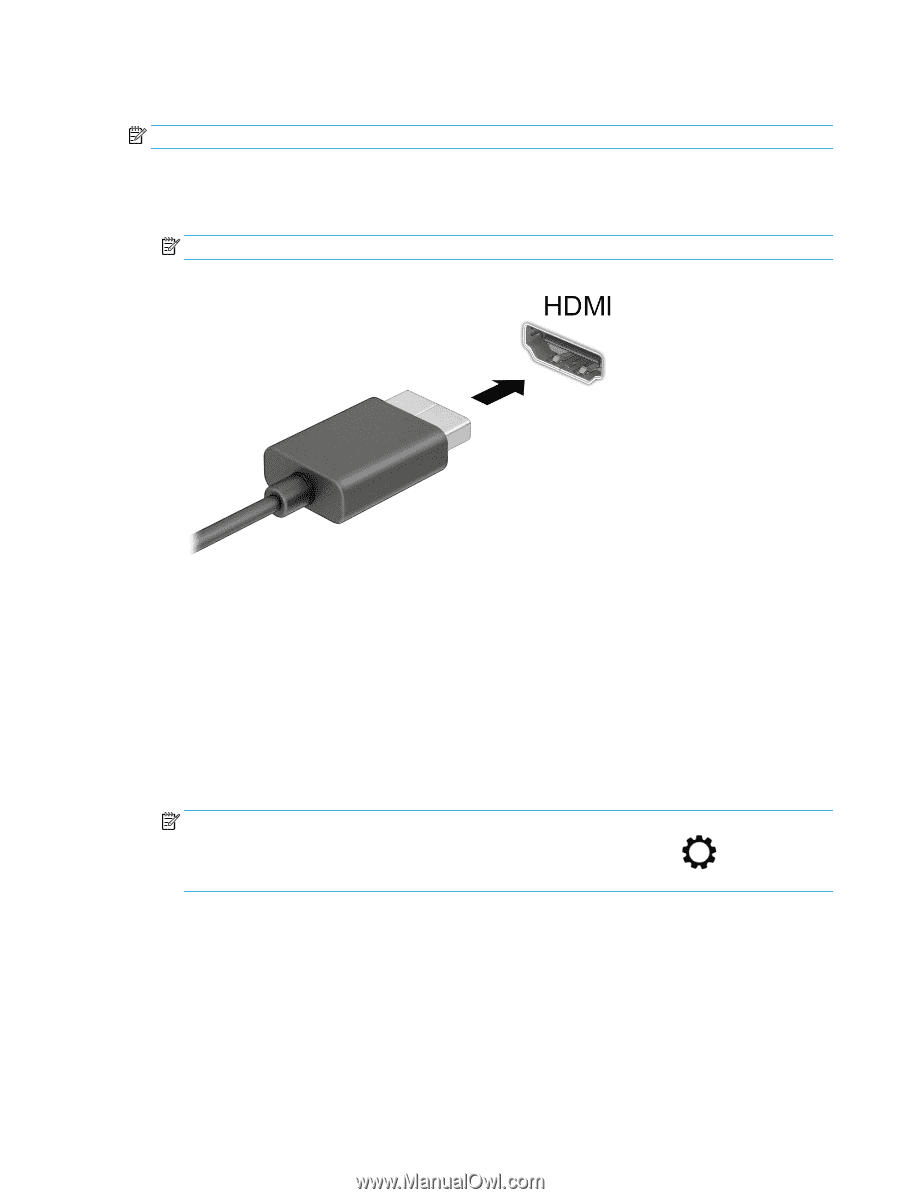
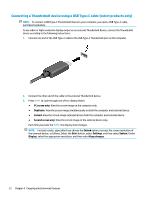
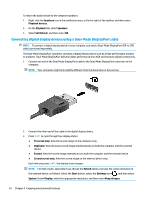
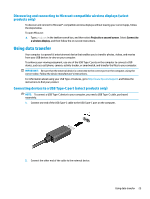
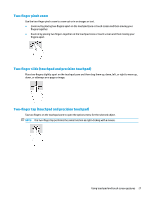
Connecting video devices using an HDMI cable NOTE: To connect an HDMI device to your computer, you need an HDMI cable, purchased separately. To see the computer screen image on a high-definition TV or monitor, connect the high-definition device according to the following instructions: 1. Connect one end of the HDMI cable to the HDMI port on the computer. NOTE: HDMI port shape can vary by product. 2. Connect the other end of the cable to the high-definition TV or monitor. 3. Press fn+f1 to cycle through four display states: ● PC screen only: View the screen image on the computer only. ● Duplicate: View the screen image simultaneously on both the computer and the external device. ● Extend: View the screen image extended across both the computer and the external device. ● Second screen only: View the screen image on the external device only. Each time you press fn+f1, the display state changes. NOTE: For best results, especially if you choose the Extend option, increase the screen resolution of the external device, as follows. Select the Start button, select the Settings icon , and then select System. Under Display, select the appropriate resolution, and then select Keep changes. Setting up HDMI audio HDMI is the only video interface that supports high-definition video and audio. After you connect an HDMI TV to the computer, you can then turn on HDMI audio by following these steps: 1. Right-click the Speakers icon in the notification area, at the far right of the taskbar, and then select Playback devices. 2. On the Playback tab, select the name of the digital output device. 3. Select Set Default, and then select OK. Using video 23
-
 1
1 -
2
-
3
-
4
-
5
-
6
-
7
-
8
-
9
-
10
-
11
-
12
-
13
-
14
-
15
-
16
-
17
-
18
-
19
-
20
-
21
-
22
-
23
-
24
-
25
-
26
-
27
-
28
-
29
-
 30
30 -
 31
31 -
 32
32 -
 33
33 -
 34
34 -
 35
35 -
 36
36 -
 37
37 -
 38
38 -
 39
39 -
 40
40 -
41
-
42
-
43
-
44
-
45
-
46
-
47
-
48
-
49
-
50
-
51
-
52
-
53
-
54
-
55
-
56
-
57
-
58
-
59
-
60
-
61
-
62
-
63
-
64
-
65
-
66
-
67
-
68
-
69
-
70
-
71
-
72
-
73
-
74
-
75
-
76
-
77
-
78
-
79
 |
 |