HP Officejet 6000 Wired/Wireless Networking Guide - Page 11
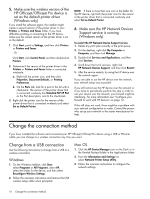
Change from an Ethernet connection - wireless setup
 |
View all HP Officejet 6000 manuals
Add to My Manuals
Save this manual to your list of manuals |
Page 11 highlights
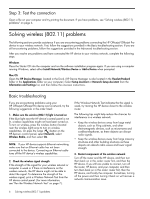
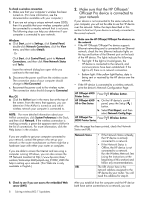
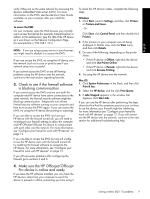
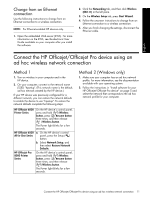
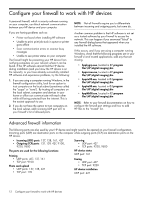
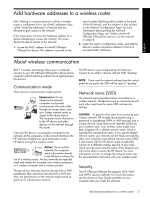
English Change from an Ethernet connection Use the following instructions to change from an Ethernet connection to a wireless connection. NOTE: For Ethernet-enabled HP devices only. 1. Open the embedded Web server (EWS). For more information on the EWS, see the electronic User Guide available on your computer after you install the software. 2. Click the Networking tab, and then click Wireless (802.11) in the left pane. 3. On the Wireless Setup tab, press Start Wizard. 4. Follow the onscreen instructions to change from an Ethernet connection to a wireless connection. 5. After you finish changing the settings, disconnect the Ethernet cable. Connect the HP Officejet/Officejet Pro device using an ad hoc wireless network connection Method 1 1. Turn on wireless in your computer and in the HP device. 2. On your computer, connect to the network name (SSID) "hpsetup". (This network name is the default, ad hoc network created by the HP device.) If your HP device was previously configured for a different network, you can restore the network defaults to enable the device to use "hpsetup". To restore the network defaults complete the following steps: HP Officejet 6000 Printer Series On the HP device's control panel, press and hold ( ) Wireless button, press ( ) Resume button three times, and then release ( ) Wireless button. The Power light blinks for a few seconds. HP Officejet 6500 a. On the HP device's control All-in-One Series panel, press the Setup ( ) button. b. Select Network Setup, and then select Restore Network Defaults. HP Officejet Pro 8000 Printer Series On the HP device's control panel, press and hold ( ) Wireless button, press ( ) Resume button three times, and then release ( ) Wireless button. The Power light blinks for a few seconds. Method 2 (Windows only) 1. Make sure your computer has an ad hoc network profile. For more information, see the documentation available with your operating system. 2. Follow the instructions in "Install software for your HP Officejet/Officejet Pro device" on page 5 and select the network that corresponds to the ad hoc network profile for your computer. Connect the HP Officejet/Officejet Pro device using an ad hoc wireless network connection 11
-
 1
1 -
2
-
3
-
4
-
5
-
 6
6 -
 7
7 -
 8
8 -
 9
9 -
 10
10 -
 11
11 -
 12
12 -
 13
13 -
 14
14 -
 15
15 -
 16
16 -
17
-
18
-
19
-
20
-
21
-
22
-
23
-
24
-
25
-
26
-
27
-
28
-
29
-
30
-
31
-
32
-
33
-
34
-
35
-
36
-
37
-
38
-
39
-
40
-
41
-
42
-
43
-
44
-
45
-
46
-
47
-
48
-
49
-
50
-
51
-
52
-
53
-
54
-
55
-
56
 |
 |