HP Officejet 7200 User Guide - Page 184
The fax test failed, To test your fax setup, The fax hardware test failed, Solution, Setup Wizard
 |
View all HP Officejet 7200 manuals
Add to My Manuals
Save this manual to your list of manuals |
Page 184 highlights
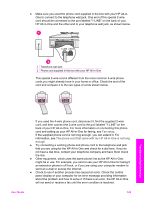
To test your fax setup 1. Make sure you have inserted the print cartridges and loaded paper before starting the test. For more information, see Replace the print cartridges and Load full-size paper. 2. Press Setup. 3. Press 6, then press 5. This displays the Tools menu and then selects Run Fax Test. The HP All-in-One displays the status of the test on the control panel display and prints a report. 4. Review the report. - If the test passes and you are still having problems faxing, check the fax settings listed in the report to verify the settings are correct. A blank or incorrect fax setting can cause faxing problems. - If the test fails, review the report for information on how to fix any problems found. For more information, you can also see the next section, The fax test failed. 5. Press OK to return to the Setup Menu. If you are still experiencing faxing problems, continue with the following sections for more troubleshooting help. The fax test failed If you ran a fax test and the test failed, review the report for basic information about the error. For more detailed information, check the report to see which part of the test failed, and then navigate to the appropriate topic in this section for information: ● The fax hardware test failed ● The fax connected to active telephone wall jack test failed ● The phone cord connected to correct port on fax test failed ● The fax line condition test failed ● The dial tone detection test failed The fax hardware test failed Solution ● Turn off the HP All-in-One by using the On button located on the control panel and then unplug the power cord from the back of the HP All-in-One. After a few seconds, plug the power cord back in and turn the power on. Run the test again. If the test fails again, continue reviewing the troubleshooting information in this section. ● Try to send or receive a test fax. If you can send or receive a fax successfully, there might not be a problem. ● If you are using a Windows computer and are running the test from the Fax Setup Wizard, make sure the HP All-in-One is not busy completing another task, such as receiving a fax or making a copy. Check the control panel display for a message indicating that the HP All-in-One is busy. If it is busy, wait until it is finished and in the idle state, before running the test. After you resolve any problems found, run the fax test again to make sure it passes and your HP All-in-One is ready for faxing. If the Fax Hardware Test continues to fail and you experience problems faxing, contact HP support. Go to Troubleshooting information User Guide 181
-
 1
1 -
2
-
3
-
4
-
5
-
6
-
7
-
8
-
9
-
10
-
11
-
12
-
13
-
14
-
15
-
16
-
17
-
18
-
19
-
20
-
21
-
22
-
23
-
24
-
25
-
26
-
27
-
28
-
29
-
30
-
31
-
32
-
33
-
34
-
35
-
36
-
37
-
38
-
39
-
40
-
41
-
42
-
43
-
44
-
45
-
46
-
47
-
48
-
49
-
50
-
51
-
52
-
53
-
54
-
55
-
56
-
57
-
58
-
59
-
60
-
61
-
62
-
63
-
64
-
65
-
66
-
67
-
68
-
69
-
70
-
71
-
72
-
73
-
74
-
75
-
76
-
77
-
78
-
79
-
80
-
81
-
82
-
83
-
84
-
85
-
86
-
87
-
88
-
89
-
90
-
91
-
92
-
93
-
94
-
95
-
96
-
97
-
98
-
99
-
100
-
101
-
102
-
103
-
104
-
105
-
106
-
107
-
108
-
109
-
110
-
111
-
112
-
113
-
114
-
115
-
116
-
117
-
118
-
119
-
120
-
121
-
122
-
123
-
124
-
125
-
126
-
127
-
128
-
129
-
130
-
131
-
132
-
133
-
134
-
135
-
136
-
137
-
138
-
139
-
140
-
141
-
142
-
143
-
144
-
145
-
146
-
147
-
148
-
149
-
150
-
151
-
152
-
153
-
154
-
155
-
156
-
157
-
158
-
159
-
160
-
161
-
162
-
163
-
164
-
165
-
166
-
167
-
168
-
169
-
170
-
171
-
172
-
173
-
174
-
175
-
176
-
177
-
178
-
 179
179 -
 180
180 -
 181
181 -
 182
182 -
 183
183 -
 184
184 -
 185
185 -
 186
186 -
 187
187 -
 188
188 -
 189
189 -
190
-
191
-
192
-
193
-
194
-
195
-
196
-
197
-
198
-
199
-
200
-
201
-
202
-
203
-
204
-
205
-
206
-
207
-
208
-
209
-
210
-
211
-
212
-
213
-
214
-
215
-
216
-
217
-
218
-
219
-
220
-
221
-
222
-
223
-
224
-
225
-
226
-
227
-
228
-
229
-
230
-
231
-
232
-
233
-
234
-
235
-
236
-
237
-
238
-
239
-
240
 |
 |