HP Pavilion 10 TouchSmart 10z-e000 User Guide - Page 29
Using the webcam, Managing your audio and video files (select models only), Camera, Help and Support
 |
View all HP Pavilion 10 TouchSmart 10z-e000 manuals
Add to My Manuals
Save this manual to your list of manuals |
Page 29 highlights
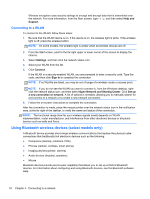
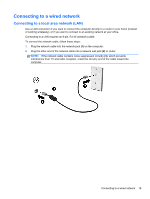
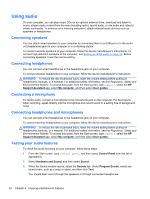
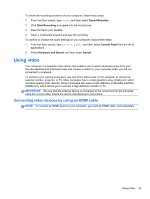
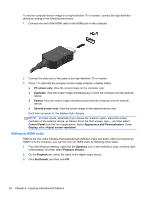
Component (5) (6) (7) (8) (9) Audio-out (headphone)/Audio-in (microphone) jack USB 3.0 port HDMI port Speakers (2) (not illustrated) Memory card reader (not illustrated) Description Connects optional powered stereo speakers, headphones, earbuds, a headset, or a television audio cable. Also connects an optional headset microphone. This jack does not support optional microphone-only devices. WARNING! To reduce the risk of personal injury, adjust the volume before putting on headphones, earbuds, or a headset. For additional safety information, refer to the Regulatory, Safety, and Environmental Notices. To access this guide, from the Start screen, type support, select the HP Support Assistant app, select My computer, and then select User guides. NOTE: When a device is connected to the jack, the computer speakers are disabled. Each USB 3.0 port connects an optional USB device, such as a keyboard, mouse, external drive, printer, scanner or USB hub. Connects an optional video or audio device, such as a high-definition television, any compatible digital or audio component, or a high-speed HDMI device. Produce sound. Reads optional memory cards that store, manage, share, or access information. To insert a card: Hold the card label-side up, with connectors facing the slot, insert the card into the slot, and then push in on the card until it is firmly seated. To remove a card: Press in on the card it until it pops out. Using the webcam The computer has an integrated webcam that records video and captures photographs. Some models may allow you to video conference and chat online using streaming video. ▲ To start the webcam, from the Start screen, type camera, and then select Camera from the list of applications. For details about using the webcam, go to Help and Support. From the Start screen, type help, and then select Help and Support. Managing your audio and video files (select models only) CyberLink PowerDVD helps you manage and edit your photo and video collections. ▲ To open CyberLink PowerDVD, from the Start screen, type video, and then select Video. For more information about using CyberLink PowerDVD, see the PowerDVD software Help. Using the webcam 21
-
 1
1 -
2
-
3
-
4
-
5
-
6
-
7
-
8
-
9
-
10
-
11
-
12
-
13
-
14
-
15
-
16
-
17
-
18
-
19
-
20
-
21
-
22
-
23
-
 24
24 -
 25
25 -
 26
26 -
 27
27 -
 28
28 -
 29
29 -
 30
30 -
 31
31 -
 32
32 -
 33
33 -
 34
34 -
35
-
36
-
37
-
38
-
39
-
40
-
41
-
42
-
43
-
44
-
45
-
46
-
47
-
48
-
49
-
50
-
51
-
52
-
53
-
54
-
55
-
56
-
57
-
58
-
59
-
60
-
61
-
62
-
63
-
64
-
65
-
66
-
67
-
68
-
69
-
70
-
71
-
72
 |
 |