HP Pavilion 13-s000 Pavilion x360 Convertible PC model numbers: 13-s000 throug - Page 50
Remove the WLAN antenna cables and transceivers., Remove the right display hinge.
 |
View all HP Pavilion 13-s000 manuals
Add to My Manuals
Save this manual to your list of manuals |
Page 50 highlights
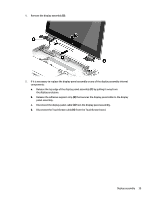
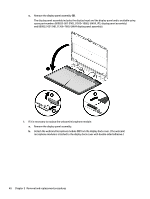
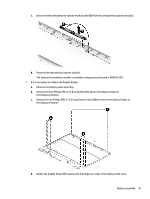
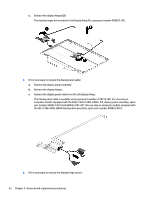
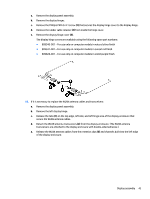
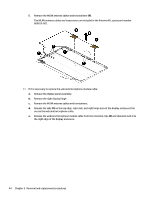
f. Remove the WLAN antenna cables and transceivers (4). The WLAN antenna cables and transceivers are included in the Antenna Kit, spare part number 809815-001. 11. If it is necessary to replace the webcam/microphone module cable: a. Remove the display panel assembly. b. Remove the right display hinge. c. Remove the WLAN antenna cables and transceivers. d. Release the tabs (1) on the top edge, right side, and right hinge area of the display enclosure that secure the webcam/microphone cable. e. Release the webcam/microphone module cable from the retention clips (2) and channels built into the right edge of the display enclosure. 44 Chapter 5 Removal and replacement procedures
-
 1
1 -
2
-
3
-
4
-
5
-
6
-
7
-
8
-
9
-
10
-
11
-
12
-
13
-
14
-
15
-
16
-
17
-
18
-
19
-
20
-
21
-
22
-
23
-
24
-
25
-
26
-
27
-
28
-
29
-
30
-
31
-
32
-
33
-
34
-
35
-
36
-
37
-
38
-
39
-
40
-
41
-
42
-
43
-
44
-
 45
45 -
 46
46 -
 47
47 -
 48
48 -
 49
49 -
 50
50 -
 51
51 -
 52
52 -
 53
53 -
 54
54 -
 55
55 -
56
-
57
-
58
-
59
-
60
-
61
-
62
-
63
-
64
-
65
-
66
-
67
-
68
-
69
-
70
 |
 |
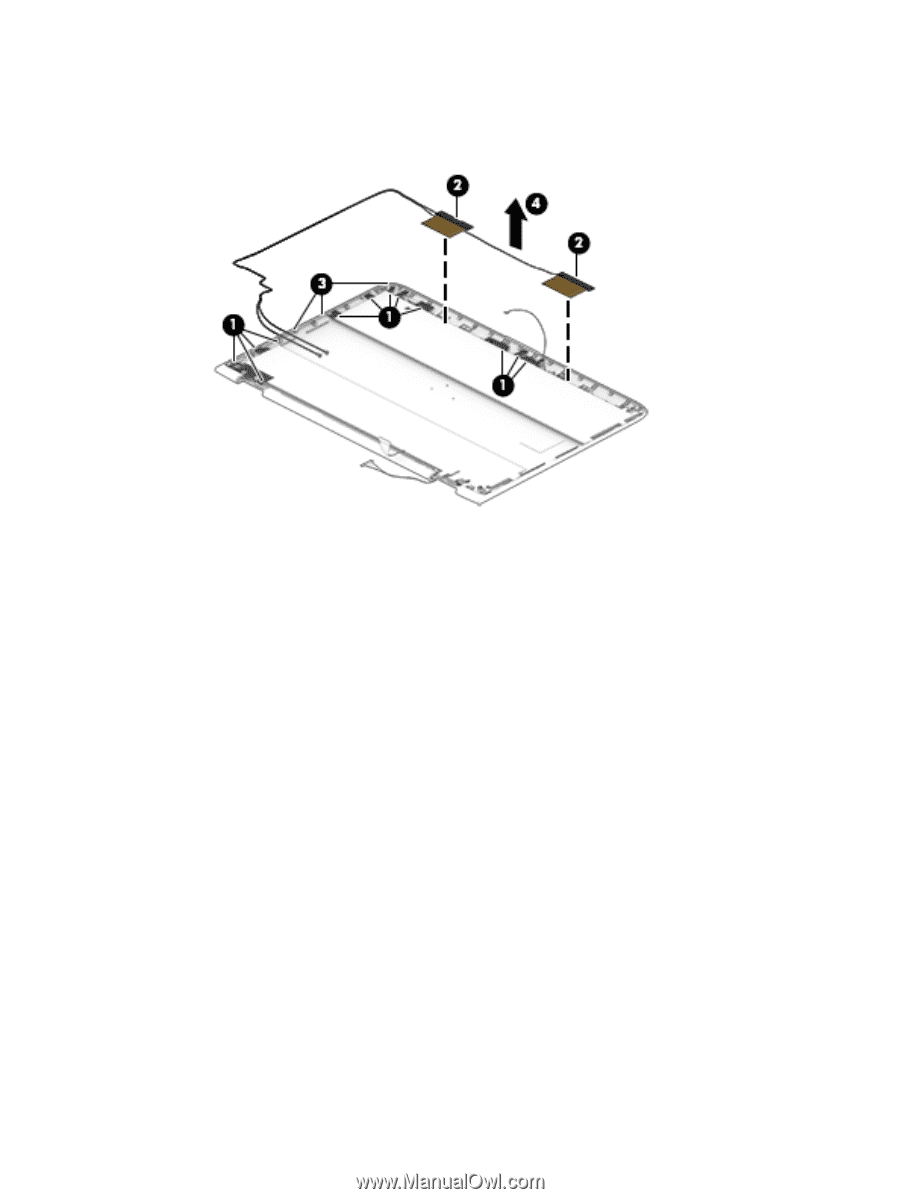
f.
Remove the WLAN antenna cables and transceivers
(4)
.
The WLAN antenna cables and transceivers are included in the Antenna Kit, spare part number
809815-001.
11.
If it is necessary to replace the webcam/microphone module cable:
a.
Remove the display panel assembly.
b.
Remove the right display hinge.
c.
Remove the WLAN antenna cables and transceivers.
d.
Release the tabs
(1)
on the top edge, right side, and right hinge area of the display enclosure that
secure the webcam/microphone cable.
e.
Release the webcam/microphone module cable from the retention clips
(2)
and channels built into
the right edge of the display enclosure.
44
Chapter 5
Removal and replacement procedures